GSNadmin
Staff member
There is always that occasional opportunity to do some soldering. When you need to add some connectors to a battery pack, or to make a set of wiring adapters for your battery charger, using heat and molten metal to join wires together is one of the oldest do-it-yourself tasks for RC hobbyists. The task is usually very simple: just add heat and solder, and you’re done! But for the haven’t-done-it-yet newcomers in the crowd, there’s a little more to it than that. Here are a few helpful hints to get you started!
YOU’LL NEED
For basic wire, motor terminal and speed control soldering, you’ll need:
THE BASIC TASK

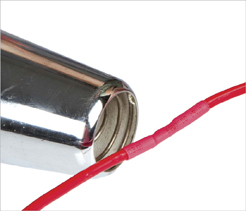
1 Start by stripping the plastic insulation off the ends of the wires (usually, 3/16- to 1/2-inch is plenty).
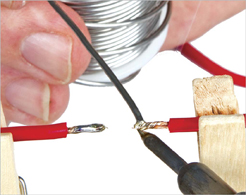
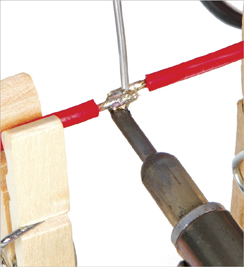
2 Set up the wires in your holding jig. Tin the ends of the wires by lightly applying a small amount of solder to the exposed wire and allow it to flow into its strands. Apply the heat to one side of the wire and touch the other side with the solder. When the wire is hot enough, the solder will flow into the wire braiding.
NEED A HAND?
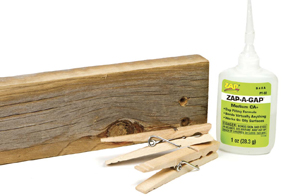
A piece of pine, two wooden clothespins and some ZAP is all that’s needed to make a holding jig for soldering.
You can snap off the clothespins easily and reglue for different jobs. The cost is nothing!
Commercial soldering jigs like this one from Tingler Innovations (solderbuddy.com) are also a good investment.
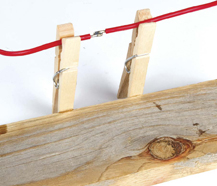
The first thing you’ll learn is that to solder anything together, you’ll need an extra set of hands, especially when trying to solder two wires together. With solder in one hand and the soldering pen in the other, how do you prevent the wires from moving around? With a handy-dandy “third-hand” holding jig, of course! You can easily build such a holding aid with a wood base and a couple of wooden clothespins glued to it. A holding jig or fixture will pay off the very first time you use it-take my word for it! You can glue the clothespins in the exact placement you need for a specific job and then you can snap them off and reposition them whenever the need arises. I don’t think that you can really do a good soldering job without one!
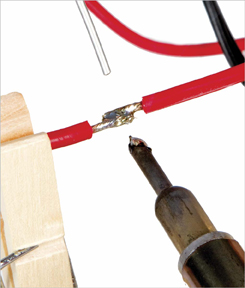
3 Slip some heat-shrink tubing over the wires and push them away from the solder joint area. Position the ends of the wires together, then reheat the wire. Watch the solder tinning. When it liquefies and flows together, add just a little more solder to fully fill in the joint.
4 Remove the solder and the heat and allow the joint to cool off. Don’t move or budge the wires. If they move while the solder is still hot and fluid, you’ll create a weak “cold joint” that can break easily from vibration while your plane is in the air.
SOLDERING TIPS
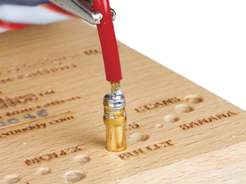
5 Once the solder joint has cooled, slide the heat-shrink tubing over the joint and shrink it into place. I like to do this with a hot air gun used for shrinking plastic covering. It’s quick and easy and the heat gun won’t melt the wires or the solder.
Of course, it takes practice to improve your skills so cut up some wire and solder the pieces back together. You’ll be a soldering pro in no time at all!
Model Airplane News - The #1 resource for RC plane and helicopter enthusiasts featuring news, videos, product releases and tech tips.
Continue reading...
YOU’LL NEED
For basic wire, motor terminal and speed control soldering, you’ll need:
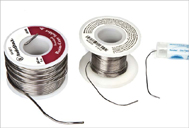
- 40/60 rosin-core solder
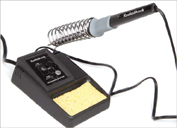
- 25 to 40W soldering gun or pen
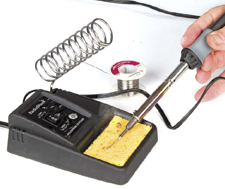
- Moist sponge to clean the soldering tip
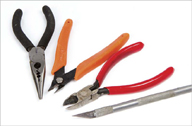
- Basic tools (clothespins and alligator clips) to hold parts, pliers, etc.
- Tube of soldering flux for soldering and tinning metal parts
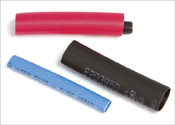
- Heat-shrink tubing to insulate wire solder joints
THE BASIC TASK
1 Start by stripping the plastic insulation off the ends of the wires (usually, 3/16- to 1/2-inch is plenty).
2 Set up the wires in your holding jig. Tin the ends of the wires by lightly applying a small amount of solder to the exposed wire and allow it to flow into its strands. Apply the heat to one side of the wire and touch the other side with the solder. When the wire is hot enough, the solder will flow into the wire braiding.
NEED A HAND?
A piece of pine, two wooden clothespins and some ZAP is all that’s needed to make a holding jig for soldering.
You can snap off the clothespins easily and reglue for different jobs. The cost is nothing!
Commercial soldering jigs like this one from Tingler Innovations (solderbuddy.com) are also a good investment.
The first thing you’ll learn is that to solder anything together, you’ll need an extra set of hands, especially when trying to solder two wires together. With solder in one hand and the soldering pen in the other, how do you prevent the wires from moving around? With a handy-dandy “third-hand” holding jig, of course! You can easily build such a holding aid with a wood base and a couple of wooden clothespins glued to it. A holding jig or fixture will pay off the very first time you use it-take my word for it! You can glue the clothespins in the exact placement you need for a specific job and then you can snap them off and reposition them whenever the need arises. I don’t think that you can really do a good soldering job without one!
3 Slip some heat-shrink tubing over the wires and push them away from the solder joint area. Position the ends of the wires together, then reheat the wire. Watch the solder tinning. When it liquefies and flows together, add just a little more solder to fully fill in the joint.
4 Remove the solder and the heat and allow the joint to cool off. Don’t move or budge the wires. If they move while the solder is still hot and fluid, you’ll create a weak “cold joint” that can break easily from vibration while your plane is in the air.
SOLDERING TIPS
- ¶ When in doubt, use a bigger soldering pen. More heat is always better than not enough. If your solder takes more than two or three seconds to start flowing, you don’t have enough heat.
- ¶ For most everyday soldering, standard rosin-core solder works great. For very fine-wire gauges (like servo leads), use thin solid-core solder and apply a dab of solder flux paste to the wires.
- ¶ Keep your soldering tip clean. Use a damp sponge and wipe the tip between each use.
- ¶ Use only resin-core solder or flux paste with braided wire. Liquid soldering flux can wick into the plastic insulation and cause your wires to corrode over time.
5 Once the solder joint has cooled, slide the heat-shrink tubing over the joint and shrink it into place. I like to do this with a hot air gun used for shrinking plastic covering. It’s quick and easy and the heat gun won’t melt the wires or the solder.
Of course, it takes practice to improve your skills so cut up some wire and solder the pieces back together. You’ll be a soldering pro in no time at all!
Model Airplane News - The #1 resource for RC plane and helicopter enthusiasts featuring news, videos, product releases and tech tips.
Continue reading...