• If you are new to GiantScaleNews.com, please register, introduce yourself, and make yourself at home.

    We're 1st in Giant Scale RC because we've got the best membership on the internet! Take a look around and don't forget to register to get all of the benefits of GSN membership!

    Welcome!

Scale 1/3 Scale Extra 330L Build.

acerc

640cc Uber Pimp
I think adding and shaping would be far easier and probably better fitting than quartering the cowl. Just curious, will keeping the cowl the same size suit the airframe or is it going to make the nose look to big in diameter?
But ultimately it is up to you, what you want, and are willing to do. I am sure we will like it no matter what.
 

Snoopy1

640cc Uber Pimp
I held the cowl in place and even when looked from the side it looks ok. Added benefit it the gear is just bolted to the bottom so what I will do pull that shape back to the gear and make it level with the gear I think that will look ok.
Note on the cowl the orange part I believe to be a little to big do not know until it is made and the cowl fit checked. Will sand it down until the cowl fits. Believe I need to make the cowl ring first that fits the cowl and has the correct shape and then make the extension to F1.
 
Last edited:

Snoopy1

640cc Uber Pimp
Just had to do something over thinking things so I just went ahead and epoxied the rudder in it is in square and straight. Just have leave it alone for 6 hours. Then we can continue. Thanks guys for all the support sometimes it is nice to bounce things of fellow builders for some help, THANKS.
367FFFE5-876F-4D0C-8CC8-3171DD81303B.jpeg
 
I held the cowl in place and even when looked from the side it looks ok. Added benefit it the gear is just bolted to the bottom so what I will do pull that shape back to the gear and make it level with the gear I think that will look ok.
Note on the cowl the orange part I believe to be a little to big do not know until it is made and the cowl fit checked. Will sand it down until the cowl fits. Believe I need to make the cowl ring first that fits the cowl and has the correct shape and then make the extension to F1.
@Snoopy1 I was thinking that adding to the former would have issues as the landing gear is not far behind, but if you shape it in it should look fine. As I mentioned earlier, once I cut the cooling hole in the bottom rear of the cowl, it wrapped around the existing shape nicely. Even if you use a cowl ring (which I did not, I stuck to the plans for my mounting) it should wrap nicely to the ring. I would avoid adding to the former until you cut the cooling hole and see how it works out.
 
perfect, that thing is going to fly so nice!
@Bartman, this plane does fly nice, even in my hands. It makes my flying look good. There is a little rudder to aileron and elevator coupling in knife edge, but it is so minor that I manually fly it (no mixes). It also does wonderful inverted flat spins when the rates are on high. Inverted flying is a breeze as are spins. I have yet to find a nasty vice in its performance and I have been flying mine for about 7 years.
 

Snoopy1

640cc Uber Pimp
@Snoopy1 I was thinking that adding to the former would have issues as the landing gear is not far behind, but if you shape it in it should look fine. As I mentioned earlier, once I cut the cooling hole in the bottom rear of the cowl, it wrapped around the existing shape nicely. Even if you use a cowl ring (which I did not, I stuck to the plans for my mounting) it should wrap nicely to the ring. I would avoid adding to the former until you cut the cooling hole and see how it works out.

I would install the cowl like you have described but after the cowl was split it may not be so easy to do. Will have a look but the split has made it quite stiff around the split.
 

Snoopy1

640cc Uber Pimp
Working on filling the area in around the rudder, that is always a difficult part of the build to get it just right. A lot cutting measuring and filling but it is coming along. Filling it in with 3/16 that should give a little sand room and blending at the radios, it also done with 3/16 because it also adds a lot of stability to the rudder. Will take some pictures later on.
 

WMcNabb

150cc
Ok as you gentlemen know my cowl is considerably bigger than the F1 bulkhead when I fit the cowl to the bulkhead there is about 3/16 of an inch clearance all the way around or there about. So been thinking about that because it has been bothering me because it really takes away from the lines of the plane and the finished product would look like hell.
So if you look at the picture of the drawing I made of the bottom of bulkhead F1. The out line of the bottom of the bulk is in purple. There is a added section in orange added to the bottom of F1 and the shape is blended in to F1. If I do this and add that piece to the bottom of F1 it will take up the excess cowl material. Will have to do some shaping to blend that backwards into the fuselage but that can be done once the extra piece is added and the cowl fitted. What do think.
View attachment 109948

I’m guessing the gap between the cowl and the bulkhead is for airflow to cool the engine.
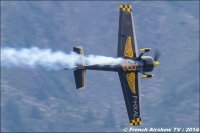
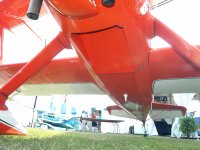
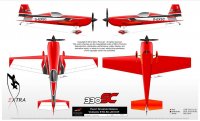
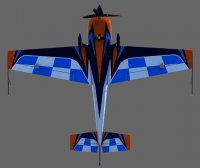
Take a look at at couple of examples...
 

Attachments

  • 7B81AE7E-E56C-4F6B-8831-2A1D9114673F.jpeg
    7B81AE7E-E56C-4F6B-8831-2A1D9114673F.jpeg
    224.5 KB · Views: 228
  • 27815A73-C0F9-4014-8056-A280FB8AF789.jpeg
    27815A73-C0F9-4014-8056-A280FB8AF789.jpeg
    710.7 KB · Views: 195
  • 098B0414-6362-4E29-A599-4A2520CEBC05.jpeg
    098B0414-6362-4E29-A599-4A2520CEBC05.jpeg
    238.3 KB · Views: 187
  • 89506E41-DF3E-4B8D-AC4B-686B14E6501D.jpeg
    89506E41-DF3E-4B8D-AC4B-686B14E6501D.jpeg
    312 KB · Views: 197
Top