dskuro95
100cc
Redwing RC 50cc Yak 55 Build Log
This is my current build log. I am not yet finished but will be updating as some accessories begin to show up that I need.
Hey everyone here is my build log of the new 50cc Yak 55! Throughout the log I will show you how I went about doing the build and a few tips and tricks I know as well.
List of things you will need:
Drill
¼” Drill bit
Hobby Knife
Metric Allen Wrenches
30 Minute Epoxy (Hisol and 3M glue gun is best!)
5 Minute Epoxy
Sandpaper
Dremel
Thin & Thick CA
Vaseline (I use white lithium grease)
Pliers
¼’ nut driver or pliers
Hinge tape
Paper towel/rag
Blue & High temperature Red Loctite
Small socket set
Crescent Wrench
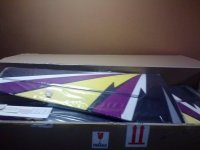
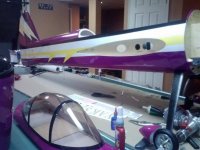
First thing I did was take a look at the packaging once the plane arrived. Overall I was very happy with the way it was packaged and did not find anything that I did not like.
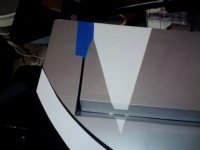
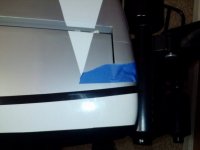
After I did that I got right to the building. First thing I did was glue in all the hinges. I detached all the surfaces, pulled out the hinges, and went from there. Some people use Vaseline around the hinge point to avoid epoxy getting in there and causing it to stick, but I like to use white lithium grease. It stops the glue from getting in hinge point and also greases the hinges. It is also very easy to wipe off the airplane if you get it on the covering. Go ahead and mix your epoxy, put it on the hinges, glue them in place, and set your stabs, ailerons, and fuse off to the side to dry. If you run out of time to glue all the surfaces, don’t worry you can do it again later.
TIP: Joe Smith taught me this one. Take blue painter’s tape, and tape off around the hinge. This way when your glue drips out it does not get all over the plane. When you tape it, take your hobby knife and cut the tape down the middle along the hinge line. Also put tape on the tips of the surfaces to hold them in their neutral position while they dry.
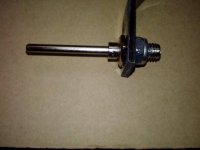
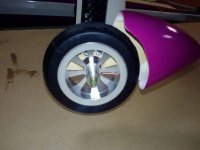
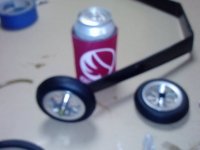
While everything is drying, I worked on the landing gear. First thing I did was mount the axles. Next, I put on my wheels. I used custom wheels from my sponsor, Aztech Aeromodels. After I put them on, I put blue Loctite on the wheel collar set screw, and mounted it in place.
TIP! – I like to either drill a hole in the axle and pin the wheel, but in this case I used the wheel collar and then put a piece of 1/8” fuel tubing on the tip of the axle to stop the wheel collar from ever coming off.
Next I went on to the wheel spats. With the spats comes 2 bolts with washers, and blind nuts. I drove in blind nuts with the bolt and then 5 minute epoxy’ed them in place. Once the glue done drying, I pulled the bolt out and then mounted them on the landing gear.
NOTE – With these custom wheels, you need to shave down the back of the spat a little bit in order for the wheel to spin freely. I took the dremel with a grinding wheel, and just shaved a small piece out.
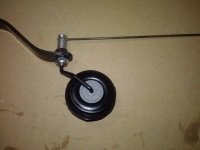
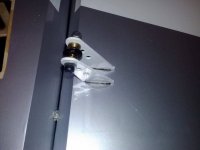
Next I worked on my tail wheel assembly. It is pretty self-explanatory but I figured I would show you how it looks anyway.
TIP!- Use a crescent wrench and a socket to tighten in the tail wheel holder.
By this time the glue should have cured so you can at least work on the fuselage. I mounted my tailwheel and my main gear. To mount the main gear, I took a ¼” socket and held the bolt with the screwdriver while tightening with the socket set.
Next since I used a DA-50r and it has the same mounting pattern as a DLE-55 I went ahead and drilled the holes in the firewall.
TIP!- I took 5 minute epoxy and made a very thin coat on the motorbox for added strength!
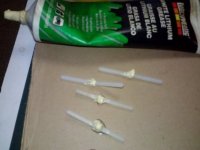
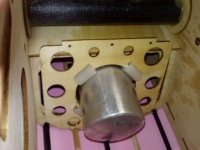
Next I went and mounted the canister. I took some ¼” diameter high temperature silicone tubing and cut pieces into it to mount the canister with to absorb vibrations.
TIP!- I have a bunch of canister mounts from previous airframes so I used one in the back for added support. You can also get them from Aztech Aeromodels. I glued the mount in with 5 minute epoxy.
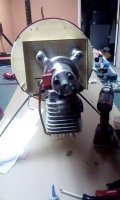
I went on and mounted my motor next. I used high temp red Loctite on the standoff bolts on both sides to assure nothing will come loose.
NOTE- You will need to take 1/8”th ply and cut squares then drill a hole in them in order to get the desired standoff length needed.
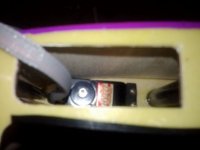
Next I went ahead and mounted the servos in the elevator halves. I used MKS servos and since the mounting tabs are a bit wider than other servos you will need to sand the mounting block and the fiberglass former in order to make them fit easily.
Next I went back to doing some gluing and I glued in the control horn pieces. I really like that the horns are colored. I also like the fact that the horn slots are precut and slotted. All I did was rough up the horns with sandpaper and then glued them in with 30 minute epoxy.
Now that my header and servo arms came in, I went on to hooking up the canister to the motor with my new header from DA! It is a pretty straight forward setup which made me really happy. I had to trim the coupler down a little bit to get it all lined up and at the correct length. All I did was take my x-acto knife and take off 1/4" to get it to the correct length.
This is my current build log. I am not yet finished but will be updating as some accessories begin to show up that I need.
Hey everyone here is my build log of the new 50cc Yak 55! Throughout the log I will show you how I went about doing the build and a few tips and tricks I know as well.
List of things you will need:
Drill
¼” Drill bit
Hobby Knife
Metric Allen Wrenches
30 Minute Epoxy (Hisol and 3M glue gun is best!)
5 Minute Epoxy
Sandpaper
Dremel
Thin & Thick CA
Vaseline (I use white lithium grease)
Pliers
¼’ nut driver or pliers
Hinge tape
Paper towel/rag
Blue & High temperature Red Loctite
Small socket set
Crescent Wrench
First thing I did was take a look at the packaging once the plane arrived. Overall I was very happy with the way it was packaged and did not find anything that I did not like.
After I did that I got right to the building. First thing I did was glue in all the hinges. I detached all the surfaces, pulled out the hinges, and went from there. Some people use Vaseline around the hinge point to avoid epoxy getting in there and causing it to stick, but I like to use white lithium grease. It stops the glue from getting in hinge point and also greases the hinges. It is also very easy to wipe off the airplane if you get it on the covering. Go ahead and mix your epoxy, put it on the hinges, glue them in place, and set your stabs, ailerons, and fuse off to the side to dry. If you run out of time to glue all the surfaces, don’t worry you can do it again later.
TIP: Joe Smith taught me this one. Take blue painter’s tape, and tape off around the hinge. This way when your glue drips out it does not get all over the plane. When you tape it, take your hobby knife and cut the tape down the middle along the hinge line. Also put tape on the tips of the surfaces to hold them in their neutral position while they dry.
While everything is drying, I worked on the landing gear. First thing I did was mount the axles. Next, I put on my wheels. I used custom wheels from my sponsor, Aztech Aeromodels. After I put them on, I put blue Loctite on the wheel collar set screw, and mounted it in place.
TIP! – I like to either drill a hole in the axle and pin the wheel, but in this case I used the wheel collar and then put a piece of 1/8” fuel tubing on the tip of the axle to stop the wheel collar from ever coming off.
Next I went on to the wheel spats. With the spats comes 2 bolts with washers, and blind nuts. I drove in blind nuts with the bolt and then 5 minute epoxy’ed them in place. Once the glue done drying, I pulled the bolt out and then mounted them on the landing gear.
NOTE – With these custom wheels, you need to shave down the back of the spat a little bit in order for the wheel to spin freely. I took the dremel with a grinding wheel, and just shaved a small piece out.
Next I worked on my tail wheel assembly. It is pretty self-explanatory but I figured I would show you how it looks anyway.
TIP!- Use a crescent wrench and a socket to tighten in the tail wheel holder.
By this time the glue should have cured so you can at least work on the fuselage. I mounted my tailwheel and my main gear. To mount the main gear, I took a ¼” socket and held the bolt with the screwdriver while tightening with the socket set.
Next since I used a DA-50r and it has the same mounting pattern as a DLE-55 I went ahead and drilled the holes in the firewall.
TIP!- I took 5 minute epoxy and made a very thin coat on the motorbox for added strength!
Next I went and mounted the canister. I took some ¼” diameter high temperature silicone tubing and cut pieces into it to mount the canister with to absorb vibrations.
TIP!- I have a bunch of canister mounts from previous airframes so I used one in the back for added support. You can also get them from Aztech Aeromodels. I glued the mount in with 5 minute epoxy.
I went on and mounted my motor next. I used high temp red Loctite on the standoff bolts on both sides to assure nothing will come loose.
NOTE- You will need to take 1/8”th ply and cut squares then drill a hole in them in order to get the desired standoff length needed.
Next I went ahead and mounted the servos in the elevator halves. I used MKS servos and since the mounting tabs are a bit wider than other servos you will need to sand the mounting block and the fiberglass former in order to make them fit easily.
Next I went back to doing some gluing and I glued in the control horn pieces. I really like that the horns are colored. I also like the fact that the horn slots are precut and slotted. All I did was rough up the horns with sandpaper and then glued them in with 30 minute epoxy.
Now that my header and servo arms came in, I went on to hooking up the canister to the motor with my new header from DA! It is a pretty straight forward setup which made me really happy. I had to trim the coupler down a little bit to get it all lined up and at the correct length. All I did was take my x-acto knife and take off 1/4" to get it to the correct length.
Attachments
-
 10962101_10204657721456463_916465426_n.jpg61 KB · Views: 493
 -
 10967877_10204657721376461_1714266746_n.jpg55.3 KB · Views: 440
 -
 10979410_10204657719616417_1523034883_n.jpg42.2 KB · Views: 461
 -
 10965676_10204657719656418_402315938_n.jpg41.3 KB · Views: 451
 -
 10962227_10204657721216457_1147507425_n.jpg55.4 KB · Views: 424
 -
 10966666_10204657720056428_2068078821_n.jpg64 KB · Views: 411
 -
 10877898_10204657720296434_1073809966_n.jpg48.4 KB · Views: 421
 -
 10984757_10204657719896424_723700205_n.jpg71 KB · Views: 456
 -
 10966920_10204657719376411_1720931200_n.jpg85.8 KB · Views: 407
 -
 10967730_10204652078835401_808316592_n.jpg74.4 KB · Views: 448
 -
 10961766_10204652079115408_458140628_n.jpg65.1 KB · Views: 409
 -
 10967055_10204657716416337_1297913754_n.jpg37 KB · Views: 448
 -
 10979369_10204657718976401_772071292_n.jpg42.1 KB · Views: 379
 -
 10968021_10204657716336335_1102785604_n.jpg60.6 KB · Views: 397
 -
 10962176_10204657718816397_404816822_n.jpg30.9 KB · Views: 403
 -
Redwing RC 50cc Yak 55 Build Log2.pdf889.9 KB · Views: 531
Last edited: