• If you are new to GiantScaleNews.com, please register, introduce yourself, and make yourself at home.

    We're 1st in Giant Scale RC because we've got the best membership on the internet! Take a look around and don't forget to register to get all of the benefits of GSN membership!

    Welcome!

Scale 1/3 Scale Harvard with Moki 250

BRITISH NAVY HARVARD


I've been 3 winters working on this plane (it was started with Brad on RCCANADA).

I got it almost completed (80%) last winter but my wife's eye surgery (that went bad) and subsequent 17 trips to the surgeons put a damper on finishing it for last years' Joe Nall. Thank god that has now been resolved and it's a thing of the past. The surgeons did a great job with the unexpected problems that cropped up during her cataract surgery. It's a strange hereditary problem that she has (too complicated for me to explain).

Here is a picture of the paint scheme I chose. I wanted a different paint scheme and I like this one as the underside being yellow should make it easy to see the different orientation when it is in the sky. It's the Hatter's Castle scheme.


The basic kit is made in Germany.
BRITISH NAVY HARVARD.jpg AT-6 HARVARD.jpg
 
ELECTRICAL WIRING

Today I got back into finishing the wiring for this plane.

I had forgotten what I had done a year ago causing me to go back and retrace some of the leads. I always colour code the leads from each servo or item with a small plastic wire tie. This helps me make sure I get the right servo plugged into the proper spot on the receiver.

Here is a list of the channels that I needed for this plane.

#1 Throttle #2 Right Aerilon #3 Right Elevator #4 Rudder #5 Left Flap #6 Left Aerilon #7 Right Flap #8 Middle Flap #9 Gyro Rate Input

#10 Main Gear Retracts #11 Tail Wheel Control (mixed to the Rudder) #12 Ignition Kill #13 Smoke Control #14 Choke #15 Lights


These are not receiver channels but inputs to the Main Receiver.

#16 The SRXL connection from X+8 Receiver to the Main Receiver #17 The main Power Soft Switch #18 Telemetry input (and Bind)

From the Electric Gear Control there are two outputs one for the right and one for the left side.

I am using a Power Safe Receiver so there are two battery inputs and one battery for the ignition.
HARVARD WIRING.JPG
 
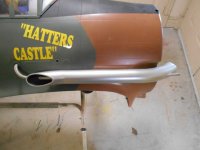
SIDE EXHAUST SYSTEM

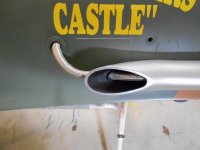
The Harvard had a side exhaust system that allowed a separate pipe to carry heat into the cockpit to keep the pilot(s) warm in the Canadian winter.

I made mine from electrical PVC pipe that I "manipulated" with some heat and force to get the right curve. I also used stainless steel washing machine line (burnt out the rubber lining for weight reduction) to simulate the heating line going into the cockpit. As this is a "semi-scale" plane the size of the piping is slightly too small but I think the "look" is still there.

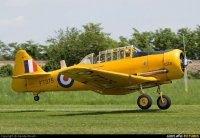
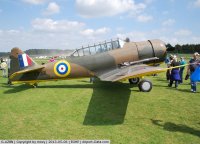
I've added 2 pictures of real planes so you can see the effect that I was after. It took over a week last winter to build this exhaust system.

In the future I plan to replace the fake exhaust with real stainless steel tubing and have the Moki exhaust come out of it. But that's for next year or I'll never get this plane done.

DUMMY SIDE EXHAUST.JPG COCKPIT HEATING PIPE.JPG FULL SIZE PLANE.jpg G-ABZN.jpg
 
COCKPIT DETAILS

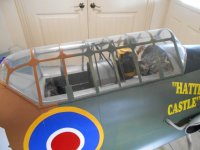
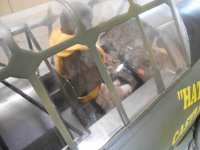
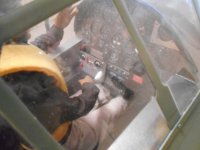
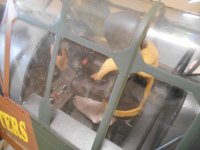
Here are some pictures of the cockpit, pilot and front and rear instrument panels.

Painting the cross bars on the clear canopy was extremely time consuming. To mask it out I used "FASMASK" a liquid masking tape. I took 3 coats to completely seal the clear plastic before it was ready for painting.

My wife made the yellow Mae West vest for the pilot. The original was made from plastic and looked quite cheap.

COCKPIT OVERVIEW.JPG FRONT PILOT SEAT.JPG INSTRUMENT PANEL.JPG LEFT SIIDE.JPG REAR PILOT SEAT.JPG LIQUID MASKING TAPE.JPG
 
Top