GSNadmin
Staff member
OK, it’s really called a payload release mechanism, and it plugs directly into your receiver, but this slick Payload Release from E-flite is the perfect solution for scale modelers who want mechanical options like drop tank and bomb drop function on your scale plane.
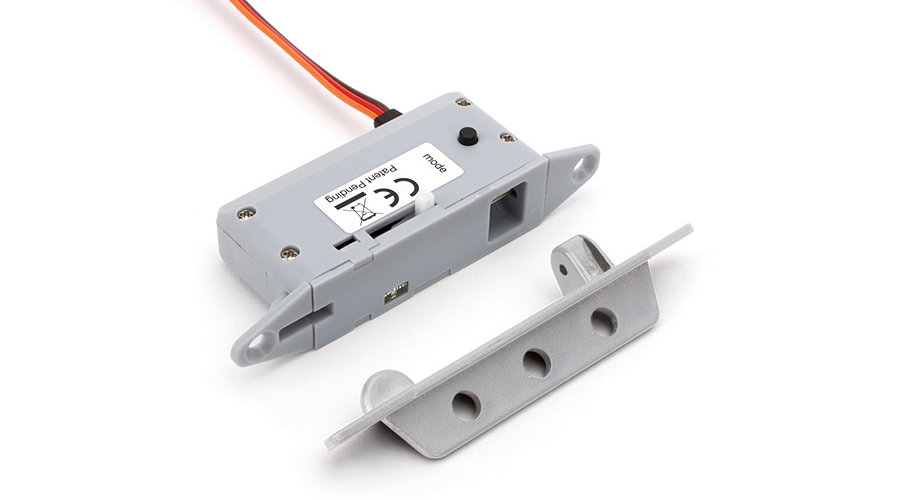
For less than $25, the unit plugs directly into the receiver using standard servo connectors, and you can connect and control multiple mechanisms with a single radio channel. They can be used with several settings iincluding one-by-one and programmed delay modes. The units features both electronic and manual release features and it is ready to use straight out of the package and is very easy to install.

The E-flite servoless payload release enables you to drop a single payload while in flight, or enables you to use multiple devices to drop multiple payloads using only one channel on your receiver. The manual release lever allows quick reloading without turning on your radio. It can also be used as a tow release for sailplanes.
So here’s how I added the “bomb drop” to my triplane. I basically cut an opening in the bottom of the fuselage and used hardwood blocks to support the unit. If you simply screw the unit flush on the bottom of the fuselage, the release/load lever is inside the fuselage as is the mode button. So the blocks act to lower the unit exposing the sides of the unit. Also some triangular lite-ply braces give the blocks a “bomb shackle” look. See drawing below.

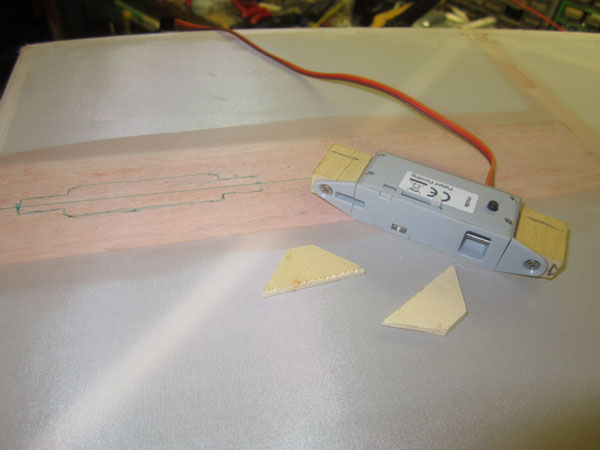
The 3/32 inch strip of balsa gives the fabric bottom support and a solid gluing and cutting surface.
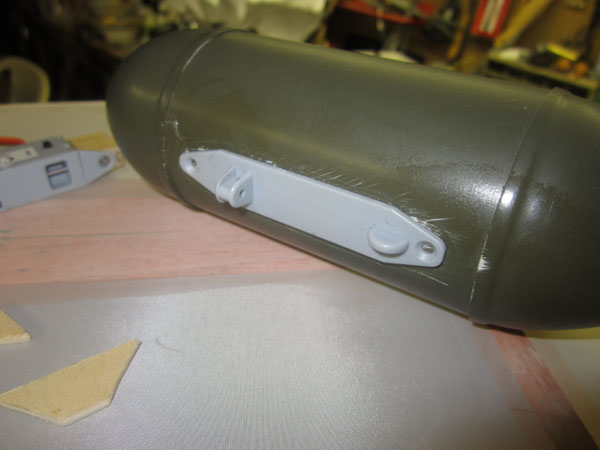
The release unit comes with a shackle that you glue and or screw to your bomb. I used a Hangar 9 static scale bomb for my droppable.
I placed the release point that matches up to the release pin at about the 30% point of the bomb. For the bomb to fall properly I needed to add about 1 oz. of lead shot and resin inside the nose of the bomb.
Once the opening is cut into the fuselage, you can attach the unit to the blocks and insert them all together to the depth you need. Then Tack glue the blocks and the braces into place and remove the release unit. Then go over the glue joints again with CA glue, I use ZAP.
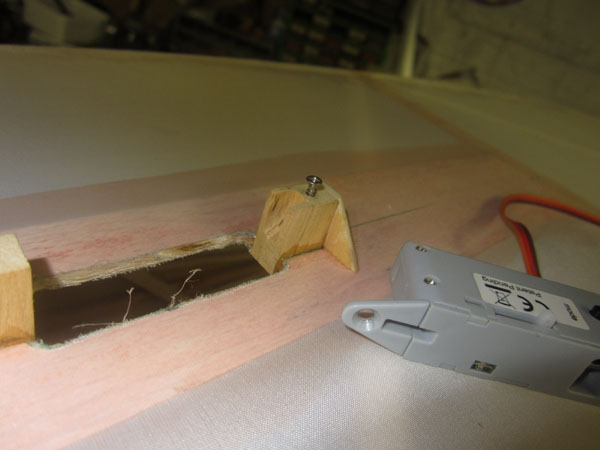
Because the slot on the unit for the aft stabilizer tab has a bulge under the aft mount tab, you have to cut an opening into the mounting block as shown here. This allows the unit to fit flush ontop of the blocks.

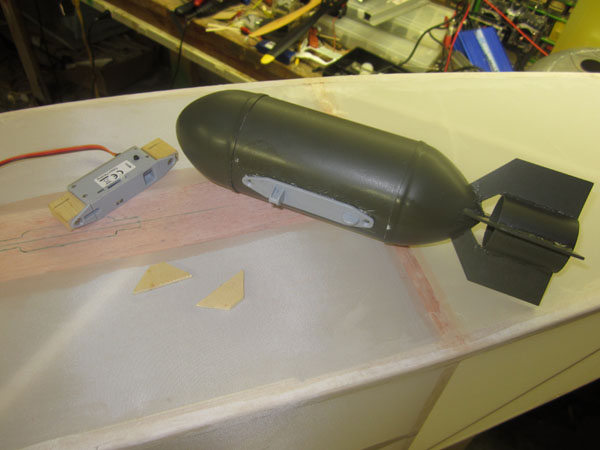
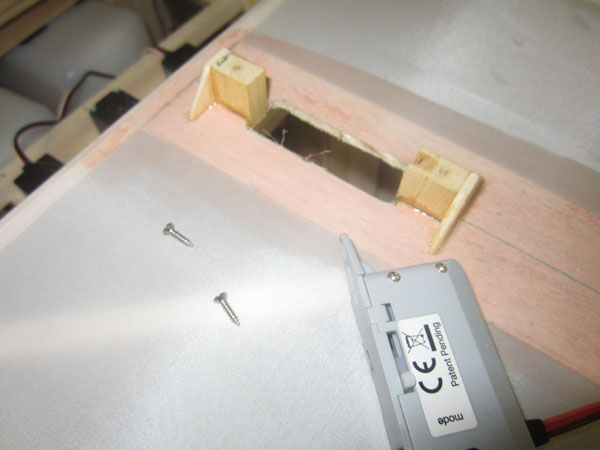
Unit in place and blocks and braces glued in place.

Here you see the entire side of the unit is exposed so you have access to the black mode button and the white release/load lever.
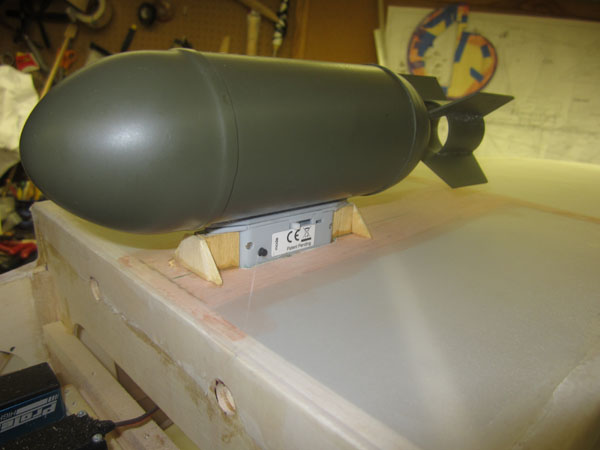
Droppable bomb load in place. Now just plug in the lead to a spare channel for your receiver and you are good to go.
You can as stated above, connect the units and use them together while still using a single release switch on your radio. By using the Mode button, you can daisy chain them together as the device offers five different release modes for multiple payloads:

OK, I’ll say it! “Bombs Away!”
Model Airplane News - The #1 resource for RC plane and helicopter enthusiasts featuring news, videos, product releases and tech tips.
Continue reading...
For less than $25, the unit plugs directly into the receiver using standard servo connectors, and you can connect and control multiple mechanisms with a single radio channel. They can be used with several settings iincluding one-by-one and programmed delay modes. The units features both electronic and manual release features and it is ready to use straight out of the package and is very easy to install.
The E-flite servoless payload release enables you to drop a single payload while in flight, or enables you to use multiple devices to drop multiple payloads using only one channel on your receiver. The manual release lever allows quick reloading without turning on your radio. It can also be used as a tow release for sailplanes.
So here’s how I added the “bomb drop” to my triplane. I basically cut an opening in the bottom of the fuselage and used hardwood blocks to support the unit. If you simply screw the unit flush on the bottom of the fuselage, the release/load lever is inside the fuselage as is the mode button. So the blocks act to lower the unit exposing the sides of the unit. Also some triangular lite-ply braces give the blocks a “bomb shackle” look. See drawing below.
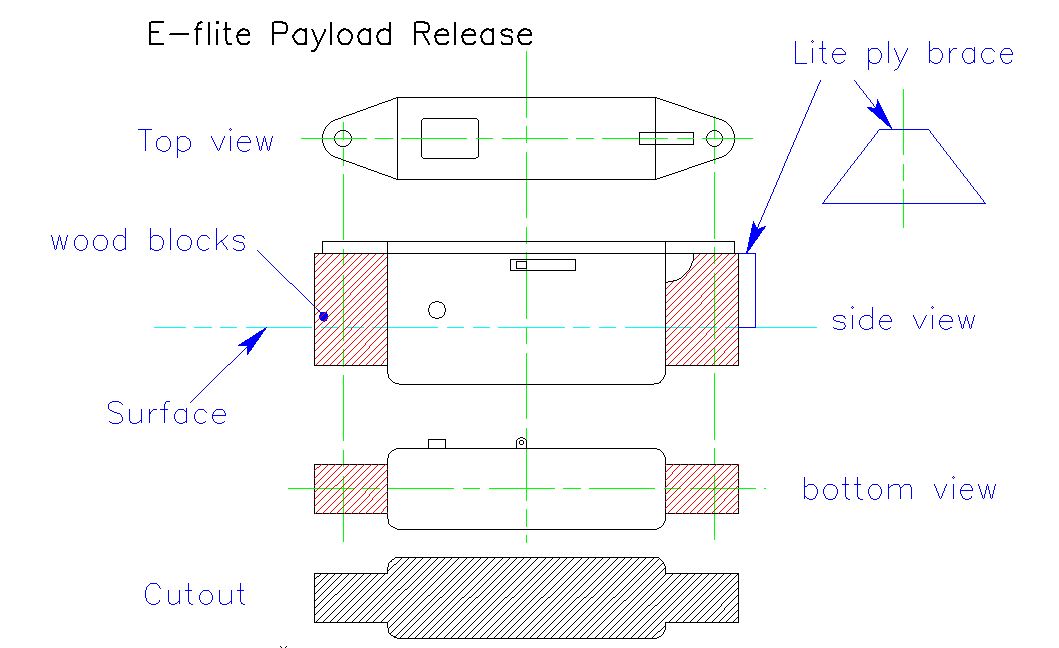
The 3/32 inch strip of balsa gives the fabric bottom support and a solid gluing and cutting surface.
The release unit comes with a shackle that you glue and or screw to your bomb. I used a Hangar 9 static scale bomb for my droppable.
I placed the release point that matches up to the release pin at about the 30% point of the bomb. For the bomb to fall properly I needed to add about 1 oz. of lead shot and resin inside the nose of the bomb.
Once the opening is cut into the fuselage, you can attach the unit to the blocks and insert them all together to the depth you need. Then Tack glue the blocks and the braces into place and remove the release unit. Then go over the glue joints again with CA glue, I use ZAP.
Because the slot on the unit for the aft stabilizer tab has a bulge under the aft mount tab, you have to cut an opening into the mounting block as shown here. This allows the unit to fit flush ontop of the blocks.
Unit in place and blocks and braces glued in place.
Here you see the entire side of the unit is exposed so you have access to the black mode button and the white release/load lever.
Droppable bomb load in place. Now just plug in the lead to a spare channel for your receiver and you are good to go.
You can as stated above, connect the units and use them together while still using a single release switch on your radio. By using the Mode button, you can daisy chain them together as the device offers five different release modes for multiple payloads:
- Zero Delay Blue LED (Default)
- 250ms Delay Green LED
- 500ms Delay Red LED
- 750ms Delay Flashing Red LED
- Individual Release White LED
OK, I’ll say it! “Bombs Away!”
Model Airplane News - The #1 resource for RC plane and helicopter enthusiasts featuring news, videos, product releases and tech tips.
Continue reading...