GSNadmin
Staff member
Check out these reader tips! Betcha you’ll use at least one on your next building project. (Have a tip you’d like to share? Send it to MAN@airage.com … no photo required!)
Hatch Leash
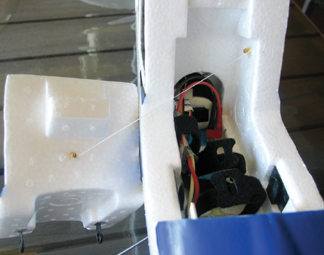
A great way to ensure your canopy arrives attached to your plane, rather than flying off one way and the plane going the other, is to use two small pieces of wood from a matchstick or a wooden BBQ skewer. I epoxy one for the inside of the foam canopy and the other for the inside of the fuselage, then I wrap a small length of dental floss (which is strong and light) to each piece. I do this before pushing them into the foam while the epoxy is still wet. This system adds minimal weight to the plane, but ensures I don’t end up losing the canopy!
The Perfect Building Guide
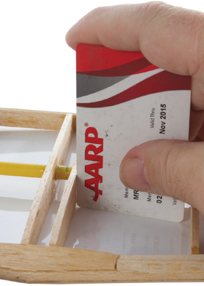
Here is the way to use your old credit cards and build straight at the same time. While building wing panels on plans, you have to ensure the ribs are 90 degrees to the building board. Old plastic credit cards are great building guides as their edges are perfectly square and the corners are rounded so they don’t get glued to the rib during construction. When they get ratty just throw them away, they don’t cost a thing ‘ that is, if you have a good credit score!
Custom Sanding Sticks
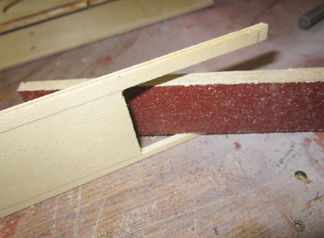
For neat and straight edges on parts I cut for my airplanes, I find it helpful to make custom-sized sanding sticks to fit into tight areas. Simply get some stick-on sandpaper (usually for electric sanders) and cut it into strips. Make your sanding stick to fit and then apply the sandpaper. The end result is clean edges for a professional-looking job.
Quick Connections
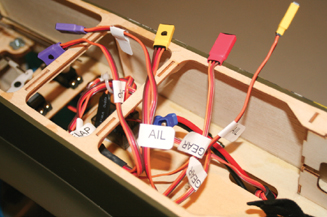
I’ve found that even when servo labels stay on, it is much too tedious to plug them all in properly. So, this is my solution. I bought several different colors of heat-shrink tubing: 3/8 inch for the female connectors and 1/4 inch for the male. To make it easy to determine the correct polarity, I draw dots on the tubing with a felt-tip marker to make connecting them a snap.
Model Airplane News - The #1 resource for RC plane and helicopter enthusiasts featuring news, videos, product releases and tech tips.
Continue reading...
Hatch Leash
A great way to ensure your canopy arrives attached to your plane, rather than flying off one way and the plane going the other, is to use two small pieces of wood from a matchstick or a wooden BBQ skewer. I epoxy one for the inside of the foam canopy and the other for the inside of the fuselage, then I wrap a small length of dental floss (which is strong and light) to each piece. I do this before pushing them into the foam while the epoxy is still wet. This system adds minimal weight to the plane, but ensures I don’t end up losing the canopy!
The Perfect Building Guide
Here is the way to use your old credit cards and build straight at the same time. While building wing panels on plans, you have to ensure the ribs are 90 degrees to the building board. Old plastic credit cards are great building guides as their edges are perfectly square and the corners are rounded so they don’t get glued to the rib during construction. When they get ratty just throw them away, they don’t cost a thing ‘ that is, if you have a good credit score!
Custom Sanding Sticks
For neat and straight edges on parts I cut for my airplanes, I find it helpful to make custom-sized sanding sticks to fit into tight areas. Simply get some stick-on sandpaper (usually for electric sanders) and cut it into strips. Make your sanding stick to fit and then apply the sandpaper. The end result is clean edges for a professional-looking job.
Quick Connections
I’ve found that even when servo labels stay on, it is much too tedious to plug them all in properly. So, this is my solution. I bought several different colors of heat-shrink tubing: 3/8 inch for the female connectors and 1/4 inch for the male. To make it easy to determine the correct polarity, I draw dots on the tubing with a felt-tip marker to make connecting them a snap.
Model Airplane News - The #1 resource for RC plane and helicopter enthusiasts featuring news, videos, product releases and tech tips.
Continue reading...