GSNadmin
Staff member
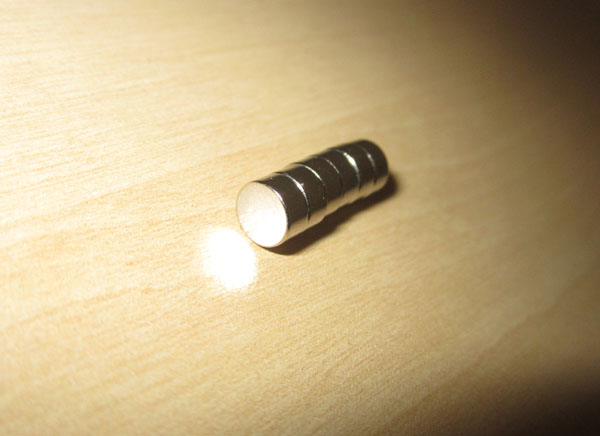
Neodymium magnets are members of the rare earth family and made from a combination of iron, boron and of course, neodymium. They were developed by General Motors and Sumitomo Special Metals in the early 1980s and are the strongest permanent magnets to date. These magnets are truly amazing. Their strength is over ten times the strength of the best ceramic magnets.

They can easily be purchased in many different shapes and sizes, spheres, discs, cylinders, blocks, rings, etc. and are graded by the ingredients they are made from, using the letter designation “N” followed by a number. As a rule, the higher the number the stronger the magnetic properties.
Here are some of the supplies needed:

Since I was in the midst of converting my 1/4-scale Me-163 Komet from glow to electric power, it was the opportune time to redesign the cowl mounts from unsightly exterior screws to internal magnets. My Komet has a wingspan of 82 inches, weighs in at around 12 pounds and has a round, cone style cowling that is approximately 7 inches in diameter at the firewall. The cowl is fiberglass and very lightweight. For the Komet I decided to use ¼ inch diameter by 1/8 inch depth, N42 rated, cylindrical magnets.
Here’s how I did it.
1. Make a cowl mount former using 1/8 inch light ply. The former should be ¾ inch to 1 inch wide and slightly larger than the firewall diameter.

2. Temporarily mount the cowl former to the firewall using whatever screws you like. I used hex head servo mounting screws because it’s easier to use a ball driver than a screwdriver. Next, use your favorite sanding block to sand the outside edge of the former to conform to the fuselage. Test fit the cowl to make sure it fits nicely over the former and fuselage.

3. Mark the former where the magnets are to be installed. In this case, I marked 13 locations around the former. There was no particular reason for the number 13 other than I thought more would be better than less. I then drill out the locations using the appropriate size drill bit. Since I was using ¼ inch diameter magnets, I used a ¼ inch drill bit. I wrapped masking tape around the bit to use as a depth gauge so that I would not drill any deeper than needed.
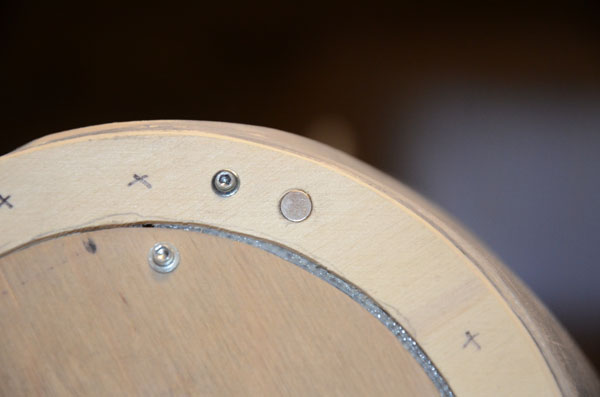
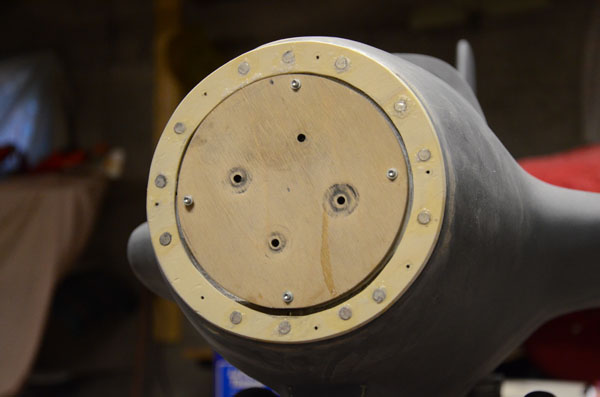
4. Drill out the magnet locations. Remove the former and install the magnets into the firewall using your favorite glue. I used medium CA to install mine. It is not important which field of the magnet remains exposed, positive or negative. Make sure that the magnets are flush with the firewall when permanently installed.

5. Install the corresponding magnets in the cowl former. It is vitally important that these magnets are installed with the correct pole facing its opposite on the firewall. To accomplish this, just place the magnets over the corresponding magnets on the firewall. Don’t worry about magnetic fields here, the little buggers will snap to its opposite as you draw near. Place the former over the magnets, apply some glue and tap the former down against the firewall to seat all the magnets in the cowl former. At this point you have all the magnets in the cowl former and firewall permanently installed.

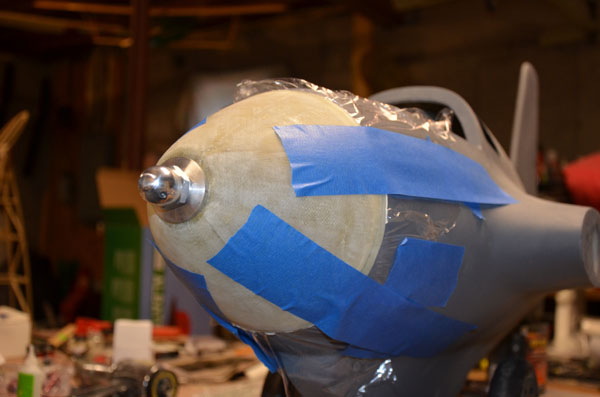
6. It’s time to adhere the cowl former to the cowl. Pry the cowl former off the firewall. Use Glad Cling wrap to cover the firewall and fuselage from excess glue used to install the cowl. Cling Wrap is thin, will stretch to make a good seal. Use some masking tape to pull the cling wrap tight. Once the Cling Wrap is installed, put the cowl former in place over the cling wrap. It will snap right in place. Use your favorite epoxy to glue the cowl to the cowl former. I dabbed the outer edge of the cowl former with epoxy and ran a bead inside the cowl. Adjust the cowl in place and tape securely.

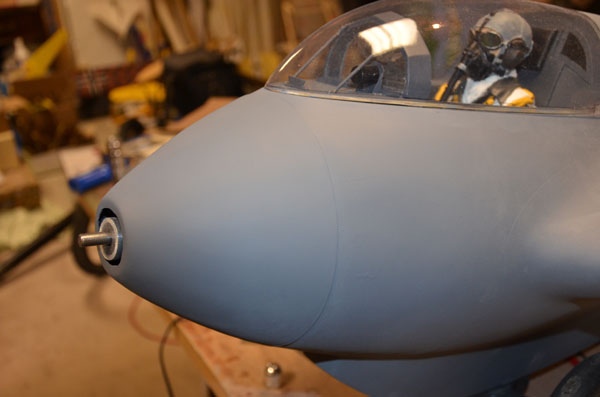
This shows the model primed with the cowl installed.
The painted and finished electric powered Komet.

Of course, the size and number of Neodymium magnets used will depend on the size and weight of your particular model. Suffice to say that I believe any model in the .40 to 1.20 range could utilize the same size magnets that I did for the Komet. You would only vary the number used based on the size and weight of the cowl. For larger models, I would consider using the larger 3/8 or ½ inch cylindrical magnet.
Where to buy. The best place I found to purchase Neodymium magnets in all shapes and sizes eBay. The number of eBay listings is staggering and the prices are very reasonable.
BY SAL CALVAGNA
Model Airplane News - The #1 resource for RC plane and helicopter enthusiasts featuring news, videos, product releases and tech tips.
Continue reading...
They can easily be purchased in many different shapes and sizes, spheres, discs, cylinders, blocks, rings, etc. and are graded by the ingredients they are made from, using the letter designation “N” followed by a number. As a rule, the higher the number the stronger the magnetic properties.
Here are some of the supplies needed:
Since I was in the midst of converting my 1/4-scale Me-163 Komet from glow to electric power, it was the opportune time to redesign the cowl mounts from unsightly exterior screws to internal magnets. My Komet has a wingspan of 82 inches, weighs in at around 12 pounds and has a round, cone style cowling that is approximately 7 inches in diameter at the firewall. The cowl is fiberglass and very lightweight. For the Komet I decided to use ¼ inch diameter by 1/8 inch depth, N42 rated, cylindrical magnets.
Here’s how I did it.
1. Make a cowl mount former using 1/8 inch light ply. The former should be ¾ inch to 1 inch wide and slightly larger than the firewall diameter.
2. Temporarily mount the cowl former to the firewall using whatever screws you like. I used hex head servo mounting screws because it’s easier to use a ball driver than a screwdriver. Next, use your favorite sanding block to sand the outside edge of the former to conform to the fuselage. Test fit the cowl to make sure it fits nicely over the former and fuselage.
3. Mark the former where the magnets are to be installed. In this case, I marked 13 locations around the former. There was no particular reason for the number 13 other than I thought more would be better than less. I then drill out the locations using the appropriate size drill bit. Since I was using ¼ inch diameter magnets, I used a ¼ inch drill bit. I wrapped masking tape around the bit to use as a depth gauge so that I would not drill any deeper than needed.
4. Drill out the magnet locations. Remove the former and install the magnets into the firewall using your favorite glue. I used medium CA to install mine. It is not important which field of the magnet remains exposed, positive or negative. Make sure that the magnets are flush with the firewall when permanently installed.
5. Install the corresponding magnets in the cowl former. It is vitally important that these magnets are installed with the correct pole facing its opposite on the firewall. To accomplish this, just place the magnets over the corresponding magnets on the firewall. Don’t worry about magnetic fields here, the little buggers will snap to its opposite as you draw near. Place the former over the magnets, apply some glue and tap the former down against the firewall to seat all the magnets in the cowl former. At this point you have all the magnets in the cowl former and firewall permanently installed.
6. It’s time to adhere the cowl former to the cowl. Pry the cowl former off the firewall. Use Glad Cling wrap to cover the firewall and fuselage from excess glue used to install the cowl. Cling Wrap is thin, will stretch to make a good seal. Use some masking tape to pull the cling wrap tight. Once the Cling Wrap is installed, put the cowl former in place over the cling wrap. It will snap right in place. Use your favorite epoxy to glue the cowl to the cowl former. I dabbed the outer edge of the cowl former with epoxy and ran a bead inside the cowl. Adjust the cowl in place and tape securely.
- When dry, pry off the cowl, remove the Cling Wrap, you’re all done. Your cowl should snap tightly in place.
This shows the model primed with the cowl installed.
The painted and finished electric powered Komet.
Of course, the size and number of Neodymium magnets used will depend on the size and weight of your particular model. Suffice to say that I believe any model in the .40 to 1.20 range could utilize the same size magnets that I did for the Komet. You would only vary the number used based on the size and weight of the cowl. For larger models, I would consider using the larger 3/8 or ½ inch cylindrical magnet.
Where to buy. The best place I found to purchase Neodymium magnets in all shapes and sizes eBay. The number of eBay listings is staggering and the prices are very reasonable.
BY SAL CALVAGNA
Model Airplane News - The #1 resource for RC plane and helicopter enthusiasts featuring news, videos, product releases and tech tips.
Continue reading...