GSNadmin
Staff member
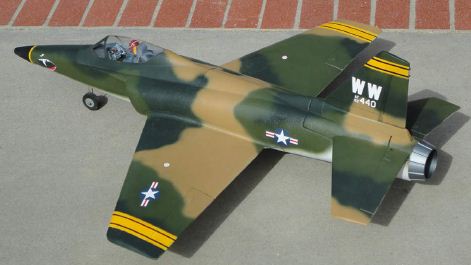
I’ve been waiting for a F86 Sabre EDF to come along that didn’t have a HUGE “out of scale”nose intake and didn’t cost an arm and a leg. Finally E-flite did it. Watching the performance of this model on the stock setup , I was finally satisfied. Having just finished a repaint, retract install and canopy modification of my ParkZone Habu that I tried to make resemble a F105 Wild Weasel in camo, I turned my attention onto what I could do with the F86 airframe.
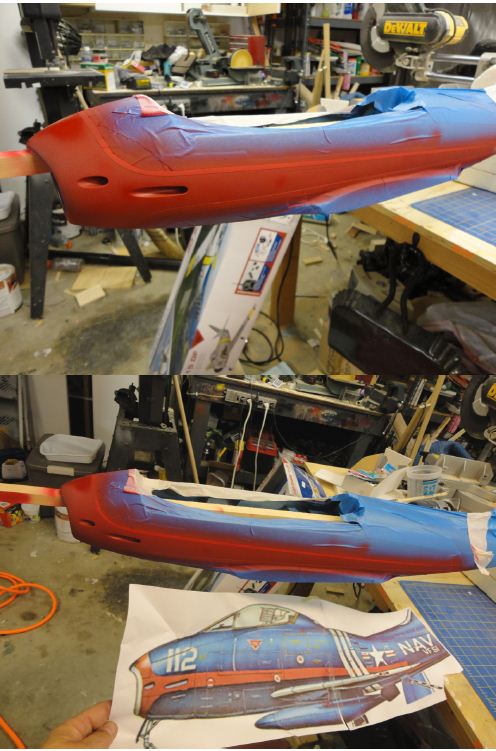
The Navy FJ3 Fury was my first (and only) choice.
This is how I go about a transformation process of a model like this. First get an idea for a paint scheme, The internet is a great place to get pics of different paint schemes. I also use plastic models for ideas. The instructions in a plastic model kit can be very useful for a repaint. For this model I used a Squadron book I’ve had since I was a kid some 30 years ago.
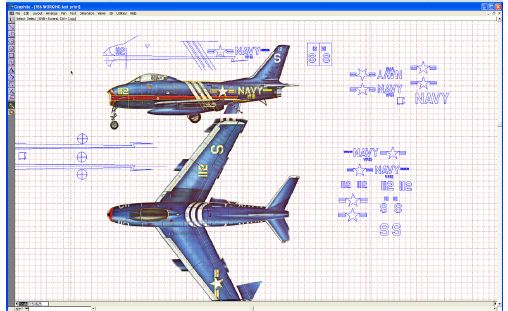
I use Photoshop and a 2d/3d cad program called Graphite for my layout work. I do this so I can have plans that are actual size. I just use the image art as a guide and layout markings, paint masks and fuse/ wing modifications. A graphics cutter like Callie Graphics can use the exported data for the vinyl material.
Start the model unassembled, if you can. The F86 is better started unassembled.
Safety Precautions for Stripping the Paint|
Eye protection, paint respirator (not just a dust mask) and thick rubber gloves are a must for this. Do not use chemicals to strip vacuum-formed plastic. It will just melt the parts. Instead mask the canopy glass and lightly sand the areas to be painted along the other similar plastic parts.
The fuselage was stripped because E-flite’s paint job is so nice and thick the finished weight of over spraying the original finish would make the finished model too heavy. So it was either sand it (scary) or chemical strip (more scary). I chose to chemically strip the fuse and rudder. The idea was to get the paint off but not soften the gelcoat of the fuse. This was a gamble, but it paid off.
AGAIN Eye protection , paint respirator, good airflow and thick rubber gloves are a must. Working outside in the shade with a slight breeze, I used Kleenstrip paint remover, not the paste kind, it’s the liquid solvent type. The stripper was applied to a paper towel in foil and wrapped around the fuse. I waited ten minutes then peeked under the foil. The paint wrinkled and was easily scraped off. Work in small sections, be patient and check the progress frequently.
Don’t try to strip the yellow, it won’t come off. It’s made by space aliens and is impervious to any known solvent on the earth. Just sand it smooth. Lightly sand the fuse and clean with acetone to remove any lingering stripper.
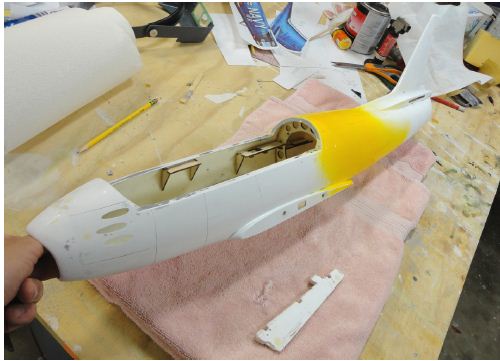
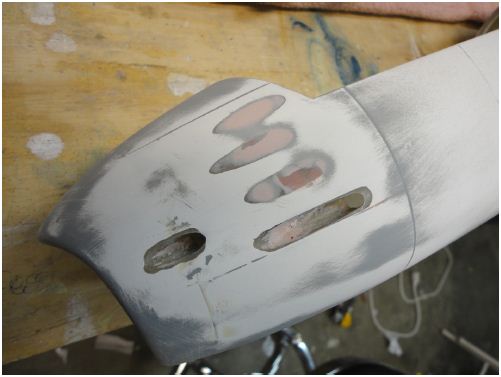
Stripped fuselage ready for work!
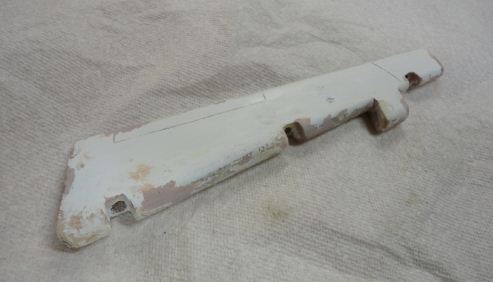
The rudder had body filler that softened and came off during the strip. I used Bondo to fill the voids and re-sanded and primed it.
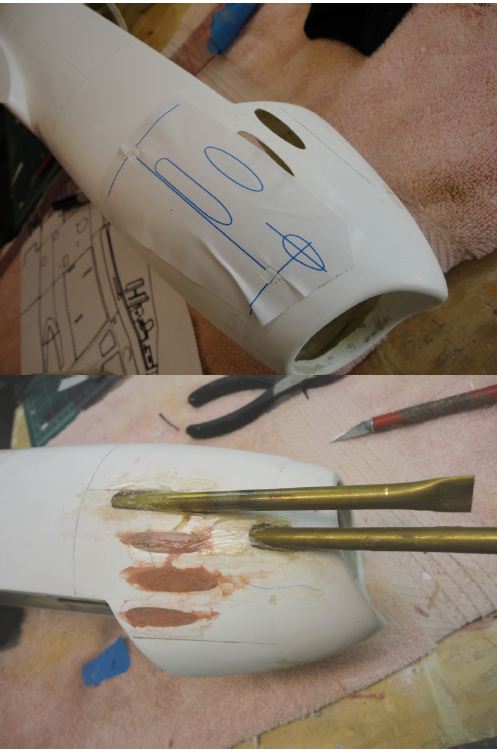
Changing the nose
I decided to change the nose to more resemble a FJ3 Fury so I fiberglassed the six original 50 cal gun ports and replaced them with the 4 Fury gun ports. Most of my work is done in the computer so I could print out paper patterns that could be taped to the fuselage. Using a Dremel tool I cut into the fuse the four openings. I took some brass tube with some wax applied for a release agent and inserted them into the holes for the guns and glassed around them. When the polyester resin set the tubes were removed, and viola!, gunports that double for electronics cooling. A little spot putty to clean every thing up and the fuse was primed, checked for flaws and lightly sanded. Then primed again and readied for the colors.
I chose MonoKote saphire blue for the blue coat. Unfortunately Monokote’s rattle can spray paint doesn’t match it. So I used a custom PPG automotive paint to match the MonoKote, it’s a single stage paint that doesn’t need a clear coat. The paint is for autobody professionals and uses three different chemicals, color , reducer, activator, mixed in appropriate ratios. I sprayed the base blue with the automotive paint in a spray booth, with a #5 Paasche airbrush. A paint this pricey goes on perfectly in one coat.
Then it was on to the red stripe. Callie Graphics again to the rescue. I laid out the stripe on the computer and she cut a paint mask for me. Once the area to be painted red was masked I scuffed the blue paint with 600 sandpaper in order to get good adhesion. Testors oil based enamel model paint was used for the stripe. It took 3 coats to get the color deep enough.
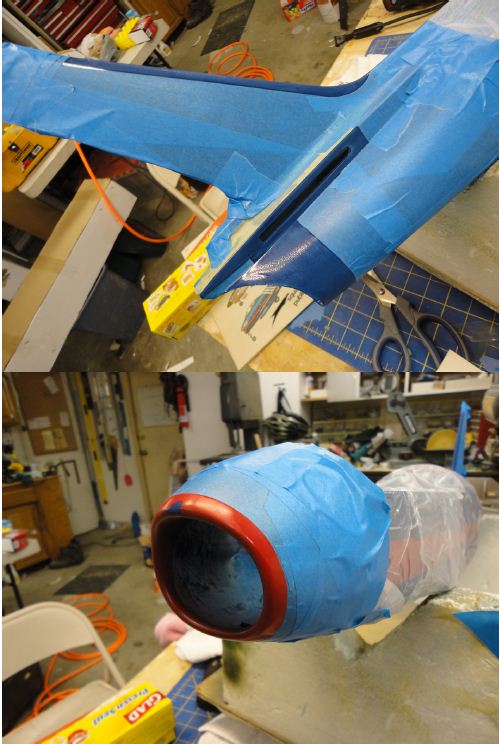
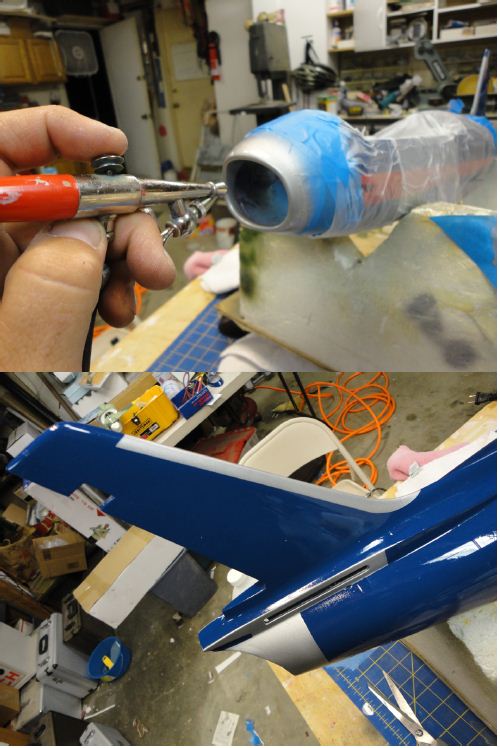
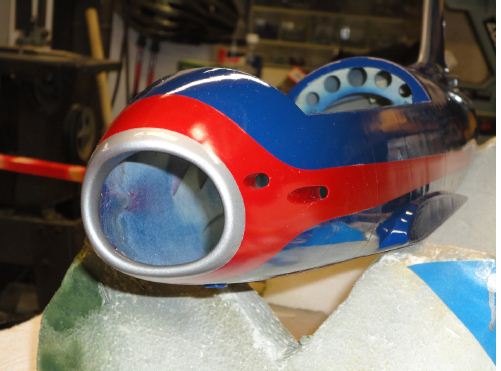
After the red came the silver. This was just good old fashioned masking. That contoured silver nose took a while to mask correctly. Be patient when doing this type of work. Take your time, it’s not a race. Again I used Testors enamel paint for the silver.
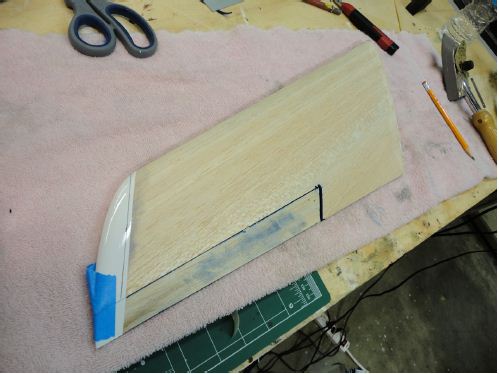
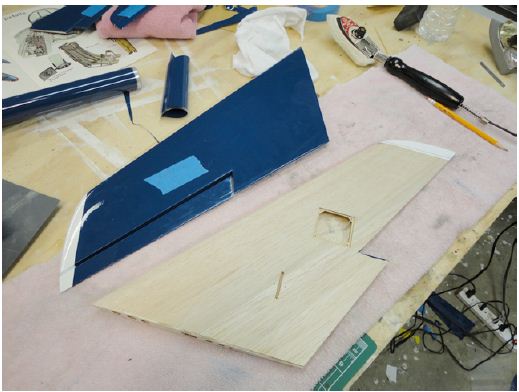
The Wings and Horizontal Tail
Removing the UltraCote covering, it’s a shame but must be done for our purposes. Use a heat gun to remove the covering on the wings and tail. Don’t peel it cold, you’ll break the wood. Work slowly and wear a glove over the hand you are peeling with, or you will get burned. Again work slowly and only use enough heat to remove the UltraCote.
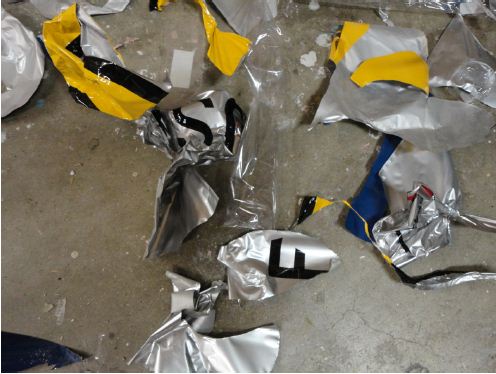
E-flite’s work on my workshop floor.
Once all the material is removed lightly sand the wood with 400 sandpaper to smooth it out.
I’m not going to go into how I MonoKoted the wing. It’s no different than any other iron on covering job. But a word about MonoKote: Please use a thermometer for the iron. Don’t eyeball it. Covering is very simple if you take your time and have the temp set right. The result is so much nicer. And use a MonoKote or similar sock over the iron. The silver on the tail and wings is a pressure sensitive silver MonoKote trim sheet material.

Decals were designed on the computer to generate vector files that can be used by Callie Graphics to cut. She does a great job at really great prices too. I usually order two sets at a time just in case I mess up. The only difficult decal was the fuse stripes. Laying that out took me four tries.
The vinyl decals can be applied dry or wet with water with a few drops of dish soap in a spray bottle. Wet works great because it a
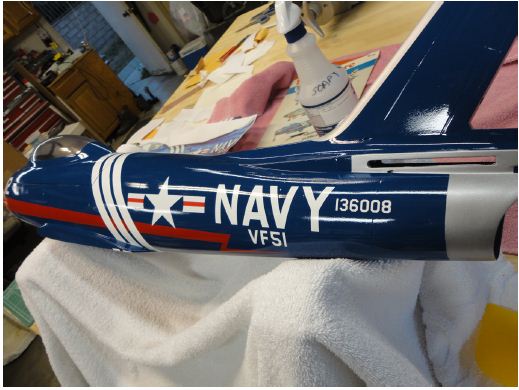
llows the decal to be positioned before it’s permanently squeegeed down. Some were applied dry like the stars and bars and lettering on the side of the fuse. The stripes were done wet. I applied one side and then the other.
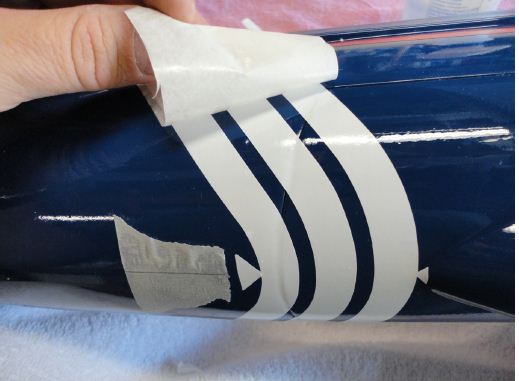
Applying the stripes “wet.”
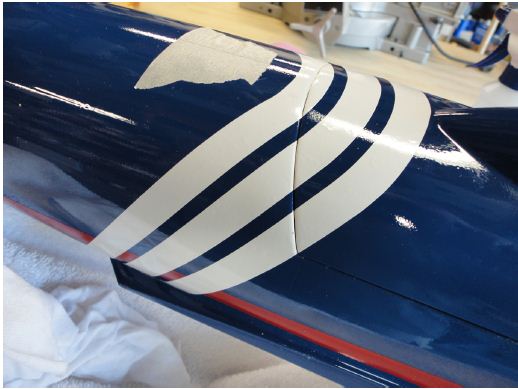
Vinyl cut and flattened for hatch opening…..perfect!
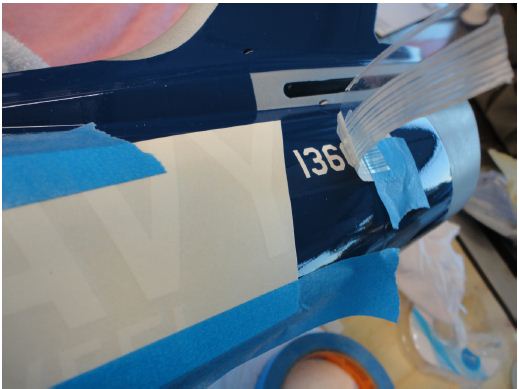
The letter decals were taped with the carrier paper to the fuse so they stay aligned during application. Remove the backing and roll the decal onto the surface.
This is really fun work at this point!
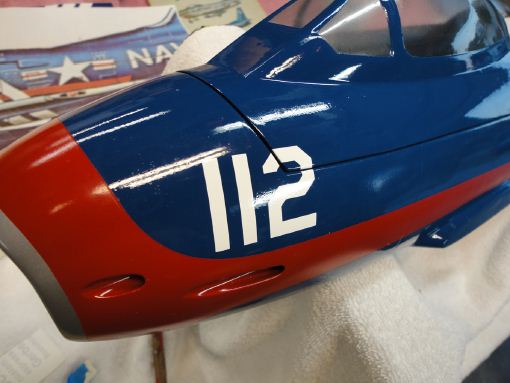
Nose numbers. Here the gun ports sell the model as a Fury.
Applying the decals for the wings is the same as the fuse with one caution. The backing paper is fairly sticky and can pull the monocote off the wood. Peel the backing paper at a sharp angle (almost parallel) to the surface not perpendicular. Watch for tiny air bubbles and just work them out with a little plastic spreader or credit card. Sand the sides of the plastic card with 600 sandpaper to round off the sharp edges so it doesn’t gouge the vinyl.

That’s about it. Step back and admire your workmanship at the completed, customized refinished model and then it hits you, the kit is back to the same state it was when you brought it home. Now it needs to be built and flown. Get back to work!
Make an ARF your own show piece and you will definitely stand out at the “cookie cutter” ARF- populated flying field.
By Dave Penikas
About the Author
When I was 6 years old I built my first plastic model kit. It was a Japanese Zero. I was hooked. Plastic modeling was my world until I was 18 years old, then I got my first RC airplane and that was it for me. I could make my static models now fly and have for the last 28 years.
Model Airplane News - The #1 resource for RC plane and helicopter enthusiasts featuring news, videos, product releases and tech tips.
Continue reading...
The Navy FJ3 Fury was my first (and only) choice.
This is how I go about a transformation process of a model like this. First get an idea for a paint scheme, The internet is a great place to get pics of different paint schemes. I also use plastic models for ideas. The instructions in a plastic model kit can be very useful for a repaint. For this model I used a Squadron book I’ve had since I was a kid some 30 years ago.
I use Photoshop and a 2d/3d cad program called Graphite for my layout work. I do this so I can have plans that are actual size. I just use the image art as a guide and layout markings, paint masks and fuse/ wing modifications. A graphics cutter like Callie Graphics can use the exported data for the vinyl material.
Start the model unassembled, if you can. The F86 is better started unassembled.
Safety Precautions for Stripping the Paint|
Eye protection, paint respirator (not just a dust mask) and thick rubber gloves are a must for this. Do not use chemicals to strip vacuum-formed plastic. It will just melt the parts. Instead mask the canopy glass and lightly sand the areas to be painted along the other similar plastic parts.
The fuselage was stripped because E-flite’s paint job is so nice and thick the finished weight of over spraying the original finish would make the finished model too heavy. So it was either sand it (scary) or chemical strip (more scary). I chose to chemically strip the fuse and rudder. The idea was to get the paint off but not soften the gelcoat of the fuse. This was a gamble, but it paid off.
AGAIN Eye protection , paint respirator, good airflow and thick rubber gloves are a must. Working outside in the shade with a slight breeze, I used Kleenstrip paint remover, not the paste kind, it’s the liquid solvent type. The stripper was applied to a paper towel in foil and wrapped around the fuse. I waited ten minutes then peeked under the foil. The paint wrinkled and was easily scraped off. Work in small sections, be patient and check the progress frequently.
Don’t try to strip the yellow, it won’t come off. It’s made by space aliens and is impervious to any known solvent on the earth. Just sand it smooth. Lightly sand the fuse and clean with acetone to remove any lingering stripper.
Stripped fuselage ready for work!
The rudder had body filler that softened and came off during the strip. I used Bondo to fill the voids and re-sanded and primed it.
Changing the nose
I decided to change the nose to more resemble a FJ3 Fury so I fiberglassed the six original 50 cal gun ports and replaced them with the 4 Fury gun ports. Most of my work is done in the computer so I could print out paper patterns that could be taped to the fuselage. Using a Dremel tool I cut into the fuse the four openings. I took some brass tube with some wax applied for a release agent and inserted them into the holes for the guns and glassed around them. When the polyester resin set the tubes were removed, and viola!, gunports that double for electronics cooling. A little spot putty to clean every thing up and the fuse was primed, checked for flaws and lightly sanded. Then primed again and readied for the colors.
I chose MonoKote saphire blue for the blue coat. Unfortunately Monokote’s rattle can spray paint doesn’t match it. So I used a custom PPG automotive paint to match the MonoKote, it’s a single stage paint that doesn’t need a clear coat. The paint is for autobody professionals and uses three different chemicals, color , reducer, activator, mixed in appropriate ratios. I sprayed the base blue with the automotive paint in a spray booth, with a #5 Paasche airbrush. A paint this pricey goes on perfectly in one coat.
Then it was on to the red stripe. Callie Graphics again to the rescue. I laid out the stripe on the computer and she cut a paint mask for me. Once the area to be painted red was masked I scuffed the blue paint with 600 sandpaper in order to get good adhesion. Testors oil based enamel model paint was used for the stripe. It took 3 coats to get the color deep enough.
After the red came the silver. This was just good old fashioned masking. That contoured silver nose took a while to mask correctly. Be patient when doing this type of work. Take your time, it’s not a race. Again I used Testors enamel paint for the silver.
The Wings and Horizontal Tail
Removing the UltraCote covering, it’s a shame but must be done for our purposes. Use a heat gun to remove the covering on the wings and tail. Don’t peel it cold, you’ll break the wood. Work slowly and wear a glove over the hand you are peeling with, or you will get burned. Again work slowly and only use enough heat to remove the UltraCote.
E-flite’s work on my workshop floor.
Once all the material is removed lightly sand the wood with 400 sandpaper to smooth it out.
I’m not going to go into how I MonoKoted the wing. It’s no different than any other iron on covering job. But a word about MonoKote: Please use a thermometer for the iron. Don’t eyeball it. Covering is very simple if you take your time and have the temp set right. The result is so much nicer. And use a MonoKote or similar sock over the iron. The silver on the tail and wings is a pressure sensitive silver MonoKote trim sheet material.
Decals were designed on the computer to generate vector files that can be used by Callie Graphics to cut. She does a great job at really great prices too. I usually order two sets at a time just in case I mess up. The only difficult decal was the fuse stripes. Laying that out took me four tries.
The vinyl decals can be applied dry or wet with water with a few drops of dish soap in a spray bottle. Wet works great because it a
llows the decal to be positioned before it’s permanently squeegeed down. Some were applied dry like the stars and bars and lettering on the side of the fuse. The stripes were done wet. I applied one side and then the other.
Applying the stripes “wet.”
Vinyl cut and flattened for hatch opening…..perfect!
The letter decals were taped with the carrier paper to the fuse so they stay aligned during application. Remove the backing and roll the decal onto the surface.
This is really fun work at this point!
Nose numbers. Here the gun ports sell the model as a Fury.
Applying the decals for the wings is the same as the fuse with one caution. The backing paper is fairly sticky and can pull the monocote off the wood. Peel the backing paper at a sharp angle (almost parallel) to the surface not perpendicular. Watch for tiny air bubbles and just work them out with a little plastic spreader or credit card. Sand the sides of the plastic card with 600 sandpaper to round off the sharp edges so it doesn’t gouge the vinyl.
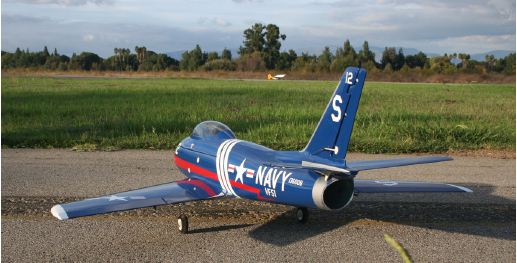
That’s about it. Step back and admire your workmanship at the completed, customized refinished model and then it hits you, the kit is back to the same state it was when you brought it home. Now it needs to be built and flown. Get back to work!
Make an ARF your own show piece and you will definitely stand out at the “cookie cutter” ARF- populated flying field.
By Dave Penikas
About the Author
When I was 6 years old I built my first plastic model kit. It was a Japanese Zero. I was hooked. Plastic modeling was my world until I was 18 years old, then I got my first RC airplane and that was it for me. I could make my static models now fly and have for the last 28 years.
Model Airplane News - The #1 resource for RC plane and helicopter enthusiasts featuring news, videos, product releases and tech tips.
Continue reading...