• If you are new to GiantScaleNews.com, please register, introduce yourself, and make yourself at home.

    We're 1st in Giant Scale RC because we've got the best membership on the internet! Take a look around and don't forget to register to get all of the benefits of GSN membership!

    Welcome!
  • Unless you are a paid advertiser NO more posting advertisement in the individual vendor forums. You may post in the Manufacturer's Announcements section only but only ONCE a month unless your a paid advertiser.

GWS C-47 Skytrain

rcdude07

70cc twin V2
I bought all electronics from Heads Up RC 2 weeks ago. Using two HURC 22A ESCs and two Emax CF2812 1600kv brushless motors with GWS 7035x3 props (one normal, one counter rotating). This was a recommended power setup I found for 3S lipos online from one YouTube video and one post from someone who contacted HURC years ago for a power recommendation. I bought the props from some dealer on Amazon with Amazon credit we had.

Monday morning I was up about an hour before the alarm goes off, so I went to the hobby room and started the build. I cut out foam from the battery compartment to make room for a 3S pack, widened the hole to the wing saddle to allow for battery to ESC leads, and then looked at the plan of how I'm going to cut the nose for magnets to allow easy access to the battery compartment.

attachment.php
attachment.php


Decided on cutting the top half of the nose off to create a battery bay. Cut the halves off this morning and then cut the elevator and rudder push rod tubes to size, as well as sanded off the rough bumps from the molding on the outside of the fuse halves this morning. I need to clean up my cut lines (later after the fuse is glued together). I need to check my magnet stock and see if I have enough for 4 pairs of magnets for the battery hatch.


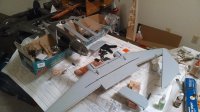
attachment.php
attachment.php
 

rcdude07

70cc twin V2
Weekend progress:

Glued the elevator and rudder pushrods in, assembled the tail wheel assembly, triple checked the battery hstch alignment and placement, glued the hatch halves together.

The manual says to install the tail wheel assembly and glue the fuse halves together next. However, the rudder was cut off previously, and if you follow the directions next, you won't have a good level, solid vertical fin TE for hinging on, and you won't be able to paint the TE around the tail wheel wire that will stick into the rudder. So I'm going to deviat and fix the TE as well as get some green paint on it before gluing in the tail wheel and fuse halves.


Got some more time yesterday and this morning on the build.

Rudder halves glued together, vertical fin TE sanded, LE of rudder angled, rudder test fit and sanded for clearance, ailerons cut, wing panels glued to wing root, aileron torque rods prepared/assembled.


attachment.php
attachment.php
 

rcdude07

70cc twin V2
Since the last post I've spackled the divots created factory mold, sanded the spackle, painted the bottom grey, spackled around the battery hatch I created by cutting the cockpit off, and sanded the battery hatch. To do is paint the green, paint the invasion stripes, paint the squadron markings (going to customize it for personal meaning as the plane isn't 100% scale), then get back to the instruction book to finish assembling. Post Christmas, she'll probably get put the side as a promised F4U to Skipper (Disney Planes) conversion must happen. Getting the Tower Hobbies EP RX-R F4U for Christmas, promised by oldest and my wife if I ever got an R/C Corsair I'd paint it up as Skipper.
 

rcdude07

70cc twin V2
What feels like a long absence, i got the tail letter painted and I finally got 3 sets of magnets glued in on the battery hatch. The front one may not be enough to prevent side to side movement, so I may need to out some reinforcement in. Granted she won't be a speed demon or high performance. Then I got the front fuse markings painted.

I used Testors acrylic flat white to paint the markings. N on the tail for my first name and T4 on the nose for my last name and number in my immediate family at the time of building. Fortunate to have found a picture from WWII with a C-47 that had T4 on the nose.


Before doing all this I was side tracked after Christmas with painting the rudder on my Tower Hobbies F4U to look like Skipper from Disney "Planes" and getting it assembled and ready for flight.
 

rcdude07

70cc twin V2
Dry fitted the LG yesterday and next the wires forward to help prevent nose overs. I need to order collet style prop adapters. Epoxied in the LG mounting brackets, wing bolt plate on wing, wing LE mounting bracket in the fuse, and the wing spar this morning. With 7" props I think I'm going to have to move the motors out from the fuselage a little bit to prevent slicing the fuse with the stock center location.
 

rcdude07

70cc twin V2
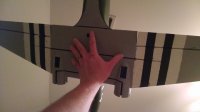
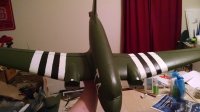
Got some time in this weekend, was tired of looking at the plain wing and put the invasion stripes on. The white required 4 coats of Testors acrylic and the black required 2 coats.

10553680_10102491846381789_1504810605916883040_o.jpg 10986897_10102491846406739_6472785943583908056_o.jpg
 
Top