• If you are new to GiantScaleNews.com, please register, introduce yourself, and make yourself at home.

    We're 1st in Giant Scale RC because we've got the best membership on the internet! Take a look around and don't forget to register to get all of the benefits of GSN membership!

    Welcome!
  • Unless you are a paid advertiser NO more posting advertisement in the individual vendor forums. You may post in the Manufacturer's Announcements section only but only ONCE a month unless your a paid advertiser.

Twisted Hobbies - 32" Crack Yak Lite

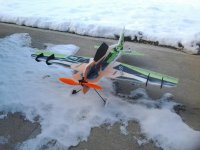
The wifie came through with a new CY Lite for me for Christmas with the stock power combo and the carbon upgrade kit. Foam quality and paint on this one is great, typical of TH EPP planes.

This is the first time I have done the Carbon kit and I really like it. The control horn extensions were easier to mount on the plastic arms because I wasn't worried about breaking or cracking them. This TH plane uses a carbon round stock spar and the lasering in the carbon braces had super tight tolerances which allowed for a pleasantly snug fit. I did have to wallow out the holes a little bit to make it easier for the long carbon spar piece to pass through the center braces. I did this with my hobby knife. It was quick and turned out great.

I think that the stock power combo is going to be ok. No chattering or ceneri g issues noted from bench testing. The ESC and motor combo 20121226_154210.jpg seemed pretty smooth with a very small amount of low throttle roughness which I found acceptable for the cost.
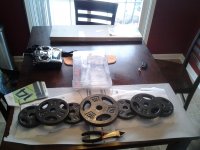
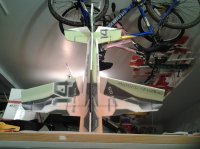
I have flown this plane at a local indoor event and the one I flew had a surprising amout of power on a 2 cell set up. It torque rolled with little or no corrections once locked into a hover and zero coupling in KE flight. I hope my build turns out as good as the on my buddy let me test fly. Here is a picture of my build so far. Weights are holding the spar fllush with the cut outs in the foam. Probably overkill but I had plenty laying around.
 
20121227_225517.jpg

Getting closer! Basically the only thing left is to let the glue dry, install servo arms, pushrods, motor, ESC and tail skid.

Most challenging part if the build is the landing gear. Dont really like the way mine came out but it will serve the purpose, one wheel is toed in a little too much to look good. Hoping the wheel pants will help hide it.

Only problem that I have run into is the upper and lower fuse tabs did not line up with the horizontal fuse. Not a big deal, just trimed away a small amount of foam on the top and made the horizontal fuse hole a little bigger for the bottom.
 
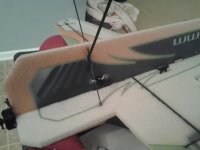
20121228_082130.jpg

Sooo, ran into major issues this morning. The laser cut landing gear cut-out is in the wrong place on my lower fuse and interferring with the aileron servo arm. I glued the gear in last night and it is locked solid now so its not like I can move it to the right location without destoying the foam. Going to contact TH to see if I got an old kit or something because the LG cut out on the kit in the build manual is well behind the servo arm. There we also no slots to anchor the tops of the LG legs in the foam.
 
Last edited by a moderator:

Twisted Realm

SITE SPONSOR
GSN SPONSOR
Great build Havoc looking good.

On you LG issue the legs to come close but should not hit. From your photo above it looks as though you may have not centered the two landing gear legs to the fuse. Check to see if this is your issue and you may have to move the one leg that is no centered. Also the legs should be wider apart.
 
Last edited by a moderator:
I have already heard back from TH, within 30 minutes of sending an e-mail. We are working a solution. I will let you know how it turns out.
 
Ok, gear issue is fixed. I have a second production run kit. In the second run they moved the gear slot forward about an inch from the original location in the lower vertical fuse. Moving it forward fixes some gear chatter issues but the gear legs come really close to the aileron servo arm.

MAKE SURE YOU SET YOUR GEAR LEGS OUT WIDE ENOUGH TO CLEAR THE AILERON DIFFERNTIAL ARM.

My kit did not have the laser cut outs for the gear legs in the horizontal fuse so I just guessed on where to put them without thinking about clearance for the diff arm. I will get some pictures up of the proper mounting location. The PDF instructions do not address this step as they were written for the first run kit and since the gear were an inch further back the diff arm clearance was not an issue.

I called Brad at TH and spoke with him about the above and he is a real stand up guy. TH is one of the few companies I deal with today that will offer support after the sale. We tried trimming down the diff arm to clear the gear, unfortunately that did not work and I had to rebuild and remount the gear. Brad was gracious enough to send me a new diff arm at no charge. Thanks Brad!

I will post some pictures of my gear position so others can see where it should be. My indoor fly in is tonigt so I will let you guys know how it goes!
 
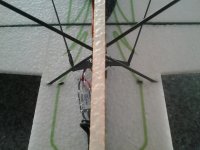
20130105_112107.jpg
Here is the gear position. You can see where I cut the first set of gear out (I just clipped it at the base of the leg to not damage the foam). I would suggest installing your alieron servo and diff arm and the using that as a refeence fot rhe gear width.

One other suggstion that I have when building the gear is to install the flat fiber stock into the fuse and glue it in. Make sure to check and make sure your wings are setting level on the legs so you dont have one wing lower than the other.

When that is dry come back and install your angle pieces, spacers, wheels, and wheel pant hangers. The PDF manual shows to build each soie of the gear as an assy then install in the fuse. I found that doing it the way the manual states can lead to the axles not being perpendicular to the ground. If you build the axles up on the plane you can adjust this and your wheel chamber will be correct.

The only way to adjust wheel chamber/toe when building the gear as an assy is by changing the position of the legs in either the vert or horz fuse which could cause a servo diff arm clearance issue if you have to move them too much.

I hope all this will help someone so they avoid the mistakes I made.

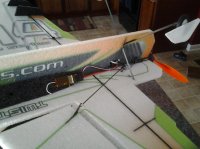
20130105_112128.jpg
Left side electronics install.

20130105_112217.jpg
Ready for Maiden!
 
Put the maiden on this beastie at the indoor fly-in last night. I felt pretty comfy with this airplane almost immediately. Battry pack felt good hust slightly ahead of center on the spar so I cut my slot. Little tail heavy from the stock location but that is where it felt the best to me.

I have been flying my Crack Pitts on 3s all season indoors and this felt pretty similar, but they are definately different planes. The lite is easier to hover, torque roll, and KE. I like the Pitts better for snaps and harrier manuvers.

I was only able to get three flights on this airframe because the rudder servo failed. I was hovering in front of me and I heard something clicking so I landed to check it out. The gearing is completely out of the servo. I have had this happen before after a crash (who hasn't) but never just stripping out in flight. I do like to do alot of snaps so maybe the gear train is weak. I am using the stock power combo. I was happy with the servos up until the failure. I hve a couple friends who are running the sme set up and their servos are fine. I will get a new one and try again, but the jury is still out on the servos for me.
 

Dan5.0

New to GSN!
You just happened to get a bad one, it happens with these small servos sometimes. Call Twisted Hobbys see if they'll replace it, shouldn't be a problem.
 
Top