• If you are new to GiantScaleNews.com, please register, introduce yourself, and make yourself at home.

    We're 1st in Giant Scale RC because we've got the best membership on the internet! Take a look around and don't forget to register to get all of the benefits of GSN membership!

    Welcome!

IMAC Build: Dalton Extra 300

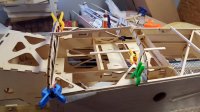
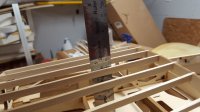
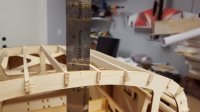
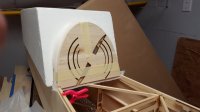
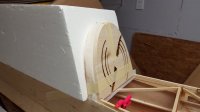
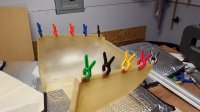
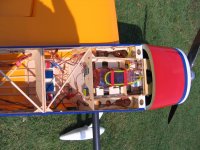
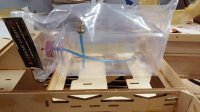
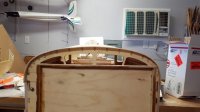
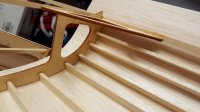
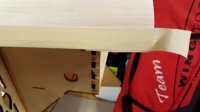
The last little bit for today was getting the corner braces in for the canopy hatch.

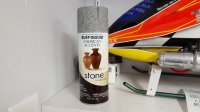
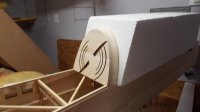
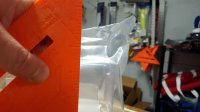
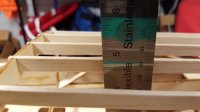
I also went and got some stone paint to dress up the inside of the hatch with.

Are there any build threads for dash panels?
 

Attachments

  • 20160221_172109.jpg
    20160221_172109.jpg
    102.1 KB · Views: 405
  • 20160221_172122.jpg
    20160221_172122.jpg
    82.9 KB · Views: 403
I ordered a dash panel and fuel tank from Extreme Flight this morning.

I tried one of the Flow Master tanks in my EF Edge and I love it so it was a no brainer when I was deciding what I wanted to put in the Dalton.

It's 1/2" taller than a DuBro so it should fit fine.
 
Well, the stringers for the hatch are glued in. I also got the last piece of 1/4 spruce installed. I'll probably get some more and maybe add in a few pieces to help brace the canopy. I'm also debating about how much I should sand the canopy back plate down by. I can sand it down some more to lower it but I might leave it where it is and let the canopy overhang.

I also took some measurements for the fuel tank and maybe I should see if EF can refund me for the fuel tank...
 

Attachments

  • 20160222_204204.jpg
    20160222_204204.jpg
    116.1 KB · Views: 412
  • 20160222_204209.jpg
    20160222_204209.jpg
    125.5 KB · Views: 432
  • 20160222_205151.jpg
    20160222_205151.jpg
    148.4 KB · Views: 417
  • 20160222_205218.jpg
    20160222_205218.jpg
    50.3 KB · Views: 423
  • 20160222_204409.jpg
    20160222_204409.jpg
    85.5 KB · Views: 404
  • 20160222_204447.jpg
    20160222_204447.jpg
    75.3 KB · Views: 411
Back plate for the canopy is now glued to the canopy frame. I also got the sheeting for the front of the hatch cut and glued together.

I'm going to wait for my fuel tank to arrive from EF before I glue on the sheeting. The tank is longer than the fuel tank tray in the plane so if I use it, I'll cut out the back of the tray area and then look at what I need to do to reinforce that area.
 

Attachments

  • 20160223_211036.jpg
    20160223_211036.jpg
    73.6 KB · Views: 387
  • 20160223_211042.jpg
    20160223_211042.jpg
    74.2 KB · Views: 416
  • 20160223_211052.jpg
    20160223_211052.jpg
    95.4 KB · Views: 424
  • 20160223_211942.jpg
    20160223_211942.jpg
    105.2 KB · Views: 421
The only thing I worked on tonight was cutting some pieces of lite ply to increase the thickness where the blind nuts will go on the cowl.

I also ordered a pilot figure today. I went with the one that has the checkered pattern on the helmet.
 

Attachments

  • 20160224_202214.jpg
    20160224_202214.jpg
    105.5 KB · Views: 383
  • Pilot1.jpg
    Pilot1.jpg
    85.9 KB · Views: 407
  • imagejpeg_1.jpg
    imagejpeg_1.jpg
    84 KB · Views: 381
  • imagejpeg_2.jpg
    imagejpeg_2.jpg
    82.1 KB · Views: 370

Dirt

50cc
Ben, I used a 1.5L Fiji water bottle for a fuel tank and it fits fine except for the front part of the tank tray. I had to sand the front of the tray to get the bottle neck to fit. Here is a photo of the inside on my Dalton.
 

Attachments

  • 001  Dalton looking at the inside.JPG
    001 Dalton looking at the inside.JPG
    132.9 KB · Views: 373
I got the first part of goodies today. I think the fuel tank will be a tight fit but will work. I might have to take a little off of the stringers for the canopy hatch but it wouldn't be too much.
 

Attachments

  • 20160225_205552.jpg
    20160225_205552.jpg
    113.2 KB · Views: 402
  • 20160225_205903.jpg
    20160225_205903.jpg
    83.3 KB · Views: 371
  • 20160225_210537.jpg
    20160225_210537.jpg
    65.9 KB · Views: 370
  • 20160225_210554.jpg
    20160225_210554.jpg
    74.2 KB · Views: 342
  • 20160225_210714.jpg
    20160225_210714.jpg
    64 KB · Views: 396
Not too much to report on since I had a very busy day yesterday. I competed in a Crossfit competition. I've only been doing Crossfit since February 1st so it was pretty brutal.

Anyways, I got the sheeting for the hatch partially glued on. I used poly glue as suggested and I only went to the second stringer from the edge on the formers. I can add some arrows if you need me to but you'll notice very little foaming going from the second stringer to the edge on the former. I did that so I didn't have to clean out foamed glue to get the sheeting the rest of the way down. I'm going to glue the edges down with wood glue and then hit that spot with gap filling CA.

Of course, the sheeting also decided to crack when I was gently pulling it to the 1/4" spruce of the hatch on one side so I cut the crack out and reglued it. I'll be sure to hit those areas with some water before attempting to glue them down the rest of the way.
 

Attachments

  • 20160228_142215.jpg
    20160228_142215.jpg
    104.4 KB · Views: 370
  • 20160228_142224.jpg
    20160228_142224.jpg
    84.3 KB · Views: 387
  • 20160228_202239.jpg
    20160228_202239.jpg
    90.5 KB · Views: 349
  • 20160228_215241.jpg
    20160228_215241.jpg
    51.5 KB · Views: 343
Top