B
Blucor Basher
Drill Here, Drill Now
We drill a lot of holes, we model airplane builders. We need holes all over the place, to hold all sorts of fun little machines onto our airframes. I was talking with a buddy today about aircraft assembly, and I mentioned the need to drill a hole in a steel part to make a mod I was suggesting. I went off about the proper speed to spin the drill bit, and why, and he said that this was new information to him, and he said I should write an article about it. Viola, here it is.
When we drill a hole, we are doing a particular thing. We are using a sharp blade to slice a long, thin strip of material off of a larger block of material. If we want to understand what is really happening, the best analogy is planing. This is a wood plane at work:
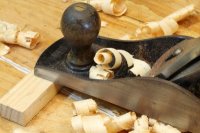
The plane has a sharp blade, set at a cutting angle to the wood. You shove it forward with the handle, and a thin strip of wood is cut away and curls up as shown. The strip that is removed is called a chip.
When we drill, we are using a sharp blade to cut a chip off of a larger piece, just like this, except we are moving our blade in a circle. The chip that is cut away is in a circular shape, as it is lifted up by the cutting edge, it forms a spiral.
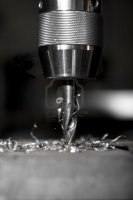
It's easy to drill a hole in wood. I don't think anyone needs much help with that. Follow the metal-drilling tips below and you'll get good results in wood, but metal is the critical material, so everything that follows is primarily about metal.
As we drill, hopefully our bit goes deeper into the material, and the chips must be transported to the surface of the hole. The flutes, or empty spaces in the bit, can hold some chips, but they get full and chips from many materials do not like to travel up the flutes. For this reason, when drill deep holes, we must pull the bit out to clear the chips and then plunge the bit back into the work piece again.
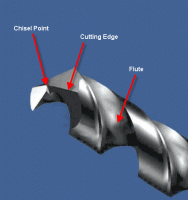
The geometry of the tip end of a drill bit is complex. When I was being trained in basic machining, my mentor patiently explained several different tip shapes that could be created on our shop grinding equipment and what materials they were best for, and I promptly forgot everything he taught me. Ah, how I wish I had been a better listener when I was young.
The grand old skill of drill-bit sharpening is now mostly a lost art. It was absolutely necessary only a hundred years ago when electricity was rare and most holes (even big holes in metal) were drilled by hand. If you were hand drilling a 3/4" hole in iron, you cared very much how much torque it required to spin a 118 degree tip versus a 135 degree tip. Now electric drills are ubiquitous and many hobbyists have excellent drill presses, and so we care much less about the technicalities of tip designs.
There are still a few details to know, however:
1. Sharp is better than dull.
Duh. Sharpening drill bits can be hard. Many of us throw dull drill bits away, and this is a bad habit. It's a bad habit because this prevents us from ever buying and owning a decent set of bits in the first place. A set of bits should last you basically forever, and should be sharpened many times. If you want, you can learn the black art of drill sharpening....or you can cheat. I highly recommend you cheat. Use one of these:
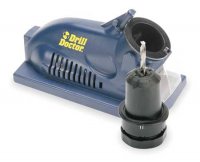
The Drill Doctor is a great little electric sharpener. Most of the bits I have purchased in the last several years were sharper after a pass through the Drill Doctor than they were brand new. It does a fine job. Now, you can, if you want, buy Drill Doctors set up for different tip angles and even some with variable sharpening angles. If we were drilling with large bits in exotic materials, we'd care that a 135 degree tip requires more torque than a 118 degree tip...but we're not so we don't. The standard, inexpensive Drill Doctor cuts a conventional 118 degree chisel tip and works great. I use it, I recommend it.
2. Chisel requires a brain.
This standard drill tip has a "chisel" point at the center. The chisel is not a cutting surface. Do not start drilling a hole with a large bit with a wide chisel tip. Very little will happen, because the chisel point does not actually drill very well.
What you are supposed to do (and if you do this, your life will be easer) is to plan your drilling job in stages. First, punch a divot exactly where you wish to drill with a punch. You don't own a punch? Get a punch. I prefer an automatic center punch like this:
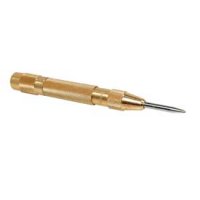
It is spring loaded, and with minimal effort will punch a nice little crater into even very hard metal. And, if you ever happen to find yourself trapped in a car underwater, it can break auto glass very easily. (you never know).
First you punch a divot. You can do this very accurately. The divot will look like this:
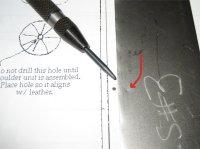
Then pick a small dill bit whose chisel tip will fit into the divot. Drill with this bit. Because you are drilling into the divot, the bit will not wander. When you have reached the desired depth, switch to a larger bit, one whose chisel tip fits entirely into the existing hole. Keep going up until you get to the desired diameter. Aha, you see now, don't you? This is how we do it, and typically it takes two or three bits to make one good proper hole in metal.
If you will use a sharp bit, use a center punch, and think about the drill sizes you need to achieve a proper hole, you will be amazed at how suddenly competent you are at drilling holes. So, what else is there to know?
Speed kills.
Drill bits, that is. If you have ever drilled a hole in metal, you know a lot of heat is liberated. The bit gets hot. First off, a properly sharpened bit will do more work with less heat than a dull one. A lot more. Secondly, we need to know about drill speed.
As in our planing analogy, we are moving this cutting edge across our metal work piece and lifting up a chip, the faster we move the more force is required and the hotter the drill tip gets. If we go too fast, the tip gets so hot that we affect the properties of the metal the drill bit is made of. It is a tricky business for a manufacturer to make a drill bit hard enough to keep a sharp cutting edge when drilling into hard materials. If we overheat our tip, we can undo all of the magical properties and our drill tip will get soft and dull. If we really overdo it, we can make our tip so hot it melts.
Alternately, we need to realize that because our cutting edge is moving in a circle, the diameter of the circle makes a big difference to the cutting speed of the bit. If two bits are spun in the same drill at the same RPM, the larger diameter one is cutting at a much faster speed in inches per minute of travel across the work piece. Because of this, smaller bits can and should be spun at higher rpm. This is why we want a variable speed drill or drill press. This also why we want to use a drill speed chart:

As you can see, if you spin all of your drills with a 3000 rpm single-speed drill, you are going to have big problems drilling metal with most of your drill-bit collection. You can always find a drill speed chart on the web when you need one. Use one every time you drill metal!
What else?
Most hobby drilling can be done dry. There are material-specific drill bit lubricants that work very well. There are universal cutting oils that work less well. If you really need a cutting lubricant, you are probably tackling a job bigger than model airplane parts. I do my aero model hole-drilling without lubricants.
Bent drill bits are useless for drilling. Mine go in the trash.
To drill on a round part, before you center punch your divot, first use a stone on a Dremel to grind a small flat area into the work piece, as shown:
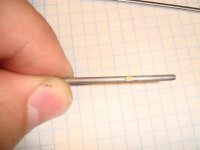
It is basically impossible to drill a hole into a round part. The flat ground area and center-punched divot are necessary to get started. This is particularly handy when drilling axles for cotter pins.
Store your bits in a holder. If you let them rattle around in a box, they will get dull quickly.
I hope that helps everyone to step up their hole-drilling. Learning to be a master at anything consists of learning the individual skills, really well, one by one. Being able to drill a proper hole is definitely a necessary skill for aero modeling.
Enjoy!
We drill a lot of holes, we model airplane builders. We need holes all over the place, to hold all sorts of fun little machines onto our airframes. I was talking with a buddy today about aircraft assembly, and I mentioned the need to drill a hole in a steel part to make a mod I was suggesting. I went off about the proper speed to spin the drill bit, and why, and he said that this was new information to him, and he said I should write an article about it. Viola, here it is.
When we drill a hole, we are doing a particular thing. We are using a sharp blade to slice a long, thin strip of material off of a larger block of material. If we want to understand what is really happening, the best analogy is planing. This is a wood plane at work:

The plane has a sharp blade, set at a cutting angle to the wood. You shove it forward with the handle, and a thin strip of wood is cut away and curls up as shown. The strip that is removed is called a chip.
When we drill, we are using a sharp blade to cut a chip off of a larger piece, just like this, except we are moving our blade in a circle. The chip that is cut away is in a circular shape, as it is lifted up by the cutting edge, it forms a spiral.

It's easy to drill a hole in wood. I don't think anyone needs much help with that. Follow the metal-drilling tips below and you'll get good results in wood, but metal is the critical material, so everything that follows is primarily about metal.
As we drill, hopefully our bit goes deeper into the material, and the chips must be transported to the surface of the hole. The flutes, or empty spaces in the bit, can hold some chips, but they get full and chips from many materials do not like to travel up the flutes. For this reason, when drill deep holes, we must pull the bit out to clear the chips and then plunge the bit back into the work piece again.

The geometry of the tip end of a drill bit is complex. When I was being trained in basic machining, my mentor patiently explained several different tip shapes that could be created on our shop grinding equipment and what materials they were best for, and I promptly forgot everything he taught me. Ah, how I wish I had been a better listener when I was young.
The grand old skill of drill-bit sharpening is now mostly a lost art. It was absolutely necessary only a hundred years ago when electricity was rare and most holes (even big holes in metal) were drilled by hand. If you were hand drilling a 3/4" hole in iron, you cared very much how much torque it required to spin a 118 degree tip versus a 135 degree tip. Now electric drills are ubiquitous and many hobbyists have excellent drill presses, and so we care much less about the technicalities of tip designs.
There are still a few details to know, however:
1. Sharp is better than dull.
Duh. Sharpening drill bits can be hard. Many of us throw dull drill bits away, and this is a bad habit. It's a bad habit because this prevents us from ever buying and owning a decent set of bits in the first place. A set of bits should last you basically forever, and should be sharpened many times. If you want, you can learn the black art of drill sharpening....or you can cheat. I highly recommend you cheat. Use one of these:

The Drill Doctor is a great little electric sharpener. Most of the bits I have purchased in the last several years were sharper after a pass through the Drill Doctor than they were brand new. It does a fine job. Now, you can, if you want, buy Drill Doctors set up for different tip angles and even some with variable sharpening angles. If we were drilling with large bits in exotic materials, we'd care that a 135 degree tip requires more torque than a 118 degree tip...but we're not so we don't. The standard, inexpensive Drill Doctor cuts a conventional 118 degree chisel tip and works great. I use it, I recommend it.
2. Chisel requires a brain.
This standard drill tip has a "chisel" point at the center. The chisel is not a cutting surface. Do not start drilling a hole with a large bit with a wide chisel tip. Very little will happen, because the chisel point does not actually drill very well.
What you are supposed to do (and if you do this, your life will be easer) is to plan your drilling job in stages. First, punch a divot exactly where you wish to drill with a punch. You don't own a punch? Get a punch. I prefer an automatic center punch like this:

It is spring loaded, and with minimal effort will punch a nice little crater into even very hard metal. And, if you ever happen to find yourself trapped in a car underwater, it can break auto glass very easily. (you never know).
First you punch a divot. You can do this very accurately. The divot will look like this:

Then pick a small dill bit whose chisel tip will fit into the divot. Drill with this bit. Because you are drilling into the divot, the bit will not wander. When you have reached the desired depth, switch to a larger bit, one whose chisel tip fits entirely into the existing hole. Keep going up until you get to the desired diameter. Aha, you see now, don't you? This is how we do it, and typically it takes two or three bits to make one good proper hole in metal.
If you will use a sharp bit, use a center punch, and think about the drill sizes you need to achieve a proper hole, you will be amazed at how suddenly competent you are at drilling holes. So, what else is there to know?
Speed kills.
Drill bits, that is. If you have ever drilled a hole in metal, you know a lot of heat is liberated. The bit gets hot. First off, a properly sharpened bit will do more work with less heat than a dull one. A lot more. Secondly, we need to know about drill speed.
As in our planing analogy, we are moving this cutting edge across our metal work piece and lifting up a chip, the faster we move the more force is required and the hotter the drill tip gets. If we go too fast, the tip gets so hot that we affect the properties of the metal the drill bit is made of. It is a tricky business for a manufacturer to make a drill bit hard enough to keep a sharp cutting edge when drilling into hard materials. If we overheat our tip, we can undo all of the magical properties and our drill tip will get soft and dull. If we really overdo it, we can make our tip so hot it melts.
Alternately, we need to realize that because our cutting edge is moving in a circle, the diameter of the circle makes a big difference to the cutting speed of the bit. If two bits are spun in the same drill at the same RPM, the larger diameter one is cutting at a much faster speed in inches per minute of travel across the work piece. Because of this, smaller bits can and should be spun at higher rpm. This is why we want a variable speed drill or drill press. This also why we want to use a drill speed chart:

As you can see, if you spin all of your drills with a 3000 rpm single-speed drill, you are going to have big problems drilling metal with most of your drill-bit collection. You can always find a drill speed chart on the web when you need one. Use one every time you drill metal!
What else?
Most hobby drilling can be done dry. There are material-specific drill bit lubricants that work very well. There are universal cutting oils that work less well. If you really need a cutting lubricant, you are probably tackling a job bigger than model airplane parts. I do my aero model hole-drilling without lubricants.
Bent drill bits are useless for drilling. Mine go in the trash.
To drill on a round part, before you center punch your divot, first use a stone on a Dremel to grind a small flat area into the work piece, as shown:

It is basically impossible to drill a hole into a round part. The flat ground area and center-punched divot are necessary to get started. This is particularly handy when drilling axles for cotter pins.
Store your bits in a holder. If you let them rattle around in a box, they will get dull quickly.
I hope that helps everyone to step up their hole-drilling. Learning to be a master at anything consists of learning the individual skills, really well, one by one. Being able to drill a proper hole is definitely a necessary skill for aero modeling.
Enjoy!


