You are using an out of date browser. It may not display this or other websites correctly.
You should upgrade or use an alternative browser.
You should upgrade or use an alternative browser.
Sport JTEC RADIOWAVE 26% Pitts Model 12
- Thread starter stangflyer
- Start date
stangflyer
I like 'em "BIG"!
No photos yet, however I have made progress on the instrument panel in the cockpit. Gauges will come next then the canopy. I am still waiting for a pilot bust the correct size to become available. But I have left ample access to install him when he arrives.
I will be drilling my prop this evening and plan to attack the cowl baffling tomorrow. Hopefully to finalize this build in the next few weeks. Paint is still a bit of time off. But I'm ok with that. We've had really warm temps here the last few days. 54 today. It won't be long and this white crap on the ground will be complete history and a memory of a bad dream. Lol
My very intelligent son clued me into a feature that our Hitec Aurora 9X has. A 33 second re-assignment of functions and I now have not only dual, but triple rates on "ALL" flight control surfaces.
I am getting so ansy to put this plane in the air. But not cutting any corners or taking any short cuts. It will be right the first time out, or she simply doesn't go.
Photos and more updates coming soon.
stangflyer
I like 'em "BIG"!
A little more accomplished over the last few days. Progress is slowing a lot lately as there is not really much left to do. To start with, I took an accumulation of numerous photos from 2wings.com and came up with a basic shape for the instrument panel. I may have to size it down and reshape it just a tad but I think it is pretty close to a couple of variations of panel designs. I have not decided completely on the layout of the gauges but I think I will be using this one:


This is what my basic shape design looks like installed in the cockpit.
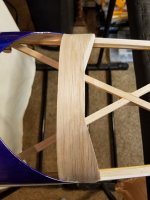
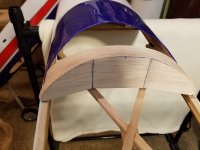
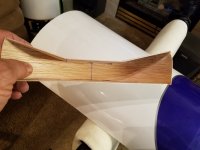
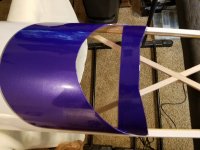
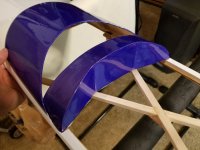
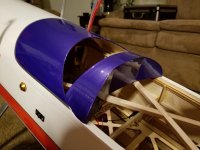
I will finalize the design in the next couple of days before I start applying the gauges. I would really like to have some really bad ass mini gauges, but for cost effectiveness I am sure they are going to be graphic design.
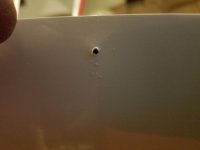
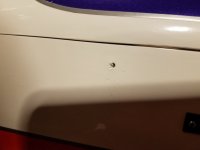
I also completed the canopy locks. I may order some Secraft locks in the Red anodized color. I do kind of like the Gold colored ones though. After drilling my holes in the mounting/support blocks from the "inside" of the fuse, I then installed the canopy/hatch and drilled from the outside in to open the holes in the hatch. Once "upsized" to 4mm, I installed the blind nuts on the ears of the hold downs on the canopy/hatch. Then bolted everything down. Hey, looks pretty darned sweet.


I decided to tape the canopy in place and set her on the scales. Totally complete and flyable...here is what she came in for weight.

A little heavy for a 50-60cc size plane, but as we have already discovered...these come in a little on the heavy side but totally flyable with no adverse issues. Guess we'll find out soon huh?
I also set her on the balance stands and as I had feared...she is more than just a little "nose" heavy. I sure wish I had kept that second rudder servo in place at the back of the plane. Oh well, guess I will figure something out. I have the flight packs as far back as I can put them. (Short of putting them in the "stringered" back part of the fuse. And "that" I am just not going to do. There are a few options still available. I don't have the G-Force pilot for the Pitts yet. My understanding is he will probably weigh in around 6 or so ounces. And actually he will be sitting directly above the flight packs. I am seriously hoping he will offset the amount needed to balance the plane. I am going to go "really" light on the baffling for the engine. Hopefully I can create something that won't weigh over a couple of ounces. That little amount of weight at the direct nose of the plane in relation to the CG point should not affect the balance "too" much. (I hope) Plus, there is the weight of the paint on the cowl and the wheel pants painted that will affect the balance yet also. I may have to loose the White Rose wheels and go to a very light Hangar 9 Pro-Lite 4" wheel. 3.5" as suggested in the parts list is just way too small for this plane. (My opinion)
As it stands, Prop is drilled, throttle servo installed, All radio functions programmed and fully operational. I achieved "WAY" more throw on the surfaces than I need, so they have been dialed back to a manageable proportion. 70% expo on all control surfaces on high rates, (slow aerobatic) and about 35% on low (normal flight) rates. The only remaining details to finish this project before maiden: Baffle and paint cowl, gauges for instrument panel then attach canopy to hatch, and resize cutouts for prop in spinner cone. And of course lastly, get the fat girl to balance. That's it. I am thinking at this point I will probably maiden the Pitts "before" I paint the cowl. True cost of this plane build far exceeds the cost of any 50cc ARF. I am just not wanting to spend another 75 to 100 dollars for paint until I "KNOW" it is going to fly.

I did encounter a small set back earlier when setting up the elevator servos. As also feared, the aft fuse sides construction is just way too weak to support the robust grunt of a top notch digital high torque servo. (in my opinion) I am sure it would be fine with servos that are not quite as strong. At any rate, I applied down elevator during programming and broke both sides of the fuse loose from the "F7" former. (Glad it happened on the ground before she went into the air). Pretty easy fix though. Since it didn't pop the covering or really "break" anything, I removed the elevator servos, laid the fuse on its side with the tail pointing up at an angle and poured in 2 ounces of epoxy on each of the two sides of the aft fuse sides. Once one side was cured, I then rotated the fuse and did the opposite side the same way. Filling the full length of the fuse sides (creating a fillet) where they meet the "F7" former, from the bottom (under side) of the stab to the bottom side of the fuse near the tail gear mounting plate. I know "one" thing certain regarding the strength of this plane. If it ever falls apart in the air or drills itself deep and hard into the earth, everything will probably be a total loss and destroyed. Except that epoxied section of the aft fuse sides. LOL
I am curious and am hoping @Maxwell1945 or @Wacobipe or maybe @Bipeguy03 can offer some advice for balance on this airframe? I am figuring the correct way would be "upright" supporting the weight from the underside of the top wing, correct? This is how I did the initial CG check. I hope this is correct.
So there we go. She is just aaalllmoooost done. Whew.... What a long 4 months this has been. I am sure I will have more photos and updates in the next few days so stayed tuned in. The weather here has been very warm lately. Reaching into the 50's and plenty of wet rain coming down. Our snow is just about gone. (Except for the piles of course) I expect we could possibly get a maiden flight or two in before the end of February. Man, I am not sure I am ready for this.
This is what my basic shape design looks like installed in the cockpit.


I will finalize the design in the next couple of days before I start applying the gauges. I would really like to have some really bad ass mini gauges, but for cost effectiveness I am sure they are going to be graphic design.
I also completed the canopy locks. I may order some Secraft locks in the Red anodized color. I do kind of like the Gold colored ones though. After drilling my holes in the mounting/support blocks from the "inside" of the fuse, I then installed the canopy/hatch and drilled from the outside in to open the holes in the hatch. Once "upsized" to 4mm, I installed the blind nuts on the ears of the hold downs on the canopy/hatch. Then bolted everything down. Hey, looks pretty darned sweet.


I decided to tape the canopy in place and set her on the scales. Totally complete and flyable...here is what she came in for weight.
A little heavy for a 50-60cc size plane, but as we have already discovered...these come in a little on the heavy side but totally flyable with no adverse issues. Guess we'll find out soon huh?
I also set her on the balance stands and as I had feared...she is more than just a little "nose" heavy. I sure wish I had kept that second rudder servo in place at the back of the plane. Oh well, guess I will figure something out. I have the flight packs as far back as I can put them. (Short of putting them in the "stringered" back part of the fuse. And "that" I am just not going to do. There are a few options still available. I don't have the G-Force pilot for the Pitts yet. My understanding is he will probably weigh in around 6 or so ounces. And actually he will be sitting directly above the flight packs. I am seriously hoping he will offset the amount needed to balance the plane. I am going to go "really" light on the baffling for the engine. Hopefully I can create something that won't weigh over a couple of ounces. That little amount of weight at the direct nose of the plane in relation to the CG point should not affect the balance "too" much. (I hope) Plus, there is the weight of the paint on the cowl and the wheel pants painted that will affect the balance yet also. I may have to loose the White Rose wheels and go to a very light Hangar 9 Pro-Lite 4" wheel. 3.5" as suggested in the parts list is just way too small for this plane. (My opinion)
As it stands, Prop is drilled, throttle servo installed, All radio functions programmed and fully operational. I achieved "WAY" more throw on the surfaces than I need, so they have been dialed back to a manageable proportion. 70% expo on all control surfaces on high rates, (slow aerobatic) and about 35% on low (normal flight) rates. The only remaining details to finish this project before maiden: Baffle and paint cowl, gauges for instrument panel then attach canopy to hatch, and resize cutouts for prop in spinner cone. And of course lastly, get the fat girl to balance. That's it. I am thinking at this point I will probably maiden the Pitts "before" I paint the cowl. True cost of this plane build far exceeds the cost of any 50cc ARF. I am just not wanting to spend another 75 to 100 dollars for paint until I "KNOW" it is going to fly.
I did encounter a small set back earlier when setting up the elevator servos. As also feared, the aft fuse sides construction is just way too weak to support the robust grunt of a top notch digital high torque servo. (in my opinion) I am sure it would be fine with servos that are not quite as strong. At any rate, I applied down elevator during programming and broke both sides of the fuse loose from the "F7" former. (Glad it happened on the ground before she went into the air). Pretty easy fix though. Since it didn't pop the covering or really "break" anything, I removed the elevator servos, laid the fuse on its side with the tail pointing up at an angle and poured in 2 ounces of epoxy on each of the two sides of the aft fuse sides. Once one side was cured, I then rotated the fuse and did the opposite side the same way. Filling the full length of the fuse sides (creating a fillet) where they meet the "F7" former, from the bottom (under side) of the stab to the bottom side of the fuse near the tail gear mounting plate. I know "one" thing certain regarding the strength of this plane. If it ever falls apart in the air or drills itself deep and hard into the earth, everything will probably be a total loss and destroyed. Except that epoxied section of the aft fuse sides. LOL
I am curious and am hoping @Maxwell1945 or @Wacobipe or maybe @Bipeguy03 can offer some advice for balance on this airframe? I am figuring the correct way would be "upright" supporting the weight from the underside of the top wing, correct? This is how I did the initial CG check. I hope this is correct.
So there we go. She is just aaalllmoooost done. Whew.... What a long 4 months this has been. I am sure I will have more photos and updates in the next few days so stayed tuned in. The weather here has been very warm lately. Reaching into the 50's and plenty of wet rain coming down. Our snow is just about gone. (Except for the piles of course) I expect we could possibly get a maiden flight or two in before the end of February. Man, I am not sure I am ready for this.
jtec/radiowave
70cc twin V2
Rob,
The balance point should be on the leading edge of the lower wing. I am very surprised that you had an issue with the rear side mounting plate for the elevator servos. That gets glue on the tail post, top and bottom longerons and F6 that should have a couple bass wood stringers added for the gluing surface. Do you recall what glue you used there. Just trying to get an idea of why it let go there and if we need to make a change.
Plane looks great
Al
Snoopy1
640cc Uber Pimp
You are really getting close. Give you week and it will ready to fly but the Stang may not. He will need a few more weeks to build mentally to get ready to fly it.
Really don't believe you have a weight problem if you think back a couple of years what we flew the weight and the engines we had available it will be great. It has just been the last couple of years where people have turned normal aeroplanes into helicopters. This propeller hanging and then accelerating upward is extremely power hungry. You will love the plane for years unless you want to hang it on the propeller.
Really don't believe you have a weight problem if you think back a couple of years what we flew the weight and the engines we had available it will be great. It has just been the last couple of years where people have turned normal aeroplanes into helicopters. This propeller hanging and then accelerating upward is extremely power hungry. You will love the plane for years unless you want to hang it on the propeller.
Last edited:
WMcNabb
150cc
With today's avionics, simpler panels with more capability are possible. First two images are from a two seat version of the Pitts Model 12. Last two images (actually from a modern Cub with autopilot??!!!) feature the Garmin touchscreen which would fit nicely in a single seat or Model 12S.


Last edited:
