Hitec X1 Pro Charger and 17A ePowerBox Combo Review
Hitec X1 Pro Charger and ePowerBox 17-amp Power Supply Review
Pros
- Reputable company
- Multi chemistry support
- Easy to read LCD
- 10 Memory Slots
- Multiple functionality
- Can purchase charger and power supply as a combo or separate
Cons
- Alarm audio level is very low
- Charger and power supply fans over power the alarm
- Not able to remove balance board lead
Specifications
Charger
- Input Voltage Range: 11~18 Volts DC
- Charge Circuit Power: 180 Watts
- Discharge Circuit Power: 30 Watts
- Charge Current Range: 0.1~16.0 Amps
- Discharge Current Range: 0.1~8.0 Amps
- LiPo, LiFe & LiIon Balancing Current Drain: 200mA per Cell
- LiPo, LiFe & LiIon Cell Count: 1~6 Cells
- Maximum NiCd/NiMh Cell Count: 1~15 Cells
- Lead Acid (Pb) Cells / Voltage: 2~20 Volts
- Dimensions: 3.6 x 4.4 x 2.0 in.
- Weight: 14.3 oz.
Power Supply
- Input Voltage Range: 100~240 Volts AC
- AC Input Voltage Frequency: 50~60Hz
- Output Voltage: 13.8 Volts DC ± 0.2V
- Current Overload Protection: 17.5A 500ms
- Input Current Protection: 5A Fuse
- Output Voltage Ripple:
- USB Output Voltage/Current: 5V / 2.1A
- Power Efficiency: 91%
- Power Factor: >0.98
- Temperature Protection Cutoff: 65?
- Cooling Method: Temperature Controlled Fan
- Dimensions: 5.0 x 3.6 x 2.0 in.
- Net Weight: 21 oz.
Unboxing
Power Supply
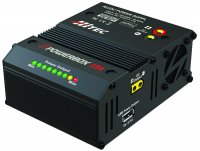
The power supply's manual is sitting on top of the foam encasement. Short, sweet, simple, only English instruction set was in my box. Pulling back the foam cover shows a compartmentalized box with the power supply wrapped in plastic on one side and all included cables and dual banana plugs in the other compartment. The charger came with the AC power cable, four dual banana plugs, and DC input power cable with XT60 connector. The ePowerBox has nine LEDs on the front to indicate the amount of power being outputted by the power supply. There is a power switch on the side of the power supply as well as a USB port on the other side for charging mobile devices or the 1S packs (and charger adapter/cables) that come in aircraft like the Estes ProtoX or Dromida Ominus. Overall, it's clean, sleek, compact design with everything clearly labeled.
Charger
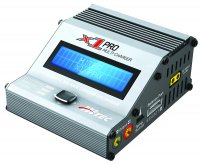
The charger's manual is on top. Mine only had the English version, which is nice to not have to weed through languages I can't read. The manual is a bit thick, but it covers every functionality the charger is capable of. Definitely need to read the manual to know how to operate the charger. The protective foam is compartmentalized like the power supply's. The charger is wrapped in plastic in one compartment while included cables are in the other. The charger comes with balance board lead, balance board, DC input power cable (XT60 on one side for the charger and banana plugs for the power supply, 18AWG Wire Charging Cable (banana plugs on one side and no connector on the other), and 2S LiPo hardcase charging lead. The charger is clearly labeled, except for the white left and right arrows on the silver faceplate, these are a bit difficult to read. There is some plastic on top of the LCD screen to protect it during shipping. The charger has a single joystick on top for manipulating the menu.
Using
Navigating the charger's menu takes a little getting used to, but the manual does an excellent job explaining how to navigate the menu. One thing to note is once you are charging or discharging, pressing left on the joystick will cancel and stop the active event. The plugs for the dual banana plugs on the bottom of the charger are covered by default. If you are performing an action on lithium based battery, pressing up will show the voltages per cell.
Being my only other lipo capable charger is a Duratrax Onyx 235, I wanted to put all my lipos in storage charge first. I have a collection of a five 2S and seven 3S packs. I went ahead and created a memory slot for lipo batteries. Unlike the Onyx where the memory slot also uses capacity as part of the saved settings, the Hitec X1 Pro Charger really only needs the chemistry type. To create the memory slot, I had to press left (back) until I got to what I refer to as the System Settings Menu, press up/down until the Memory Slots option showed, selected a memory slot by pressing right (select) then up or
down until the slot number is specified, then pressing right again to select. In the System Setting Menu, there is an option for lipo checker, so I checked the batteries after plugging them in just out of curiosity. I found the lipo checker screen very easy to read and understand. Another thing I do here in the System Settings Menu each time I connect a battery is check the Max Capacity setting. By default this comes set to 5000mAh. My largest pack is only 2200mAh, since I have a healthy fear of what lipos can do, I always set the max capacity to equal the capacity of the battery connected. Setting the Max Capacity setting is simple, once the menu item shows on the LCD, press right, then up and down to change, press right again to set.
Once the Max Capacity setting is set to match the battery and the corresponding memory slot is selected, use the up and down keys on the joystick to select the desired functionality. In this I wanted storage mode for my lipos. Press right to select the desired functionality. Select right again and amp rate will flash, use the up and down keys on the joystick to select the charge/discharge rate to match the pack, press right again and the pack voltage will start flashing, use the up and down keys on the joystick to select to match the lipo, press right on the joystick again, press and hold right on the joystick to start. At this point the charger will check the battery and report two numbers S:xxxx and R:xxxx, these report the number of cells in the lipo, if these match, when the LCD screen flashes start, press and hold right on the joystick for a few seconds. The above list of key inputs is the same for any type of charger functionality. It took me about two packs to get used to the workflow. Now, I find it entirely easy.
Lipo charging is very similar to setting up Storage Charge Mode. The Hitec X1 Pro Charger allows for charging without balancing, fast charging, and balance charging, I always balance charge my lipos. After setting the Max Capacity setting, selecting the battery memory slot, select LiPo Balance. Following the inputs of right joystick and up and down as outlined above, set the max charge rating (Amps value, also referred to as the C rating the lipo can be charged at) and pack voltage. Then start the charge. To compare charging times I simultaneously charged a 3S 2200mAh lipo on my X1 Pro and Onyx 235, both from storage charge. I found charge times were equivalent with what I am used to, roughly 30-45 minutes from storage charge at a 1C rating.
Before switching to nickel based chemistries, I attempted to remove lipo balancing lead from charger. I was unsuccessful as it appears there is not enough room on the charger’s case to allow the alligator style clip to open high enough to clear the speed bump of the balance board connector. I have used the charger on nickel based chemistries with the balance lead connected without issue. I personally would like to remove unnecessary items when I’m not using them, but the impact is zero, so this is a super minor drawback in my opinion.
For nickel based battery chemistries, the Hitec X1 Pro Charger allows for cycling the pack. You can configure the number of charge/discharge cycles, the time to wait between a charge/discharge, and whether to start with a charge or discharge. I have a 2000mAh NiMH pack from my .60 Great Planes Extra 300 I felt had become dead over the last 12 months due to forgetting to cycle it. Attempting to cycle this pack once on the Hitec X1 Pro Charger failed in the charger would hit the Max Charge Time (configurable System Setting) and fail. I set the charger to charge the pack normally, the charger stopped
with 89mAh being put back in the pack, but the pack didn't have enough juice to power my servo tester. All this confirmed the pack was not salvageable.
I attempted the same thing with a NiCd pack from my .40 size nitro fun fly airplane. Same sequence of events led to the conclusion the pack was not salvageable.
Charging one pack at time is nothing for the ePowerBox power supply; I've yet to see more than one LED light up on the power supply.
I have not explored the LiFe and lead based functionalities, but I do have confidence in this charger being able to do what it says it can do on these chemistries.
Conclusion
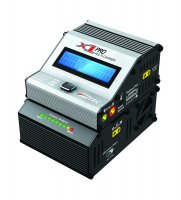
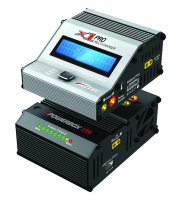
The Hitec X1 Pro Charger offers a lot of great functionality, and even built for those who parallel charge. Once getting used to the 4 position joystick and how to navigate the menus, it becomes quick and easy to configure the charger for your needs. The range of supported chemistries is a very nice plus. This charger will definitely become my primary charger. The lipo checker on the charger is handy, the ability to storage charge lipos is a must use feature I hadn't had before. I really like this charger and know with confidence when a battery comes of the charger it's good to go. The ability to properly cycle NiMH and NiCd batteries is something I was missing with my Onyx 235 charger and the capacities exceeded the max my Hobbico AccuCycle supports, so the X1 Pro will being handling this work. The ability for the charger to stack on the ePowerBox 17amp power supply greatly reduces its footprint and table space needed. With all of the included wires and connectors, all one needs is the large lead(s) for the connector types on the batteries one uses. But, as great as this charger is, the one major downside is the low volume of the alarm. I have been no further than 10 feet from the charger and the charger's fan and/or power supply fan running, I did not hear the done alarm. Many times, even being in the same room doing something else while the pack charges, I remember to go check the pack when I hear the fan(s) cut off. Granted, when charging lipos, you should never leave them unattended, even if they are in a fire retardant bag or other non-flammable surface. I've enjoyed using the Hitec X1 Pro Charger and it will be the primary workhorse in my collection of chargers. The X1 Pro will work with other power supplies if you already have one, and the ePowerBox will work with other chargers/items. Unless you want to be able to leave the room and hear when your charger is done, you cannot go wrong with the Hitec X1 Pro Charger and ePowerBox.
