GSNadmin
Staff member
Well, it has be a long while since I’ve posted some progress on our 85 inch span Ziroli Skyraider. So lets get back to it, with this post for sheeting the wings. The last time out we finished the prep work for installing the Robart 148E electric retracts and now the plywood support ribs and the mount rails have been epoxied into place.

We used the landing gear itself as a spacer for the rails and plywood ribs, so we know they will fit perfectly into place after the wing panels are sheeted. I even added an extra 1/8 inch so there’s a little wiggle room in case we need to tweak the gear’s position for proper toe in measured at the axles.

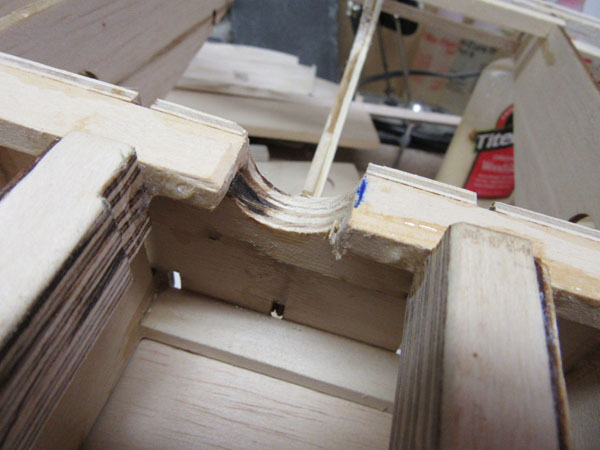
After getting the support ribs and rails in place, I added a lite ply support doubler to the W-6R rib which has it mid-section cut away to clear the wheel and forms the wheel-well area. Also at this point it is a good time to go over the entire wing structure and sand everything smooth and flush.
Also where the main spar is cut and ground to clear the main gear strut, I added a 1/4-inch plywood support doubler. This part, like the gear rails is epoxied into place
Look at your plans and estimate how much sheeting you will need to cover your wing panels. For this project I am using medium-grain 3/32 inch x 4 inch sheeting. YOu should also get yourself a good supply of no. 11 X-Acto blades as you’ll need them.
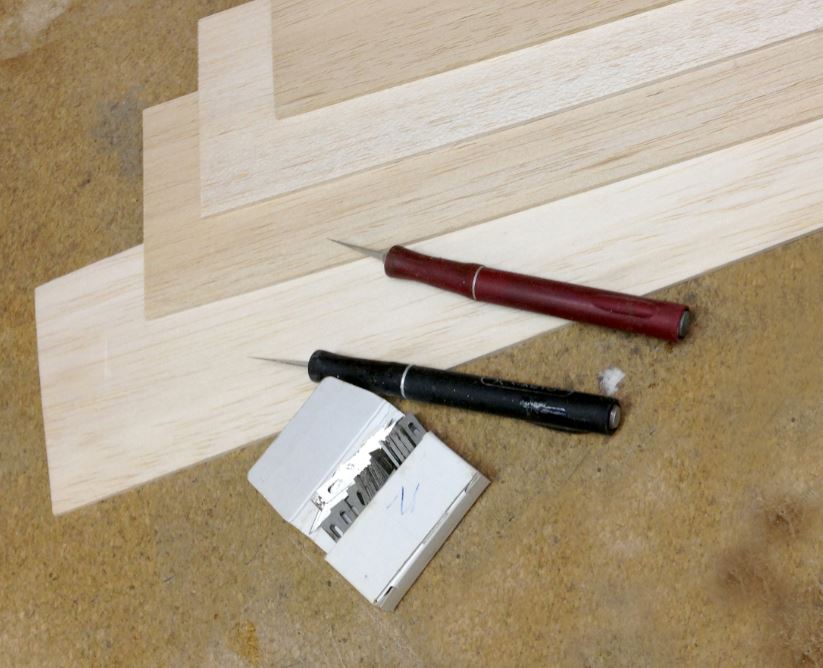
I start by first truing the edges of my sheeting using a sharp blade and a long metal straight edge. This way the joints and seams between the sheeting will be tight and the gaps will be minimal


I like to start with the bottom, aft sheet which forms the wing’s trailing edge. I cut it to length, pin it over the plans and then place the wing structure over it and pin it into place. I then tack glue a couple of ribs to the sheeting. This is the easiest piece to apply as you have full access to it and the wing structure.
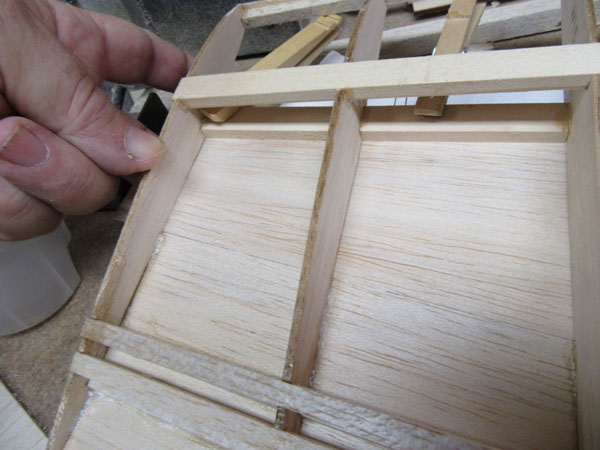
You can start anywhere, but I like to begin at the tip rib, applying Zap medium glue to the rib and sheeting, hitting with a little Kicker, then moving inboard one rib at a time. The important thing here is to not force anything while gluing so you do not warp the wing. The washout is built into the wing when it is assembled over alignment shims, and we will check it again before finishing the top wing sheeting.

I continue sheeting the bottom of the wing by gluing two sheets together as shown to cover the area from the front edge of trailing edge sheeting piece and the centerline of the main spar. First I tape the pieces together with painter’s tape as shown above.
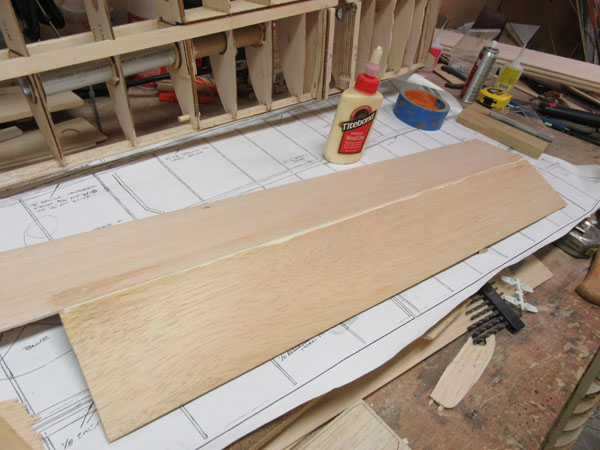
Flip the sheeting over, and prop the seam up so it opens like a book, apply some yellow glue like Titebond, and scrap away any access.

Weight the sheeting down and let the glue dry. If there is still access glue at the joint, use a damp sponge to clean it away. Once the glue has dried, lightly sand the joint with a sanding bar then cut the piece of sheeting to size.
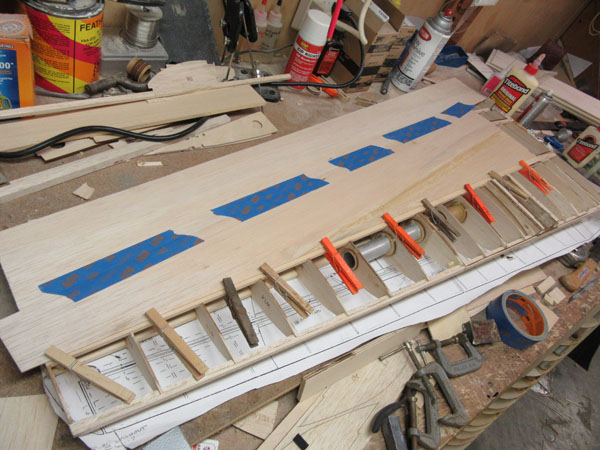
Here the sheeting has been taped to Trailing Edge sheeting piece and the front edge is clamped to the main spar. again, there should be no pressure causing the wing to twist out of shape.

With the center piece of sheeting taped and clamped into place, flip the wing panel over and start gluing it to the ribs and stringers. I use Titebond at the main spar, and Zap medium CA for the rest of the rib bottoms.
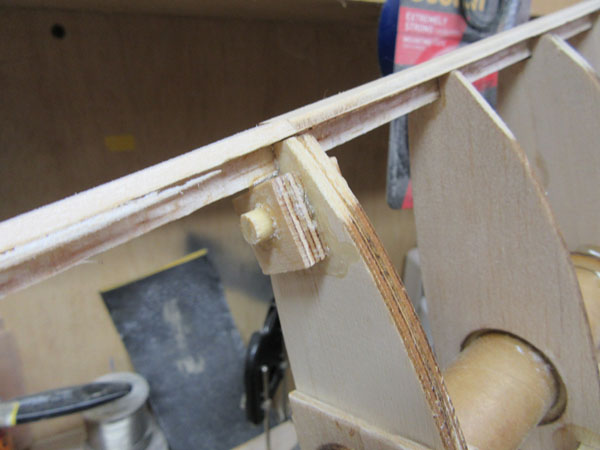
At this point I also added the alignment dowels to the ribs that form the seperation line for the outer wing panels that will plug into the wing center section. Here the fixed end of the front dowel is secured with a square of 1/4-inch plywood.

The receiver end of the dowel is supported with a square of 1/8 inch lite plywood glued to the rib, (not the dowel).

Above you see the same treatment for the aft wing panel alignment dowel.

Here you see the two W-10 plywood ribs forming the separation line between them.

Other internal parts that need to be glued in place are the wing hold-down screw support block shown above. I made it from 3/4 inch thick poplar, cutting, and sanding it to shape so it fits flush between the upper and lower sheeting.

Also before we can cover the front of the wing panel forward of the main spar we have to epoxy the outer wing panel attachment bolt support blocks in place between the wing tube socket tube and the bottom wing sheeting.

To keep the blocking flush with the main spar, I used an alignment piece weighted down with a piece of lead. This ensures that the pieces are securely epoxied together and that the sheeting will fit flush over the blocking. After the wing has been completely sheeted, I will drill a hole through the sheeting and blocking and into the aluminum wing tube. This will then be threaded to accept the attachment bolt.

The leading edge sheeting is applied in the same way as before. Cut the sheeting to length and shape and tape the pieces together, (Here the short sections inboard of the landing gear area.

Apply yellow glue to the top of the spar and the ribs and then tape and pin the sheeting into place. I also tape the leading edge tightly over the sub-leading edge strip and use some clamps to form a tight seam. Now let dry.
That’s it for now, stay tuned, as I will post the rest of the wing sheeting photos shortly.
Model Airplane News - The #1 resource for RC plane and helicopter enthusiasts featuring news, videos, product releases and tech tips.
Continue reading...

We used the landing gear itself as a spacer for the rails and plywood ribs, so we know they will fit perfectly into place after the wing panels are sheeted. I even added an extra 1/8 inch so there’s a little wiggle room in case we need to tweak the gear’s position for proper toe in measured at the axles.

After getting the support ribs and rails in place, I added a lite ply support doubler to the W-6R rib which has it mid-section cut away to clear the wheel and forms the wheel-well area. Also at this point it is a good time to go over the entire wing structure and sand everything smooth and flush.
Also where the main spar is cut and ground to clear the main gear strut, I added a 1/4-inch plywood support doubler. This part, like the gear rails is epoxied into place

Look at your plans and estimate how much sheeting you will need to cover your wing panels. For this project I am using medium-grain 3/32 inch x 4 inch sheeting. YOu should also get yourself a good supply of no. 11 X-Acto blades as you’ll need them.

I start by first truing the edges of my sheeting using a sharp blade and a long metal straight edge. This way the joints and seams between the sheeting will be tight and the gaps will be minimal


I like to start with the bottom, aft sheet which forms the wing’s trailing edge. I cut it to length, pin it over the plans and then place the wing structure over it and pin it into place. I then tack glue a couple of ribs to the sheeting. This is the easiest piece to apply as you have full access to it and the wing structure.

You can start anywhere, but I like to begin at the tip rib, applying Zap medium glue to the rib and sheeting, hitting with a little Kicker, then moving inboard one rib at a time. The important thing here is to not force anything while gluing so you do not warp the wing. The washout is built into the wing when it is assembled over alignment shims, and we will check it again before finishing the top wing sheeting.

I continue sheeting the bottom of the wing by gluing two sheets together as shown to cover the area from the front edge of trailing edge sheeting piece and the centerline of the main spar. First I tape the pieces together with painter’s tape as shown above.

Flip the sheeting over, and prop the seam up so it opens like a book, apply some yellow glue like Titebond, and scrap away any access.

Weight the sheeting down and let the glue dry. If there is still access glue at the joint, use a damp sponge to clean it away. Once the glue has dried, lightly sand the joint with a sanding bar then cut the piece of sheeting to size.

Here the sheeting has been taped to Trailing Edge sheeting piece and the front edge is clamped to the main spar. again, there should be no pressure causing the wing to twist out of shape.

With the center piece of sheeting taped and clamped into place, flip the wing panel over and start gluing it to the ribs and stringers. I use Titebond at the main spar, and Zap medium CA for the rest of the rib bottoms.

At this point I also added the alignment dowels to the ribs that form the seperation line for the outer wing panels that will plug into the wing center section. Here the fixed end of the front dowel is secured with a square of 1/4-inch plywood.

The receiver end of the dowel is supported with a square of 1/8 inch lite plywood glued to the rib, (not the dowel).

Above you see the same treatment for the aft wing panel alignment dowel.

Here you see the two W-10 plywood ribs forming the separation line between them.

Other internal parts that need to be glued in place are the wing hold-down screw support block shown above. I made it from 3/4 inch thick poplar, cutting, and sanding it to shape so it fits flush between the upper and lower sheeting.

Also before we can cover the front of the wing panel forward of the main spar we have to epoxy the outer wing panel attachment bolt support blocks in place between the wing tube socket tube and the bottom wing sheeting.

To keep the blocking flush with the main spar, I used an alignment piece weighted down with a piece of lead. This ensures that the pieces are securely epoxied together and that the sheeting will fit flush over the blocking. After the wing has been completely sheeted, I will drill a hole through the sheeting and blocking and into the aluminum wing tube. This will then be threaded to accept the attachment bolt.

The leading edge sheeting is applied in the same way as before. Cut the sheeting to length and shape and tape the pieces together, (Here the short sections inboard of the landing gear area.

Apply yellow glue to the top of the spar and the ribs and then tape and pin the sheeting into place. I also tape the leading edge tightly over the sub-leading edge strip and use some clamps to form a tight seam. Now let dry.
That’s it for now, stay tuned, as I will post the rest of the wing sheeting photos shortly.
Model Airplane News - The #1 resource for RC plane and helicopter enthusiasts featuring news, videos, product releases and tech tips.
Continue reading...
