You are using an out of date browser. It may not display this or other websites correctly.
You should upgrade or use an alternative browser.
You should upgrade or use an alternative browser.
30cc profile from the ashes of a 70" RIP AJ Slick - Build Log
- Thread starter 3dNater
- Start date
3dNater
3DRCF Regional Ambassador
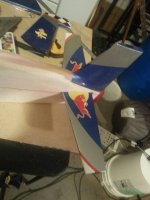
Brigg came over last night to help me continue this build. Our goals for the evening were to get the vertical and horizontal stabs figured out on the fuse. We didn't quite make it that far... but we did get the vertical stab done. We ended up finding a way to glue the original stab onto the foam and it turned out really cool.
Here are some vids documenting our progress. We are just a couple of screwballs having fun with the hobby and tools and such") I was going to just take pics but ended up doing vids instead for this portion. Everything here is raw and uncut and taken on my smart phone... so the quality sux but you can see some of the goings on in my messy garage and a really cool idea Brigg had to bring this stuff together.
I was going to just take pics but ended up doing vids instead for this portion. Everything here is raw and uncut and taken on my smart phone... so the quality sux but you can see some of the goings on in my messy garage and a really cool idea Brigg had to bring this stuff together.
[video=youtube;uP7HgkKlchM]http://www.youtube.com/watch?v=uP7HgkKlchM[/video]
[video=youtube;f7mjf5DoohI]http://www.youtube.com/watch?v=f7mjf5DoohI[/video]
[video=youtube;KlHtHjKadAE]http://www.youtube.com/watch?v=KlHtHjKadAE[/video]
Here are some vids documenting our progress. We are just a couple of screwballs having fun with the hobby and tools and such
I was going to just take pics but ended up doing vids instead for this portion. Everything here is raw and uncut and taken on my smart phone... so the quality sux but you can see some of the goings on in my messy garage and a really cool idea Brigg had to bring this stuff together.[video=youtube;uP7HgkKlchM]http://www.youtube.com/watch?v=uP7HgkKlchM[/video]
[video=youtube;f7mjf5DoohI]http://www.youtube.com/watch?v=f7mjf5DoohI[/video]
[video=youtube;KlHtHjKadAE]http://www.youtube.com/watch?v=KlHtHjKadAE[/video]
3dNater
3DRCF Regional Ambassador
Ok, I had the master builder Brigg over again last night. He sacrificed another big chunk of an evening to help me on this project. He seems to be enjoying it as much as I am and we are both anticipating the maiden! Hold your excitement though... there is still a LOT of work to do before this plane is going to fly.
Our goal last night was to get the balsa sheeting on the fuse. Brigg showed me a really cool technique he has used a few times over the years that I had never heard of before. It made the process pretty easy and fast as well as accurate. I think using gorilla glue or epoxy would work, but it would be a lot messier and I don't think you could get everything exactly where you want it with near the ease of what we were able to accomplish. I suppose if a person just wanted the sheet the foam and then cut the fuse out afterward that would work pretty well too but there would be a lot more wasted material.
Anyway, here are some quick vids of Brigg explaining and demonstrating how this is done.
[video=youtube;3Z3g3ojXGME]http://www.youtube.com/watch?v=3Z3g3ojXGME&feature=c4-overview&list=UUVnw4SJdumljd3xQlazPyvg[/video]
[video=youtube;0NKd5GGqolk]http://www.youtube.com/watch?v=0NKd5GGqolk&feature=c4-overview&list=UUVnw4SJdumljd3xQlazPyvg[/video]
3dNater
3DRCF Regional Ambassador
This morning I went back out to the garage and did some more work on the fuse. I did some sanding etc., and then decided it was time to go ahead and put the motor mount on the front. First checked the thrust line by squaring off of the vertical stab and running the line all the way up to the front of the fuse. Then I made a mark to square up the front and cut it nice and straight on the scroll saw. Once that was done I traced the motorbox gussets onto the fuse and cut out the 1/4" slots.
Here are some pics of the dry fit. Once I saw it was going to work ok, I went ahead and used medium CA to glue the box together and put the mount on with 30 min epoxy.


Here are some pics of the dry fit. Once I saw it was going to work ok, I went ahead and used medium CA to glue the box together and put the mount on with 30 min epoxy.
3dNater
3DRCF Regional Ambassador
You've inspired me to use up some of the spare parts I've got lying around now! I've got 4 48" Edge wings, h-stab and elevator and rudder from a 57" Extra. 48" profile bipe might have to happen!
Thanks!
The cool thing about the 48 edge wings is that you could just join them forever and not worry about trying to build them removable. These 70" parts are just too big for that. This project has definitely been a lot of work, but it is fun and I think the end product will be pretty sweet and total cost under $100.
3dNater
3DRCF Regional Ambassador
I haven't had a chance to update this thread with my latest progress. I was having trouble posting pictures via tapatalk. An update today seems to have fixed it.
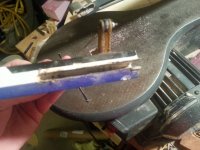
Anyway, I managed to get the stab in and the elevator halves ready for a new joiner.
Getting the stab in was a bit nerve racking for me because I had to settle on a thrust line. From a pic posted on rcg I was able to get the offsets from the thrust line for the stab and wings. I cut the hole for the stab on the scroll saw and then used a sanding drum attachment on the dremel to adjust it until the stab would finally slide in all the way. I ended up with a nice tight fit. Now I just hope it is straight!
Attachments
3dNater
3DRCF Regional Ambassador
looks good Nate...one step at a time, whenever you have time, and you'll get there!
Yep! Thanks for the comment
cardenflyer
70cc twin V2
Can't wait to see this fly. It looks like a mini version of OMP 50cc "hybrid" profile that came out years ago. A profile with a normal wing cord and rib shape should be awesome!