• If you are new to GiantScaleNews.com, please register, introduce yourself, and make yourself at home.

    We're 1st in Giant Scale RC because we've got the best membership on the internet! Take a look around and don't forget to register to get all of the benefits of GSN membership!

    Welcome!

Scale Balsa USA 1/3 Scale Super Cub Kit " NIB "

fencelake

70cc twin V2
Made some progress the past couple of days. The tail feathers are now mounted. It was a bit of a slow process just because of all the measuring, re-measuring, and re-measuring. haha!

I started out with the horizontal stabilizer. It requires both a long machine screw and epoxy to set the brass center tube in place. I clipped it in place and then used both a tape measure as well as a piece of dacron and a T-pin to check to make sure it was perfectly centered. (same distance from tip to tip to center point on the fuselage.

The instructions are a little vague on this part but looking at the plans, reading the book, and just double checking everything I got it done. Right now the stabs are held in with small nuts and bolts, but I will end up epoxying them in place probably after covering. I'm even thinking about drilling into the dowels and adding some kind of heavy wire spar. I'm not sure if that's an overkill, or even doable. Just a thought.
 

Attachments

  • HOR STAB - measuring for center.jpg
    HOR STAB - measuring for center.jpg
    123 KB · Views: 348
  • HOR STAB - check string.jpg
    HOR STAB - check string.jpg
    73.8 KB · Views: 329
  • HOR STAB - preparing to drill center hole.jpg
    HOR STAB - preparing to drill center hole.jpg
    63.6 KB · Views: 355
  • HOR STAB - preparing to drill centerline.jpg
    HOR STAB - preparing to drill centerline.jpg
    129.1 KB · Views: 335

fencelake

70cc twin V2
Now that I have the tail of the fuselage aligned properly, I permanently mounted the fin. Since I had to re-do the tail, I had to sand down the tip even, and added a little shim to get the fin mounted just right. I measured the plans to see how high from the stab plate the fin should be, and it ended up being perfect the way I built it. So that was nice. I epoxied it in place and just need to add the little bit that ties into the stringer.
 

Attachments

  • FIN - checking measurement on plan.jpg
    FIN - checking measurement on plan.jpg
    57.9 KB · Views: 326
  • FIN - angle jig.jpg
    FIN - angle jig.jpg
    66.5 KB · Views: 344
  • FIN - checking mounting location.jpg
    FIN - checking mounting location.jpg
    60 KB · Views: 489
  • FIN - adding shims at TE.jpg
    FIN - adding shims at TE.jpg
    56.2 KB · Views: 323
  • FIN - gluing LE into place.jpg
    FIN - gluing LE into place.jpg
    62.6 KB · Views: 328
  • FIN - gluing checking measure.jpg
    FIN - gluing checking measure.jpg
    58.3 KB · Views: 341
  • FIN - gluing LE with triangles.jpg
    FIN - gluing LE with triangles.jpg
    115 KB · Views: 306
  • FIN - checking angle.jpg
    FIN - checking angle.jpg
    56.8 KB · Views: 298
  • FIN - complete.jpg
    FIN - complete.jpg
    76.2 KB · Views: 345

fencelake

70cc twin V2
The next step was to complete the top piece of the door. I framed it up inside the space on the fuselage so it would fit perfectly. I got this idea from another thread, and it worked really well.
 

Attachments

  • DOOR - outside frame construction.jpg
    DOOR - outside frame construction.jpg
    81.5 KB · Views: 339
  • DOOR - frame construction 2.jpg
    DOOR - frame construction 2.jpg
    87.4 KB · Views: 335
  • DOOR - completing construction (2).jpg
    DOOR - completing construction (2).jpg
    78.7 KB · Views: 303
  • DOOR - door complete.jpg
    DOOR - door complete.jpg
    85.9 KB · Views: 319

fencelake

70cc twin V2
One thing that I had to do was build the leading edge of the rudder up a little with my wood filler. The laminated parts match the fin if there's no gap, but of course there will be about 1/8" of a gap after the hinges are installed, so I built it up with the filler a little at time over several hours. I let it dry overnight all the way before I mounted the rudder with a shim for hinge space and sanded it down to match the fin. Once the hinges are installed I'll do some final fill and sanding, and probably use some thinned epoxy or something to really harden it up before covering.
 

Attachments

  • RUDD - building front 2.jpg
    RUDD - building front 2.jpg
    59.2 KB · Views: 297
  • RUDD - building front close up.jpg
    RUDD - building front close up.jpg
    33.7 KB · Views: 287
  • RUDD - complete with filler.jpg
    RUDD - complete with filler.jpg
    57.4 KB · Views: 358

fencelake

70cc twin V2
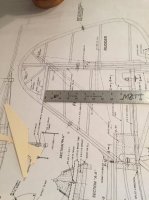
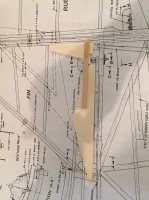
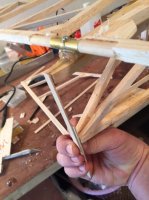
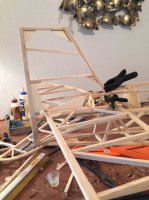
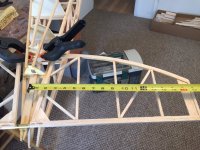
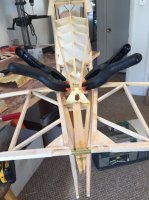
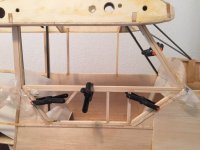
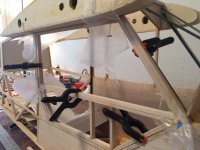
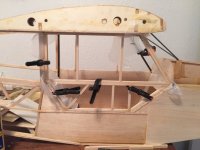
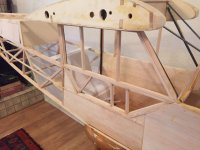
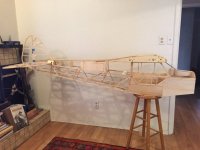
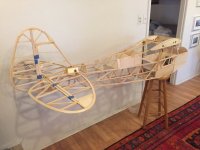
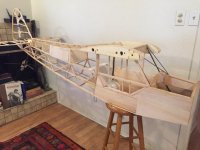
With the exception of a few things, the fuselage construction has come to an end as far as the instruction book is concerned, however, the customizing is just beginning. I ordered my wing tubes and sockets this week, and they are really critical to finishing up the interior of the fuselage because the diagonal support members that pass along the L-21 windows will tie into them. This happens on the full scale plane, and will also be helpful for wiring since I'm using PVC. They should arrive from Jtec this next week. Then I can build the wings!!

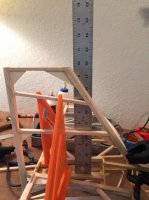
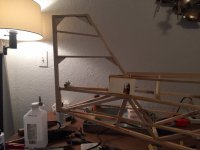
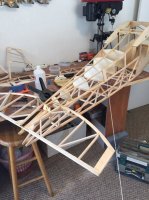
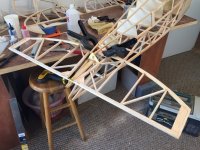
This month, financially I really need to focus on my IMAC bird, so for construction purposes I'm using old servos to get the mounts completed, and drawing out my spaces for electronics. Once I have the wing tube sockets installed in the fuse, I'll paint the inside of the fuselage.

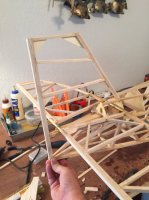
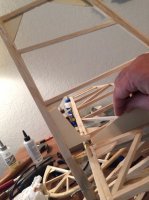
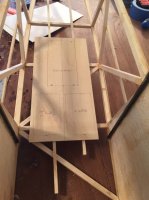
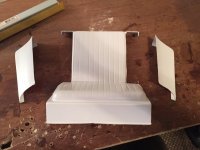
I cut the back seat to match the full scale plane, and I have a plan for having it removable with 2 screws. One of my major goals to make all my electronics hidden, but easily accessible.

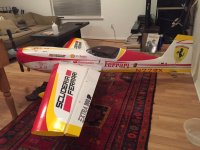
Here's a photo of my PAU Extra 300 with my new graphics from B&E! The graphics are based off of the Ferrari Formula 1 car. I wanted a scheme that included the PAU factory colors... It's never been flown, and I can not wait!!! By the way, that's my living room... my planes are outgrowing my living quarters! Haha!
 

Attachments

  • FUSE - elec plate planning.jpg
    FUSE - elec plate planning.jpg
    50.5 KB · Views: 316
  • INT - cutting plastic on back seat both sides.jpg
    INT - cutting plastic on back seat both sides.jpg
    74.4 KB · Views: 341
  • PAU Extra 300 with new graphics.jpg
    PAU Extra 300 with new graphics.jpg
    95.8 KB · Views: 354

fencelake

70cc twin V2
Here are a few progress photos of the fuselage to date! I really love this plane, and if you haven't built a model from scratch I would highly recommend it! I definitely see what the guys that build all the time are talking about. It's going to be a great day to get this baby in the air!
 

Attachments

  • FUSE - progress display Sunday.jpg
    FUSE - progress display Sunday.jpg
    69.3 KB · Views: 297
  • FUSE - progress display Sunday (3).jpg
    FUSE - progress display Sunday (3).jpg
    79.4 KB · Views: 332
  • FUSE - progress display Sunday (2).jpg
    FUSE - progress display Sunday (2).jpg
    80.6 KB · Views: 342
Top