You are using an out of date browser. It may not display this or other websites correctly.
You should upgrade or use an alternative browser.
You should upgrade or use an alternative browser.
Scale Don Smith P-51 Mustang
- Thread starter stangflyer
- Start date
stangflyer
I like 'em "BIG"!
Hee hee hee... definitely a brutha from a diff'rent mutha. That is exactly my plan. LolBuilding a Servo Door and mount is what I would do. You never know if your going to need to get at it when its done. You can always put a bunch of hold down screws all the way around it to simulate rivet detail.
Bartman
Defender of the Noob!
As I see it and please just trying to help.
1. The Fiberglas horn you are showing if you are only using one it is likely to fail or twist away in stead of moving the elevator you need to have to of them so that the arm cannot twist Fiberglas bord is strong in one direction but not in twist motion.
2. Rest looks good like it.
3. Last comment mounting a servo flat on its side into the stabilizer is difficult. When I have done it I have aluminum angle made a cut out on one leg and screwed the servo to the angle and screwed the angle to flat wood block glued to the sheeting and the ribs. I never been able to have little wood post stand up strong enough to hold the servo and glue down onto a flat piece of wood.
4. With the servo on its side you do not have contend with operating angels it is all in line so the shorter the better.
i was going to say that! two of those fiber arms with the linkage captive in the middle.
I've also done the servo mounted into angle aluminum, works great and the aluminum takes the mounting screws pretty well.
stangflyer
I like 'em "BIG"!
Worked a little on the big Stang stab/elevators today. I didn't get as far as I wanted to, but what little remaining work needs to be done I should be able to knock out in an afternoon. Ok, not an afternoon. But a solid day should do it.
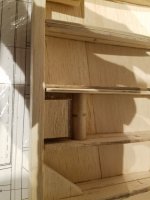
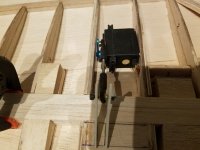
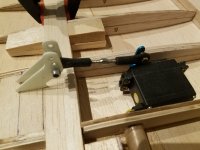
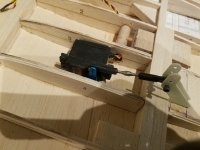
As planned, I started with slotting the elevator control horn blocks so they would accept the fiberglass control horns I purchased for this build from Chief sometime back. Really nothing big about that process. Just measure and check your distance and use the handy dandy mini razor saw I love so much. I decided it would be best to put some type of gauge on it so I didn't cut down too far and damage the top sheeting skin. Hello masking tape. LOL. Once the slots were cut with a #11 hobby knife, I finished with the razor saw. Cutting out just the amount needed for the horns to slip right into. Before I proceeded any further, I decided I needed to address an issue that I "THOUGHT" I had worked out and Snoops was so kind to remind me. Ah but that is what we are all here for right? Boring out the ribs to accommodate the servo lead tubes really wasn't tough. Just needed to go slow. Biggest setback was trying to figure out how to get the servo lead guide tubes inserted into the ribs. The length of the tubes was longer than I had space to slide them in. So I sliced the tubes about 90% of the circumference, slightly folded them...then slid them into place. A bit of medium CA sealed the tubes back up. I accidently slipped on one rib and gouged it a bit. Nothing serious. Them damn Dremel tools have a mind of their own it seems. LOL. Once the servo lead tubes were in place, it was time to mock up the linkage and use some servos I have laying around to set everything up with. The way I am seeing it, the elevator control system is going to be tough as nails and solid as a rock. Next I will build the servo doors that the servos will be attached to and build the frame work for the servo doors to attach to. Then sheet the bottom side of the stab/elevators. Add the stab/elevator tips and elevator counter balances. And then I get to do a lot of sanding and shaping. Oh joy. LOL.
They say a photo is worth a thousand words. I think I am up to like 789 so I will let the photos speak for themselves. Note: photos are not necessarily in order fellas.
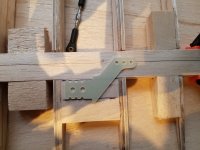
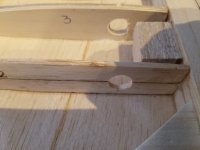
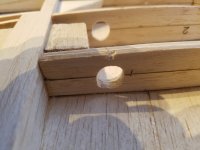
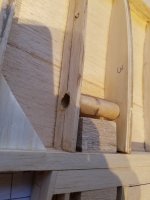
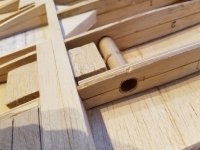
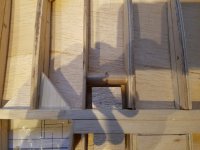
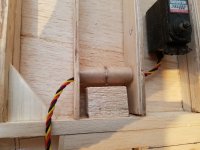
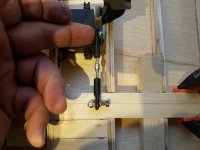
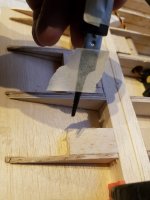
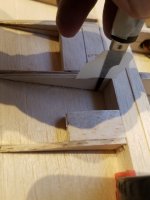
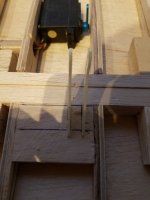
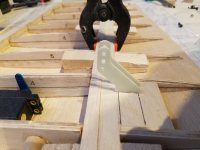
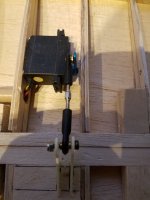
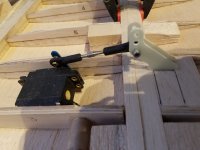
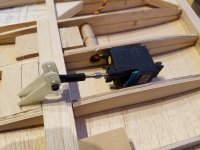
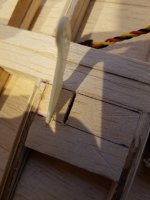
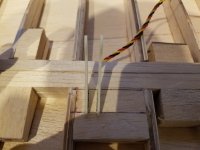
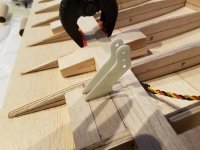
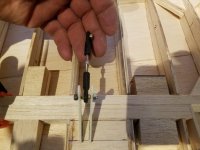
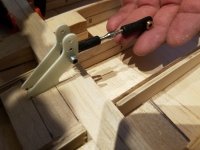
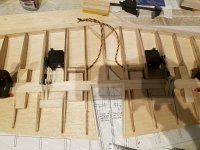
Once I get the rest of the stab/elevators finished, I will probably start on the fin/rudder group. The wing tubes arrived today so it won't be long before I start the main wing.
Getting closer by the day.
As planned, I started with slotting the elevator control horn blocks so they would accept the fiberglass control horns I purchased for this build from Chief sometime back. Really nothing big about that process. Just measure and check your distance and use the handy dandy mini razor saw I love so much. I decided it would be best to put some type of gauge on it so I didn't cut down too far and damage the top sheeting skin. Hello masking tape. LOL. Once the slots were cut with a #11 hobby knife, I finished with the razor saw. Cutting out just the amount needed for the horns to slip right into. Before I proceeded any further, I decided I needed to address an issue that I "THOUGHT" I had worked out and Snoops was so kind to remind me. Ah but that is what we are all here for right? Boring out the ribs to accommodate the servo lead tubes really wasn't tough. Just needed to go slow. Biggest setback was trying to figure out how to get the servo lead guide tubes inserted into the ribs. The length of the tubes was longer than I had space to slide them in. So I sliced the tubes about 90% of the circumference, slightly folded them...then slid them into place. A bit of medium CA sealed the tubes back up. I accidently slipped on one rib and gouged it a bit. Nothing serious. Them damn Dremel tools have a mind of their own it seems. LOL. Once the servo lead tubes were in place, it was time to mock up the linkage and use some servos I have laying around to set everything up with. The way I am seeing it, the elevator control system is going to be tough as nails and solid as a rock. Next I will build the servo doors that the servos will be attached to and build the frame work for the servo doors to attach to. Then sheet the bottom side of the stab/elevators. Add the stab/elevator tips and elevator counter balances. And then I get to do a lot of sanding and shaping. Oh joy. LOL.
They say a photo is worth a thousand words. I think I am up to like 789 so I will let the photos speak for themselves. Note: photos are not necessarily in order fellas.


Once I get the rest of the stab/elevators finished, I will probably start on the fin/rudder group. The wing tubes arrived today so it won't be long before I start the main wing.
Getting closer by the day.
Snoopy1
640cc Uber Pimp
Nice job looks clean a robust that will do the job. I see the tool but not good enough that you made the slots with the slots a are clean and neat.Worked a little on the big Stang stab/elevators today. I didn't get as far as I wanted to, but what little remaining work needs to be done I should be able to knock out in an afternoon. Ok, not an afternoon. But a solid day should do it.
As planned, I started with slotting the elevator control horn blocks so they would accept the fiberglass control horns I purchased for this build from Chief sometime back. Really nothing big about that process. Just measure and check your distance and use the handy dandy mini razor saw I love so much. I decided it would be best to put some type of gauge on it so I didn't cut down too far and damage the top sheeting skin. Hello masking tape. LOL. Once the slots were cut with a #11 hobby knife, I finished with the razor saw. Cutting out just the amount needed for the horns to slip right into. Before I proceeded any further, I decided I needed to address an issue that I "THOUGHT" I had worked out and Snoops was so kind to remind me. Ah but that is what we are all here for right? Boring out the ribs to accommodate the servo lead tubes really wasn't tough. Just needed to go slow. Biggest setback was trying to figure out how to get the servo lead guide tubes inserted into the ribs. The length of the tubes was longer than I had space to slide them in. So I sliced the tubes about 90% of the circumference, slightly folded them...then slid them into place. A bit of medium CA sealed the tubes back up. I accidently slipped on one rib and gouged it a bit. Nothing serious. Them damn Dremel tools have a mind of their own it seems. LOL. Once the servo lead tubes were in place, it was time to mock up the linkage and use some servos I have laying around to set everything up with. The way I am seeing it, the elevator control system is going to be tough as nails and solid as a rock. Next I will build the servo doors that the servos will be attached to and build the frame work for the servo doors to attach to. Then sheet the bottom side of the stab/elevators. Add the stab/elevator tips and elevator counter balances. And then I get to do a lot of sanding and shaping. Oh joy. LOL.
They say a photo is worth a thousand words. I think I am up to like 789 so I will let the photos speak for themselves. Note: photos are not necessarily in order fellas.
View attachment 109054 View attachment 109055 View attachment 109056 View attachment 109057 View attachment 109058 View attachment 109059 View attachment 109060 View attachment 109061 View attachment 109062 View attachment 109063 View attachment 109064 View attachment 109065 View attachment 109066 View attachment 109067 View attachment 109068 View attachment 109069 View attachment 109070 View attachment 109071 View attachment 109072 View attachment 109073 View attachment 109074 View attachment 109075 View attachment 109076 View attachment 109077 View attachment 109078
Once I get the rest of the stab/elevators finished, I will probably start on the fin/rudder group. The wing tubes arrived today so it won't be long before I start the main wing.
Getting closer by the day.
stangflyer
I like 'em "BIG"!
I think you mean, you can't see the tool close enough that I made the slots with? Well, here ya go....Does this help?Nice job looks clean a robust that will do the job. I see the tool but not good enough that you made the slots with the slots a are clean and neat.

Snoopy1
640cc Uber Pimp
Ok see it now a small little hack saw looks like a handy tool thanks.I think you mean, you can't see the tool close enough that I made the slots with? Well, here ya go....Does this help?
View attachment 109086
BalsaDust
Moderator
Yes sir. I picked up the Zona saw that had multiple blades to use on it. That one stang is using comes in handy a lot.Ok see it now a small little hack saw looks like a handy tool thanks.
stangflyer
I like 'em "BIG"!
Yep, the same one I have. Great for doing multiple tasks. And actually quite inexpensive as well.Yes sir. I picked up the Zona saw that had multiple blades to use on it. That one stang is using comes in handy a lot.
Snoopy1
640cc Uber Pimp
Yes I have a bunch of Zona saws but none have removable blades will have look into that , thanks guys.Yes sir. I picked up the Zona saw that had multiple blades to use on it. That one stang is using comes in handy a lot.
