• If you are new to GiantScaleNews.com, please register, introduce yourself, and make yourself at home.

    We're 1st in Giant Scale RC because we've got the best membership on the internet! Take a look around and don't forget to register to get all of the benefits of GSN membership!

    Welcome!

3D EMHW 2.15 Ultimate

Jetpainter

640cc Uber Pimp
Did the hinging for the tailfeathers. They supply nice Kavan flat hinges. The hinges have 1.4mm nails through them, but these can be replaced with #24 piano wire/spring steel to make everything removable.

As the tailfeathers are built by sandwhiching ply between balsa, digging slots out might be a challenge with handtools so used a Dremel Multitool with a 3/4 flush cut bit. BradleyBan on RcCanada did a great Ultimate build which is where I got the idea.

It worked really well and was easy to cut the hinges fairly cleanly and centered using 6mm ply sitting on some newspaper as a shim.
Nicely done!
 
Anyone have any suggestions for a good spackle? I've been using Hobbylite filler and while it works well for pinholes and really small gaps it tends to shrink and doesn't work well for more substantial gaps.

There's some work to be done blending the rear turtle deck sheeting and I don't think the Hobbylite will work very well.
 

Jetpainter

640cc Uber Pimp
On Terryscustom's suggestion I tried lightweight all purpose joint compound. So far I like it a lot. The stuff I have is Sheetrock brand. It seems to go on better than a lot of the balsa fillers and things I've used in the past, plus it sands easy and smooth. It's pretty easy to tell when it's dry since it turns bright white. My local store only had it in gallons, but I paid less than 10$ for it.
 
On Terryscustom's suggestion I tried lightweight all purpose joint compound. So far I like it a lot. The stuff I have is Sheetrock brand. It seems to go on better than a lot of the balsa fillers and things I've used in the past, plus it sands easy and smooth. It's pretty easy to tell when it's dry since it turns bright white. My local store only had it in gallons, but I paid less than 10$ for it.

Looks like I will be picking some up instead of balsa filler.
 
Looks like I will be picking some up instead of balsa filler.

You should. It works so much better than balsa filler. It goes on much easier, sands finer, shrinks less, produces less dust, it sands away at a closer rate with balsa, is strong enough to hold fine over big gaps and is $6 a gallon. Thanks Jetpainter!

On to the Zur Fertigstellung...

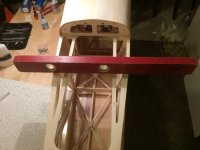
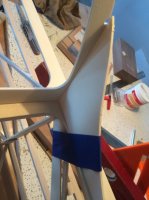
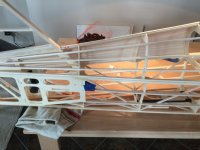
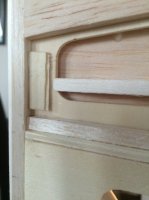
I have a small twist in the fuse for reasons I'll cover later, so when installing the vertical stab and later installing the the elevator wing rod guides I need to align their positions with the forward area of the fuse.

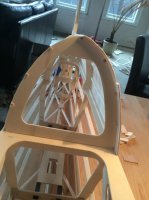
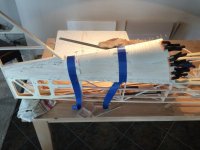
I used the iHandy Level app on my phone to set "level" using a level spanning the canopy area as a reference than glued/clamped the vertical stab to match. I'm impressed with the app as it measures to the tenth of a degree and seems to hold "zero" for a quite a long time. There's no need to actually level the fuse (despite my use of a level to span the canopy area) I just set the phone on the level and zero the app.

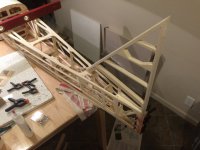
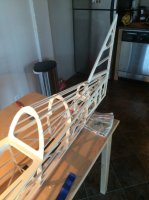
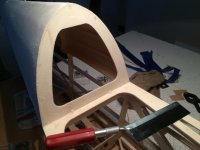
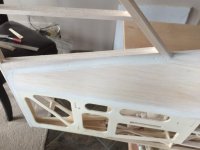
The turtle deck goes together really easily. The forward former is set in place using two jigs included with the kit which are taped in place. The two formers behind it are set vertical. I sanded all the stringers to make sure they were flush with their cutouts.

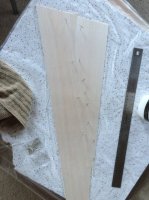
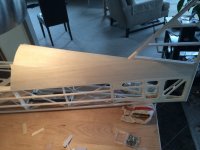
To sheet they supply balsa which already has the angles cut into it. It is glued together as shown in their photo and then it only takes minor trimming/sanding to fit it accurately to the shape of the turtledeck.

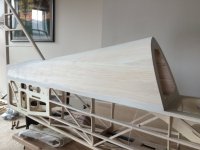
I've decided sheeting is my favorite part so far, it's fun to start seeing the shape and surprising how much it stiffens up the fuse. The vertical stab is rock solid after applying the sheeting.

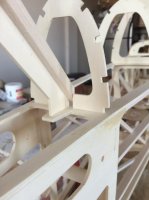
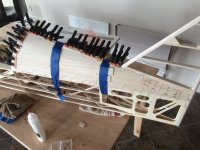
I put a little shim in the far rearward area to support the sheeting.

I've learned not to use a hobby knife to cut across the grain whenever possible so used a saw to trim the overhang and sanded flush.

I'll go over the area where the spackle blends the sheeting to the vertical stab a second time, but I'm really impressed with how well the new spackle is working.
 

Attachments

  • IMG_0602.JPG
    IMG_0602.JPG
    74.3 KB · Views: 390
  • IMG_0605.JPG
    IMG_0605.JPG
    88.3 KB · Views: 387
  • IMG_0607.JPG
    IMG_0607.JPG
    39.4 KB · Views: 599
  • IMG_0608.JPG
    IMG_0608.JPG
    65.1 KB · Views: 397
  • IMG_0610.JPG
    IMG_0610.JPG
    50.2 KB · Views: 382
  • IMG_0613.JPG
    IMG_0613.JPG
    59.4 KB · Views: 391
  • IMG_0614.JPG
    IMG_0614.JPG
    53.8 KB · Views: 403
  • IMG_0622.JPG
    IMG_0622.JPG
    96.5 KB · Views: 370
  • IMG_0623.JPG
    IMG_0623.JPG
    82.8 KB · Views: 374
  • IMG_0624.JPG
    IMG_0624.JPG
    50.5 KB · Views: 407
  • IMG_0625.JPG
    IMG_0625.JPG
    80.9 KB · Views: 369
  • IMG_0626.JPG
    IMG_0626.JPG
    54.5 KB · Views: 367
  • IMG_0628.JPG
    IMG_0628.JPG
    37.8 KB · Views: 404
  • IMG_0629.JPG
    IMG_0629.JPG
    83.9 KB · Views: 382
  • IMG_0633.JPG
    IMG_0633.JPG
    69.4 KB · Views: 619
  • IMG_0634.JPG
    IMG_0634.JPG
    73.6 KB · Views: 343
  • IMG_0635.JPG
    IMG_0635.JPG
    65.3 KB · Views: 388

Jetpainter

640cc Uber Pimp
You should. It works so much better than balsa filler. It goes on much easier, sands finer, shrinks less, produces less dust, it sands away at a closer rate with balsa, is strong enough to hold fine over big gaps and is $6 a gallon. Thanks Jetpainter!
I'd love to take the credit, but I stole the idea from Terry! :D
 
Top