You are using an out of date browser. It may not display this or other websites correctly.
You should upgrade or use an alternative browser.
You should upgrade or use an alternative browser.
First VPP F3P Freestyle Plane Build
- Thread starter AKfreak
- Start date
AKfreak
150cc
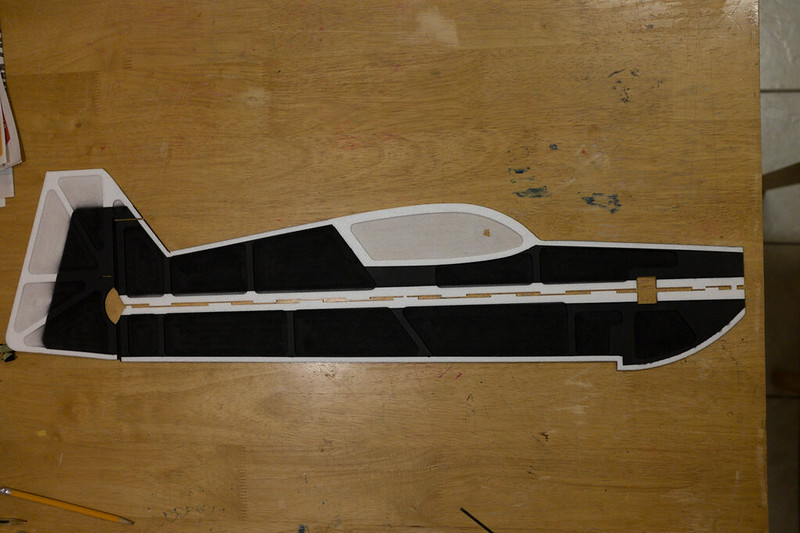
Here is the Fuse.
All I can say is Fancy Foam has a huge area of opportunity on production. The milled pockets are thick and thin (Techone, and DW foamy's smoke the quality). The Face surface has all sots of little imperfections that cause the paint to not lay up properly. From a few feet away it looks good. Up close it wont win any sort of prizes. I have airbrushed many planes. this is the first depron model that I have had so many issues with.
BTW this Fancy Foam model is also the most expensive unfinished milled model I have purchased. I will have to say it will mostly likely be the last model I buy from them. I will stick with DW, or cut my own.
On with the build.
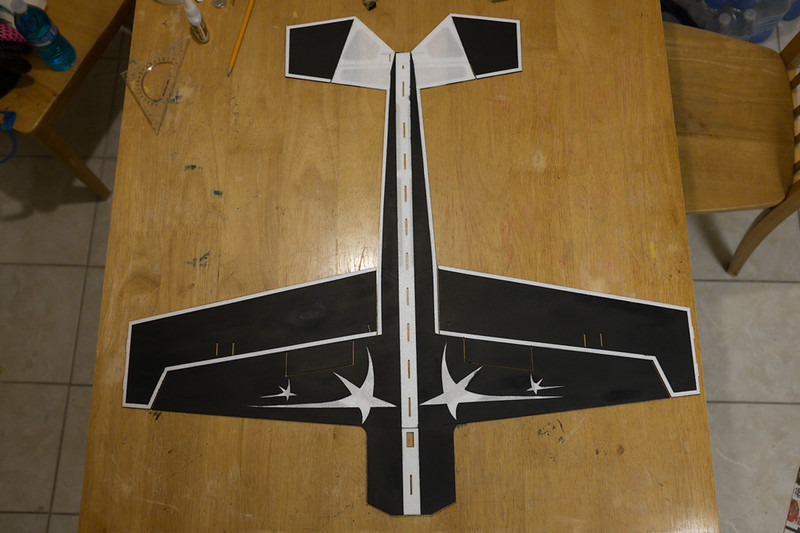
Here is the top of the wing, tail and horizontal fuse.
 Mamo Upsidedown Plane by tomshue, on Flickr
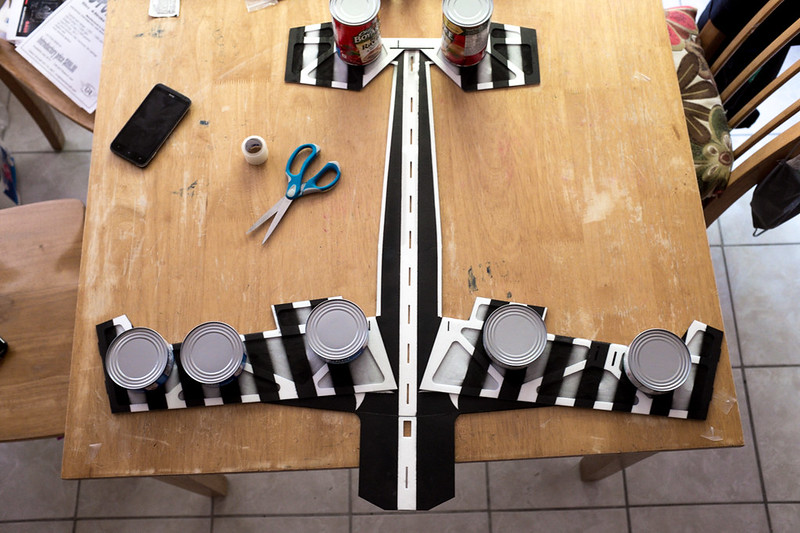
The bottom I wanted high contrast an simple. I think this is super simple.
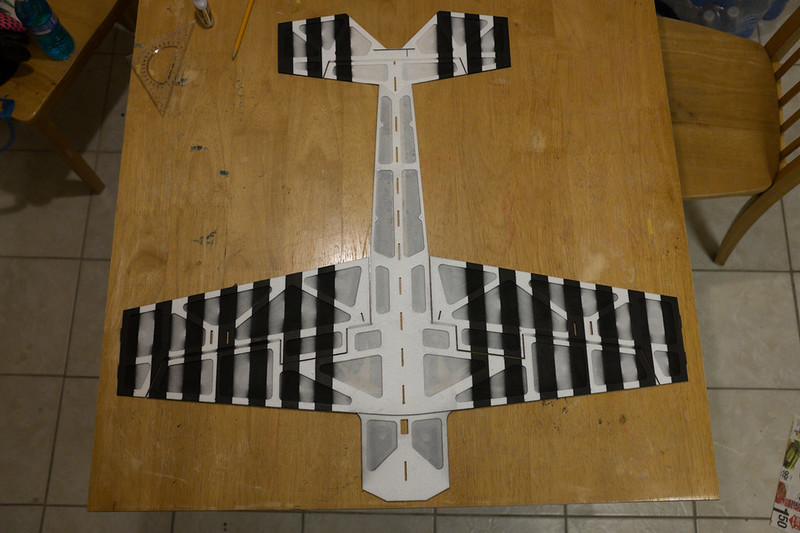 Mamo Upsidedown Plane-2 by tomshue, on Flickr
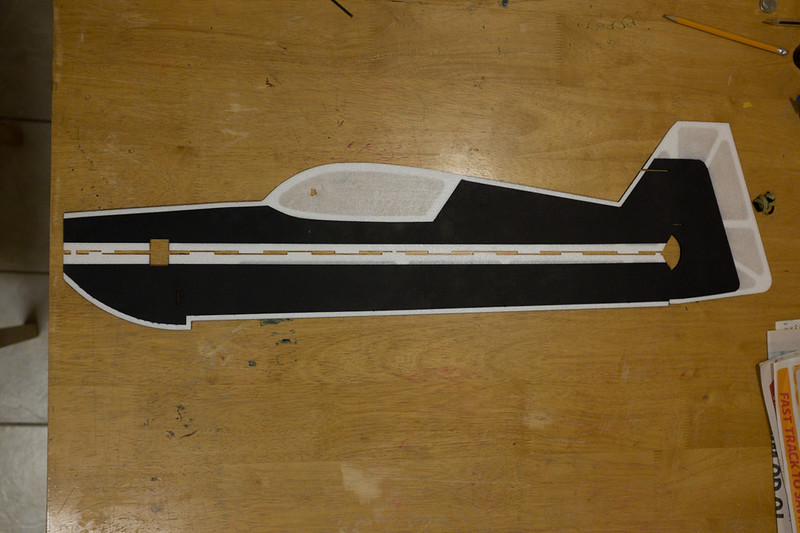
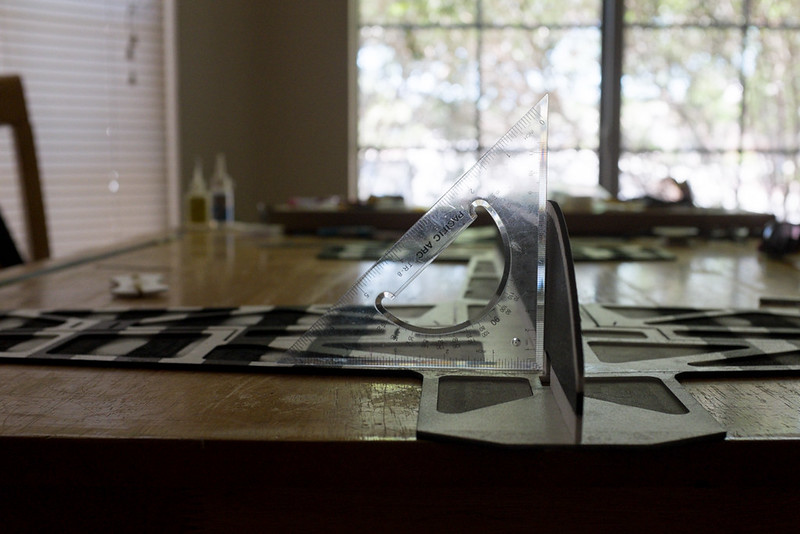
The Vertical fuse turned out nice. The only problem is the milling was so thin in the canopy area, a hole was made while pulling 3M striping tape (that really SUX). Can you say Band-Aid?
 Mamo Upsidedown Plane-3 by tomshue, on Flickr
And the milled side
 Mamo Upsidedown Plane-4 by tomshue, on Flickr
All I can say is Fancy Foam has a huge area of opportunity on production. The milled pockets are thick and thin (Techone, and DW foamy's smoke the quality). The Face surface has all sots of little imperfections that cause the paint to not lay up properly. From a few feet away it looks good. Up close it wont win any sort of prizes. I have airbrushed many planes. this is the first depron model that I have had so many issues with.
BTW this Fancy Foam model is also the most expensive unfinished milled model I have purchased. I will have to say it will mostly likely be the last model I buy from them. I will stick with DW, or cut my own.
On with the build.
Here is the top of the wing, tail and horizontal fuse.
Mamo Upsidedown Plane by tomshue, on FlickrThe bottom I wanted high contrast an simple. I think this is super simple.
Mamo Upsidedown Plane-2 by tomshue, on FlickrThe Vertical fuse turned out nice. The only problem is the milling was so thin in the canopy area, a hole was made while pulling 3M striping tape (that really SUX). Can you say Band-Aid?
Mamo Upsidedown Plane-3 by tomshue, on FlickrAnd the milled side
Mamo Upsidedown Plane-4 by tomshue, on Flickr
Last edited by a moderator:
3dmike
640cc Uber Pimp
Sorry to hear about the quality but that's just the sort of information we need. More info out there the better for everyone involved including the manufacturer. Great post man keep it up and let us know how she flies. You're definitely right though from the pics it's look amazing. Love the scheme big time.
AKfreak
150cc
Well this project is taking forever because building Depron models is tedious work, and FancyFoam doesnt even offer a set of instructions for this model. It says clearly that it comes with written instructions but it doesn't. Mike from FancyFoam says to just use the MX2 instructions, but they are much different than the MX3. Lets just say, there is a huge area of opportunity here because this is the plane that won the ETOC last year. Yet they didn't even bother to offer a simple set of instructions.
I would say this build is not for a beginner. Fortunately I have build some depron models in the past that require carbon fiber (CF) reinforcement, but nothing like this. One of the first things I did was to flex the control surfaces so they can travel friction free.
 MX3 Depron Freestyle TVVPP Project by tomshue, on Flickr
Here is the control surfaces bent flat and weighted. Its not an EPP model and Depron doesn't have memory like EPP, but I think flexing the control surface joints is a good idea.
 MX3 Depron Freestyle TVVPP Project-2 by tomshue, on Flickr
This plane has some serious control surfaces.
 MX3 Depron Freestyle TVVPP Project-3 by tomshue, on Flickr
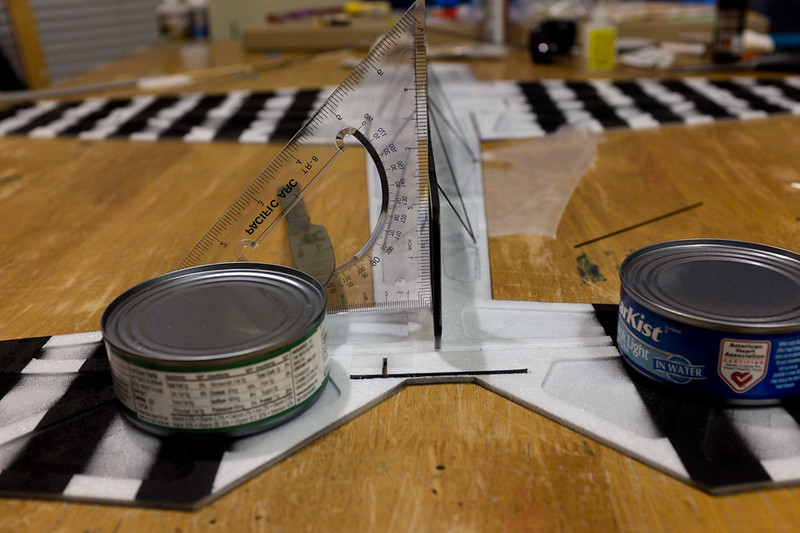
The next step is to square up the lower half of the fuselage and start bracing. Dont glue it yet, just start bracing. Its a good idea to weigh down the wings and horizontal fuse to keep it flat when installing the CF bracing.
 MX3 Depron Freestyle TVVPP Project-4 by tomshue, on Flickr
 MX3 Depron Freestyle TVVPP Project-9 by tomshue, on Flickr
 MX3 Depron Freestyle TVVPP Project-5 by tomshue, on Flickr
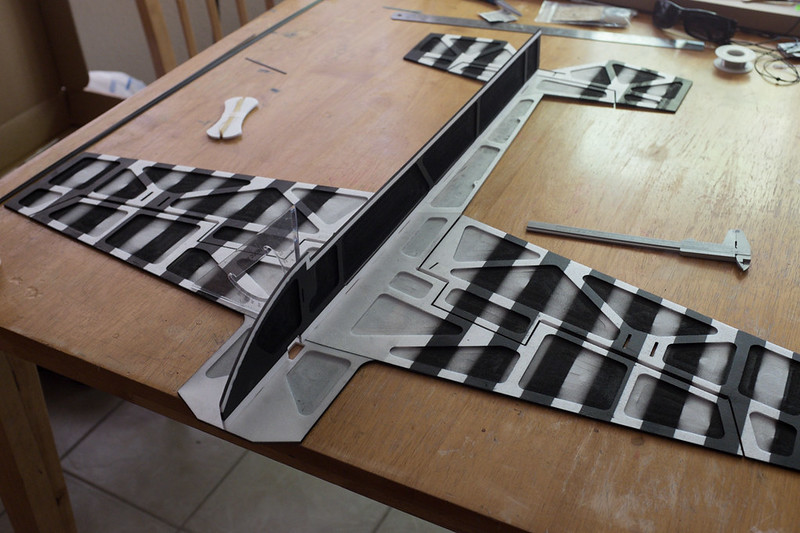
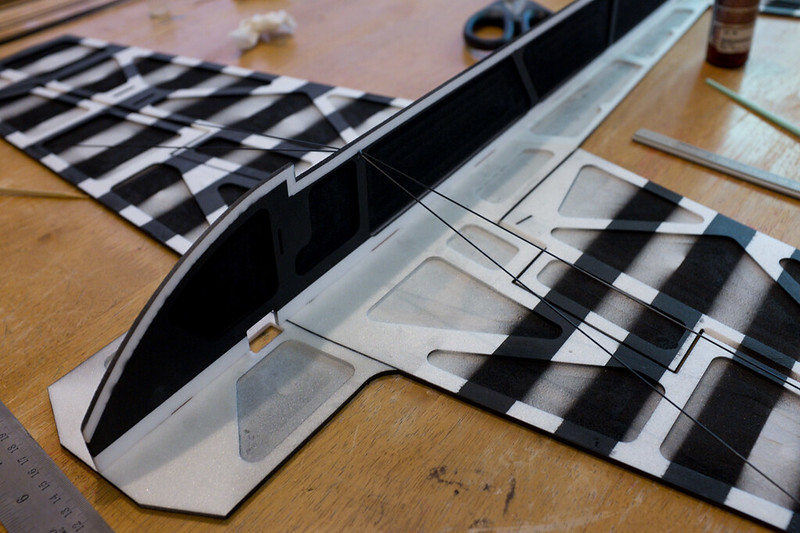
You want to think in triangles when installing the support bracing. This is the main wing support, but you still have to add cross bracing to make it solid.
 MX3 Depron Freestyle TVVPP Project-10 by tomshue, on Flickr
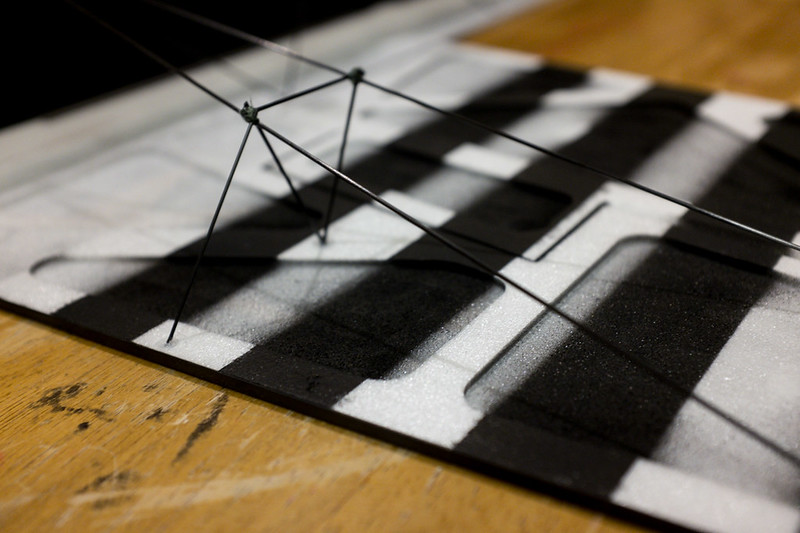
All od the bain bracing is 1.0 CF rod, but the cross bracing is .8 CF rod. At the joints, its wrapped with 10lb test Spyder Wire and hit with a drop of CA and Kicker. The trick when working with CA on depron is to prime every joint with kicker then use tiny tips from house of balsa to disperse the least amount of glue possible. Also have thin strips of paper towel ready to wick up CA and kicker if you accidentally use too much. The whole goal here is to reduce weigh. Also be careful and test your kicker and CA on some scrap pieces of Depron. Even, "Foam Safe" CA will eat up depron if you arent careful.
I would say this build is not for a beginner. Fortunately I have build some depron models in the past that require carbon fiber (CF) reinforcement, but nothing like this. One of the first things I did was to flex the control surfaces so they can travel friction free.
MX3 Depron Freestyle TVVPP Project by tomshue, on FlickrHere is the control surfaces bent flat and weighted. Its not an EPP model and Depron doesn't have memory like EPP, but I think flexing the control surface joints is a good idea.
MX3 Depron Freestyle TVVPP Project-2 by tomshue, on FlickrThis plane has some serious control surfaces.
MX3 Depron Freestyle TVVPP Project-3 by tomshue, on FlickrThe next step is to square up the lower half of the fuselage and start bracing. Dont glue it yet, just start bracing. Its a good idea to weigh down the wings and horizontal fuse to keep it flat when installing the CF bracing.
MX3 Depron Freestyle TVVPP Project-4 by tomshue, on Flickr
MX3 Depron Freestyle TVVPP Project-9 by tomshue, on Flickr
MX3 Depron Freestyle TVVPP Project-5 by tomshue, on FlickrYou want to think in triangles when installing the support bracing. This is the main wing support, but you still have to add cross bracing to make it solid.
MX3 Depron Freestyle TVVPP Project-10 by tomshue, on FlickrAll od the bain bracing is 1.0 CF rod, but the cross bracing is .8 CF rod. At the joints, its wrapped with 10lb test Spyder Wire and hit with a drop of CA and Kicker. The trick when working with CA on depron is to prime every joint with kicker then use tiny tips from house of balsa to disperse the least amount of glue possible. Also have thin strips of paper towel ready to wick up CA and kicker if you accidentally use too much. The whole goal here is to reduce weigh. Also be careful and test your kicker and CA on some scrap pieces of Depron. Even, "Foam Safe" CA will eat up depron if you arent careful.