• If you are new to GiantScaleNews.com, please register, introduce yourself, and make yourself at home.

    We're 1st in Giant Scale RC because we've got the best membership on the internet! Take a look around and don't forget to register to get all of the benefits of GSN membership!

    Welcome!

Sport JTEC RADIOWAVE 26% Pitts Model 12

stangflyer

I like 'em "BIG"!
Rob,

It looks like we will have some Carbon Gear for the Pitts and a bunch more planes. We have been working on securing a source for carbon gear and will be bring in an assortment of sizes not only for our designs but for many others.

Al
Hey, that is awesome. The aluminum gear supplied with the plane only weighs 8.4 ounces, which is not bad at all. Saving a couple of ounces on the gear won't be that huge. But if I can save an ounce here, two ounces there...another few ounces over here...It will all add up right? Really though, I am not too worried. I think the 3w 70 twin will yank that plane juuuuust fine. And heck, if it lands too fast? Heh..."FLAPERONS" x 4... LOL. Not really but cool idea huh?
 

stangflyer

I like 'em "BIG"!
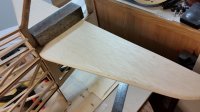
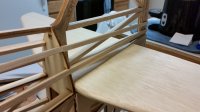
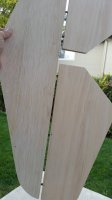
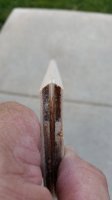
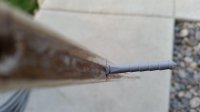
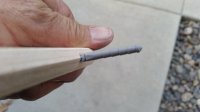
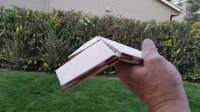
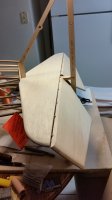
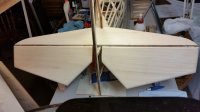
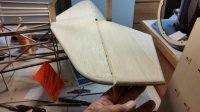
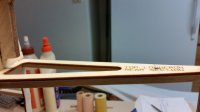
I got in the mood for doing a little hinging and sanding this evening, so I figured the stabs and elevators would be on tap. I got the stabs and elevators drilled for the large Robart hinges. I like to counter sink the holes about 1/16" of an inch so that the hinges will give a more "sealed" hinge line between the flight surfaces and the control surfaces. After using the supplied drill guide for the hinges and once the hinge holes were counter sunk, I test fit the surfaces to the stab. Once I was satisfied with the fit, I went to sanding. Ah yeah!! That building task that no one seems to enjoy. I really don't mind it too much. I have always been of the mind that I like to see progress quickly. Otherwise I loose interest just as rapidly. Sanding will give an immediate result. I think that beveling the leading edges of the elevators was the longest process tonight. I wanted to make sure I got the "pivot" point exactly in the center of the leading edge. Best way I could confirm this was if both sides of the bevel met evenly up with the hinge holes. Hey, looks pretty good. So on to rounding the leading edge of the stab and around the elevators to the trailing edge. I may need to do a little more sanding, but for now...I think they are pretty close. I am going to rely on a couple of you fellows' opinion. I tried to find some close up photos of the stab and elevators on the full scale for reference. I really could not find a good photo to go off of. So, @Wacobipe and @Maxwell1945....how'd I do? Do I need to take more off? Maybe a little different or more roundness to the stab and elevators?

I am very pleased with the amount of deflection on the elevators. I really didn't measure it, but looks pretty close to 40 to 45 degress. What do you guys think? That be enough for some advanced bipe aerobatics?

After I finished sanding, I wanted to test fit the assembly to the fuse. Oh my...it is really starting to look pretty cool. I talked for quite some time with Brett (@Wacobipe) today so I am pretty confident I can get a bunch more completed on the Pitts. One thing I am definitely going to do is extend the stringers of the rear turtle deck to the trailing edge of the fin. Then the lower section and the upper section will have balsa blocks glued in so that I can sand to the shape and design of the aft fuse.

So tonight I will more than likely glue the stab to the fuse so that I can get the structure built into the vertical fin and then sheeted. I want to go flying tomorrow if the weather permits. If not, I will be getting the rest of the fuse closer while I wait for the last of the wing tubes to arrive from TNT. By the way, if any of you have not had the pleasure to speak with Tom from TNT, You are truly missing out. That guy is an awesome gent. What a personable and outgoing guy. Too bad he don't live closer to me or me closer to him. I would completely enjoy chllin' with him.

A few photos of progress. More to come this evening.
20161021_173627.jpg 20161021_173640.jpg 20161021_173715.jpg 20161021_173744.jpg 20161021_174631.jpg 20161021_175853.jpg 20161021_180002.jpg 20161021_180048.jpg 20161021_180638.jpg 20161021_180725.jpg 20161021_181613.jpg 20161021_181743.jpg 20161021_193022.jpg 20161021_193101.jpg 20161021_193159.jpg
 

Jetpainter

640cc Uber Pimp
Looking great!

And I agree, Tom is a good dude. He made the custom aluminum gear for my scratch build project. Since it rakes forward he needed wider material than he normally uses so it wasn't cheap but they turned out awesome!
 

stangflyer

I like 'em "BIG"!
Looking great!

And I agree, Tom is a good dude. He made the custom aluminum gear for my scratch build project. Since it rakes forward he needed wider material than he normally uses so it wasn't cheap but they turned out awesome!
Maybe not cheap...but quality stuff is very important to have. Especially for that awesome scratch build of yours. I really honestly am so excited to see it once it's all done. You gotta be just thrilled huh?

Rob, you are surely getting after it! I'll send you stuff to sand! ;)
Oh now wait just a darn minute. Only way I do specialized sanding is if there is a brewsky or three in it for me. Just bring the six pack and we'll git after it. :way_to_go:

Rob you are looking good !!
May go flying tomorrow also if the weather is good.
Talk to you soon.

Van
Thank you Van. I have to confess, I referred to your tail surfaces just a bit so I could get an idea of the shape. Now don't get me wrong, I don't usually go 'round looking other fella's rears. Hee hee.:LOL_gif:
 

stangflyer

I like 'em "BIG"!
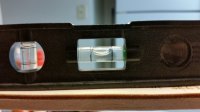
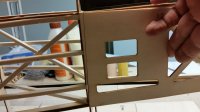
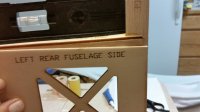
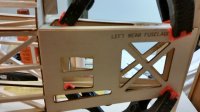
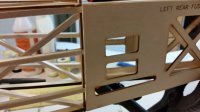
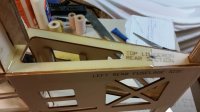
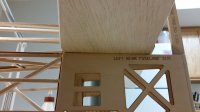
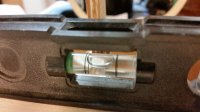
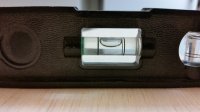
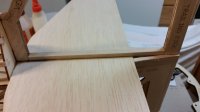
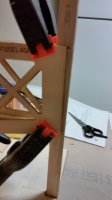
Just a little bit more accomplished tonight. I desperately wanted to get the fin finished up and the stab glued in place. So that is what I attacked this evening. First thing I did however was to make sure the resting structure for the stab was perfectly level. I most definitely do not want any twists in this fuse. So far, I think I have done pretty good at keeping it all straight. But it is usually when closing in on the end that I find (for myself) that I somehow didn't get something as straight as I wanted. Hence, part of the reason I have been reluctant to build all these years. But then again, kits are just so much better these days than they used to be. Plus, I think I might have just picked up a few things from all the awesome builders on here. But before I placed the stab in its permanent location, I wanted to get the "aft" fuse sides put in place. These were just a little weird in a way. They should sit flush against the back side of F7 and rest on the vertical fin trailing edge post. They had an angle that just did not allow for a good fit, so I chose to "angle" cut them to fit where they needed to be. Then at the aft edge, I added 1/8" x 1/4" balsa stringer pieces to finish out the trailing edge of the fuse sides. With all aligned and glued in place, I was satisfied enough to move on to the placement of the stab. With that being said, I used my little 6" level to check both laterally and longitudinally the level of the upper longeron where the stab sets. Seeing that it was perfectly level both directions, I mixed up some 30 minute epoxy and spread a generous amount on top of the upper longeron. Setting the stab in place and checking first one side, then the other, then left trailing edge tip against F7. Then the right trailing edge tip against the opposite side of F7. Measuring back and forth, the distance from the fuse side to the edge of the stab on both sides. One handy tool I would be lost without is my 4 lb., 8 oz. iron block. It's been a life saver in some cases. Using it on top of the stab to hold it in place while the epoxy cured and still continuing to measure until the epoxy was too cured to move.

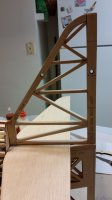
Now that the stab is in place, I wanted to get the rest of the structure of the fin completed. As with the stabs and elevators, I used 3/8" x 1/4" balsa stringers for the structure. I realized days ago that in order to sheet the fin, I am going to have to come up with some really unique way to do it and still keep the fin straight and true without warping or twisting. So....yeah, Looking for some suggestions. I suppose I can use my straight edges on once side while sheeting the opposite side. Laying it flat and stacking weight on it would be my preferred method, but that is not going to happen in this case. I also added one extra angle brace at the very tip of the fin. I have a tendency to "grip" my planes from behind usually using the fin at that exact point. I have been lucky so far with no damage to any of my fins. But I figure with an open structure with 1/16" sheeting over that area, it would be rather weak. I wanted something a little more sturdy. I may have to cut it out and reduce the angle just a little as it may not provide the support I am looking for. Also, I temporarily placed stringers aft of F7 to the fin post. I really did not want to use big balsa blocks at the rear of the fuse, then sand to shape. But I may not have an option. I would like that area sturdy, but want also to keep it light and easy to cover. As well as look really nice. From past experience, just like painting a car, the finish you apply will show every scratch, mark or any amount of work the finish will be applied to. Anyone have a suggestion for that particular area?

For now, "midnight 30" I am going to call it a night. I will be getting a little bit more done tomorrow and will post more as I proceed.
20161021_211212.jpg 20161021_211231.jpg 20161021_211410.jpg 20161021_211415.jpg 20161021_213152.jpg 20161021_213156.jpg 20161021_213203.jpg 20161021_215659.jpg 20161021_221620.jpg 20161021_221633.jpg 20161021_221752.jpg 20161021_221825.jpg 20161021_224435.jpg 20161021_232037.jpg 20161021_233654.jpg
 

Snoopy1

640cc Uber Pimp
Looking great!

And I agree, Tom is a good dude. He made the custom aluminum gear for my scratch build project. Since it rakes forward he needed wider material than he normally uses so it wasn't cheap but they turned out awesome!
Ok hoe is "Tom" hoe makes aluminum landing gear. Can you pleas give me and company name or site name thanks.
 
Top