• If you are new to GiantScaleNews.com, please register, introduce yourself, and make yourself at home.

    We're 1st in Giant Scale RC because we've got the best membership on the internet! Take a look around and don't forget to register to get all of the benefits of GSN membership!

    Welcome!

Sport JTEC RADIOWAVE 26% Pitts Model 12

stangflyer

I like 'em "BIG"!
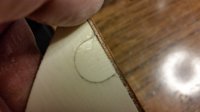
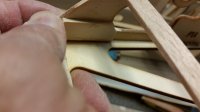
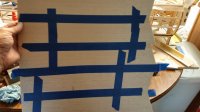
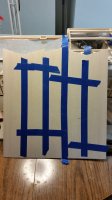
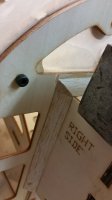
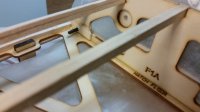
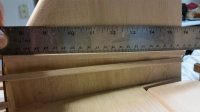
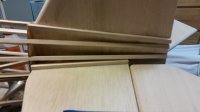
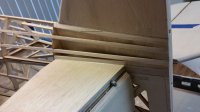
Fin and rudder sanded. Hinges drilled and temporarily installed. A quickie teaser....
20161023_161101.jpg
20161023_161207.jpg
 

HRRC Flyer

GSN Sponsor Tier 1
Hey Rob,

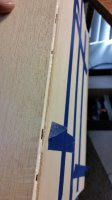
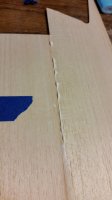
Kudo's on getting your Fin straight. . . . . . . :way_to_go:.

One small observation, if I may. If you plan on using your weight bags again, I strongly suggest you get yourself some packing, fold the top over on itself and tape the top down thoroughly. The last thing you need is one of those bags hitting the floor and the top coming undone. You'd be sweeping up bee bee's for the next year. Ask me how I know. . . . . ;)
 

stangflyer

I like 'em "BIG"!
Hey Rob,

Kudo's on getting your Fin straight. . . . . . . :way_to_go:.

One small observation, if I may. If you plan on using your weight bags again, I strongly suggest you get yourself some packing, fold the top over on itself and tape the top down thoroughly. The last thing you need is one of those bags hitting the floor and the top coming undone. You'd be sweeping up bee bee's for the next year. Ask me how I know. . . . . ;)
:laughing: good idea. Thank you. Lol
 

stangflyer

I like 'em "BIG"!
Another day and a little more accomplished on the Pitts. I mentioned earlier that I did not want to use balsa blocks aft of F7 to the trailing edge of the fin post. So that was my direction today. I probably should have re-thought that decision. Anyway, I started removing the left side 1/4" x 1/4" balsa stringers from the side of the turtle deck that would actually go all the way through were they designed as such. Since I ordered extra stringers, I don't have to worry about not having enough. Especially since the fuse is just almost done and all that will be needed are the ones for the wings.
20161024_114109.jpg

After I removed the two stringers from the left side, I recut to length the longer stringers that will go from F5 to the trailing edge of the vertical fin post. I decided to "pre" shape them to rest against the side of the fuse for a better fit.
20161024_114139.jpg

Once I had the stringers sanded to the angle I wanted, I laid them in place parallel to the existing top stringer and in alignment with the rest of the fuse.
20161024_114954.jpg 20161024_123338.jpg 20161024_140504.jpg
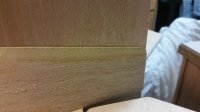
Once set up, I started with the left side turtle deck sheeting. I originally wanted to make a complete skin for the turtle deck. Or at the very minimum, a side at a time. But soon discovered it would probably be easier to lay in the sheeting a section at a time. Considering where the stringers meet the aft fuse sides, bottom of the stab, around the leading edge of the stab, the fin and all across the top stringer, I just wasn't in the mood for all that measuring. And actually, it worked out pretty well. I only need to make a couple of cuts per sheet and section in. I did notice two things while I was doing the sheeting. First, although the lower sheet fit pretty well, I noticed I had a very minor gap (about the size of the thickness of a #11 hobby knife blade), where the sheeting met the top of the stab. I really didn't want to use any balsa filler on this joint. So a little Elmers in the gab and add a little balsa dust. I have used this procedure before and it worked pretty good. The glue will bond the balsa dust to the sheeting and the sheeting on top of the stab the same way two pieces of wood are joined. It makes a nice joint and...it's very sandable. I did however use balsa filler at the top of the sheeting were it meets the sheeting on the fin. The second thing I noticed is, I inadvertently created a couple of indentations in the fin sheeting from the clamps I used to straighten the fin post. Damn!! Guess I will just have to use a little filler in those spots. NOTE TO SELF. Protect that wet balsa sheeting. Doah!
20161024_155439.jpg 20161024_163030.jpg
Once the filler had cured and the glue had set along with the glue on the turtle deck sheeting, I did a very quick sand job on what I had glued in today. I will have to go back and do a final sand on everything, but I will wait to do that when the entire airframe and wings are completely built. All the joints did come out looking pretty good. Of course once I do the final sanding on the plane, everything will look a ton better.
20161024_191214.jpg
20161024_191941.jpg
20161024_192003.jpg

I also noticed I had a very tiny shallow spot in the sheeting on the side of the turtle deck. Why, I do not know... maybe I used too much pressure when taping down the sheets while they were setting up. When I do the final sanding I will also have to "feather" in the very aft part of the turtle deck sheeting where it terminates at the trailing edge of the fin post. Otherwise it will be too wide for the rear of the plane and it will just look ridiculous once the rudder is on. But all things being considered, extending the stringers all the way wasn't all that bad. I am pleased still, so I guess I will continue with the build. LOL

I am going to "try" to get the right side of the turtle deck sheeting done tomorrow.
 

stangflyer

I like 'em "BIG"!
You can build for me anytime!!

No doubt! Beautiful work and really, really fast!! Very much enjoying watching this go together!
Thanks guys... I appreciate the supportive comments. Truthfully this Pitts has been like a drug. I can't seem to pull myself away from it. I'm enjoying doing this build as I'm starting to realize, there is still a little magic remaining in these hands. I keep remembering little things that I used to do when building years ago. Ok, so I didn't have then and certainly do not have now all the special state of the art latest, greatest and fanciest of hand tools. I guess I improvise when I get to a point that what I got ain't workin'! 4" squeegee used for spreading balsa filler also is awesome sandwiched inside 400 grit sandpaper. That transition to get a nice smooth radius between the fin and fuse side now becomes very easy to achieve. I'd forgotten how much I love to build.

Got my coffee and already have sanding dust in my hands. Guess I better get back to working on the 3w packin' Pitts!
 

stangflyer

I like 'em "BIG"!
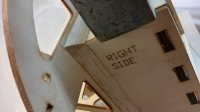
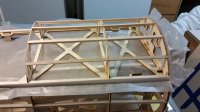
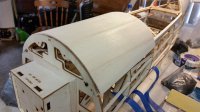
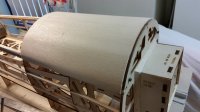
I decided to change things up a bit today. I've been wanting to get the canopy/hatch area sheeted so that is what I attacked this morning. I'm a little concerned about that particular area. According to the manual, what I am seeing with the eye and from photos of @Wacobipe and @Maxwell1945 Pitts, I am not sure the canopy sheeting and the fuse sheeting are going to match up to the same height. The Formers of F1, F2 and F3 seem to be larger in diameter than what they should be. Or maybe I am just not understanding. Kevin or Al, can you help me out? It would seem the sheeting on the canopy/hatch should only come down to meet flush and level with the top fuse longeron. But there seems to be a cut out right at the very top of F1, F2 and F3 that meets level with the top fuse longeron. Then sheeting all the way around the fuse from the top longeron to the bottom of the fuse. Hence, the sheeting on the fuse and the sheeting on the canopy/hatch should meet as a "seem" like all other canopy's. But they won't at this rate. The sheeting on the fuse will overlap the sheeting on the canopy/hatch by the thickness of 3/32" on both sides of the hatch. Have I missed something here?

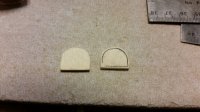
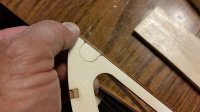
While I am trying to figure this out, I went forward with the sheeting process. First however, I decided to allow for a different than designed hatch attachment system. There are three per side locations for canopy/hatch screws to go in. I really don't like this idea much. So I decided to make some small plates and insert them into the cut outs in the front former of the canopy. I chose also to add doubler plates to the back of those as I will be using a dowel system in the front of the canopy like all other canopies. I've tossed around the idea of only using two attachment screws at the back of the canopy and then using magnets in the center of the canopy like Brett did. But I am ok with using four screws. Besides, I have some really awesome Secraft canopy attachment locks that are sitting with no home. I use them on everything else and really like them. So, no part should be without a home. They will get used on the Pitts.

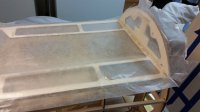
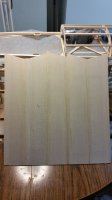
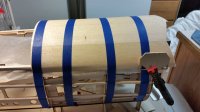
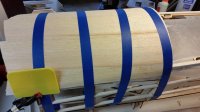
After I made up my plates and doublers for the canopy dowels, I made up a complete skin for the top of the canopy/hatch. I really don't think I do anything differently than others do. Test fit the sides of all the pieces intended on being used, sand if necessary...marry together with tape, open like a book binding, insert glue...close and wipe off the excess glue. Add a strip of tape on the opposite side and let off the side to cure. Once the skin was dry enough to handle, I laid a bead of glue on all the stringers and formers of the canopy/hatch and started with one side of my skin. Laying it on very carefully to insure I didn't get it off centered. Grab the handy dandy water bottle with the spray nozzle on it and doused that balsa sheet good. Continuing to fold the sheet/skin all the way over the top of the canopy until I met up with the other side of the fuse. Once I had a good idea of where it needed to terminate to be the same as the side I started, I traced a line from F1 to F3 and cut the excess skin off. Now laying it also over where it needed to be, added tape all across the top to hold it in place while the glue set and the water evaporated. I also added my bags of weights to the top of the balsa sheeting to keep it tight against the formers of the canopy. A couple hours later, removed the tape and canopy from the main fuse structure. I flush cut the sheeting with the front of F1 and the rear of F3, gave it a quick once over sanding and put it back on the fuse. Yes, looks pretty good.

I'll wait to hear from Jtec before I proceed further with the canopy or the fuse sheeting. I need to get the cabane strut doublers installed along with the blind nuts to attach the struts. So I still have a bit of construction to complete before I can even take the fuse off the jig to finish up the bottom.

Tomorrow, I will probably finish up the right side of the turtle deck and get it sheeted. Heck, I may even decide to do it later this afternoon. But for now, taking a break to relax.

Oh yeah, almost forgot. I temporarily used 6/32 bolts in the front of the canopy/hatch to hold it in place while I did the sheeting. I also protected that wet balsa sheeting at the front of the hatch to keep from causing myself more grief from indentations left by the clamps. LOL
20161025_103828.jpg 20161025_104315.jpg 20161025_105438.jpg 20161025_105506.jpg 20161025_115852.jpg 20161025_115932.jpg 20161025_120121.jpg 20161025_120139.jpg 20161025_121303.jpg 20161025_121310.jpg 20161025_121415.jpg 20161025_121426.jpg 20161025_121431.jpg 20161025_121739.jpg 20161025_124234.jpg 20161025_124325.jpg 20161025_152722.jpg 20161025_152744.jpg
 
Top