You are using an out of date browser. It may not display this or other websites correctly.
You should upgrade or use an alternative browser.
You should upgrade or use an alternative browser.
NEW Twisted Hobbys 39" Crack Yak WOW
- Thread starter AKfreak
- Start date
AKfreak
150cc

OK, here we go on the build. First off with Twisted Hobby's planes, you need to flex the control surfaces and weigh them down for a couple of days. This is so the servo does not have to fight too much resistance (memory of the foam). As a matter of fact, if you don't do it, it can and will burn up your servos. Also it will be hard to achieve full and equal deflections on the control surfaces. Really guys, it seems like a silly step, but its very important.
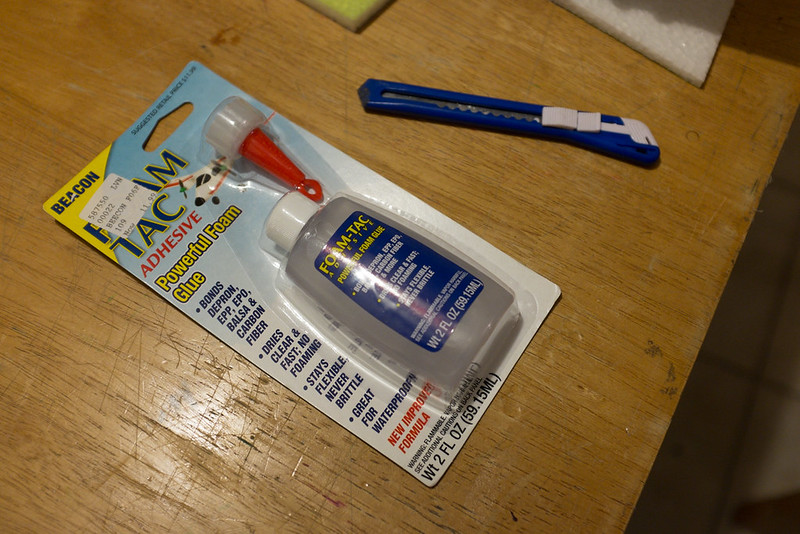
Also before you get started, inventory all your parts, and make sure you have all your supply's. Also very important, you need to have the right glue. Many foam builders swear by welders, but I don't. I swear by Beacon Foam Tac. Welders is ok, but over time it turns yellow, and cracks at the joints, Foam Tac will not do this. You can use Foam Tac exactly as you would welders. You can make hinges with it, use it like contact cement and it's super strong. It works on all foams, wood, and carbon fiber and I just love it.
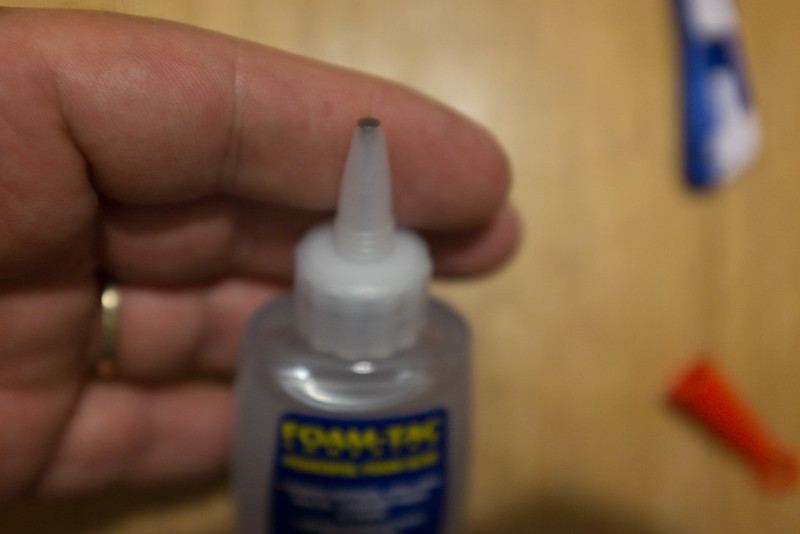
Here is a tip when using Foam Tac, find yourself a little flat head nail. Use the nail to keep the tip clear, by placing the nail in the tip after every use. Also keep the cap on when not in use. If you use the nail, and wipe the tip clean with a paper town after every use, the tip will not gum up and you will be able to use all of the glue in the bottle without any effort at all. At $12 a bottle, you don't want to waste this stuff.
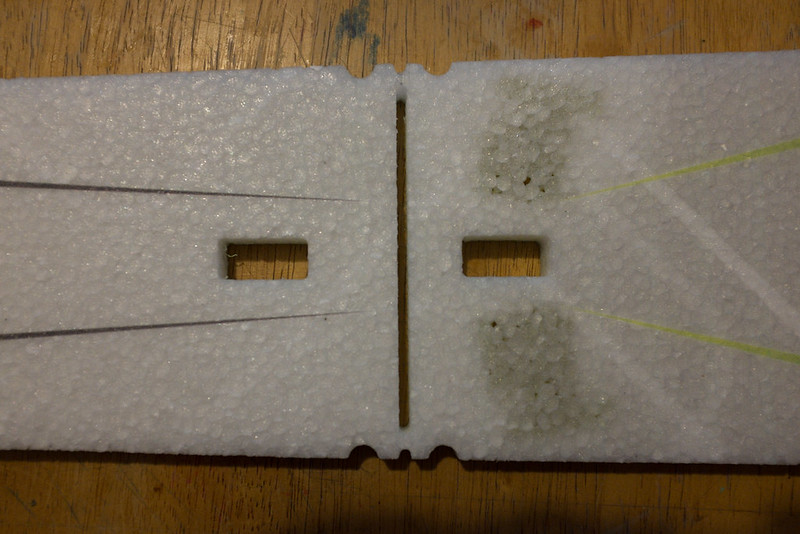
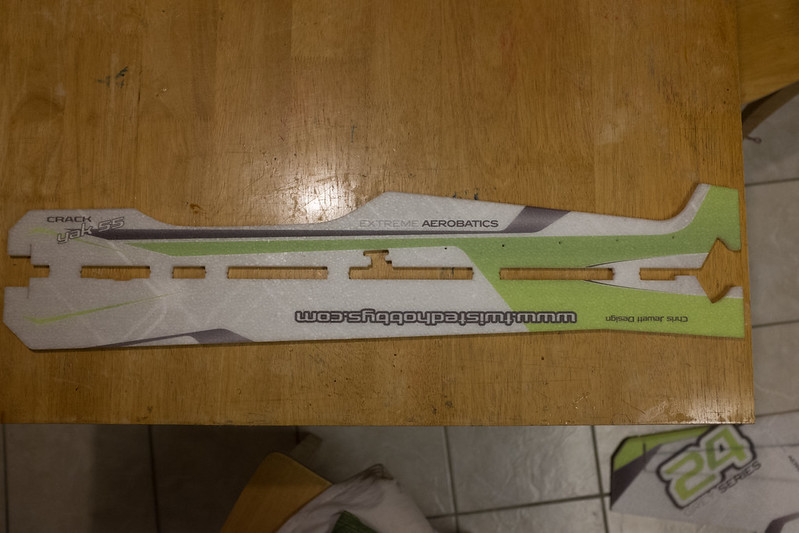
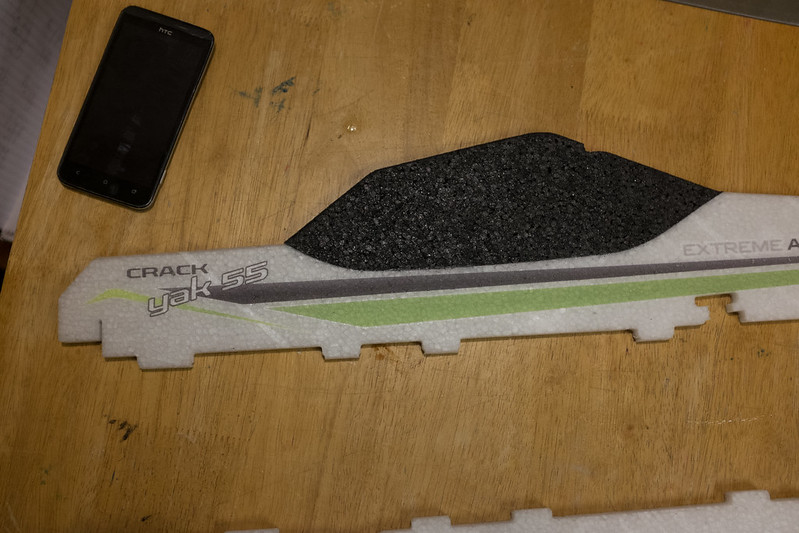
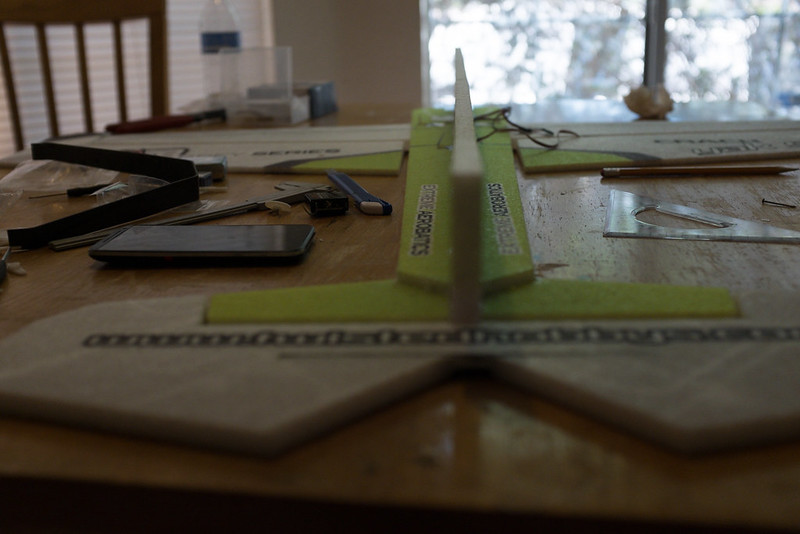
Also I want to say, this particular 39" Crack Yak is very new to Twisted, it doesn't come with a set of instructions. They offer a PDF on the website, however it's different than this plane. The PDF is for the older set of 39" planes Twisted sells. With that said, first thing you need to do is grab the horizontal fuse section. Notice there are two servo pocket on this fuse section, they need to face down. The wings will go on backwards so be careful to identify the top from the bottom, again the servo pockets are what I used to tell the top from the bottom.
Also you will notice that the two tabs on the wing root do not line up with the two cut outs on the horizontal fuse. This is because you need to remove the little tabs in that slot, and glue and in the wooden spar (the thin wood strip that's about 8" long and 1/16 think). But don't glue anything just yet.
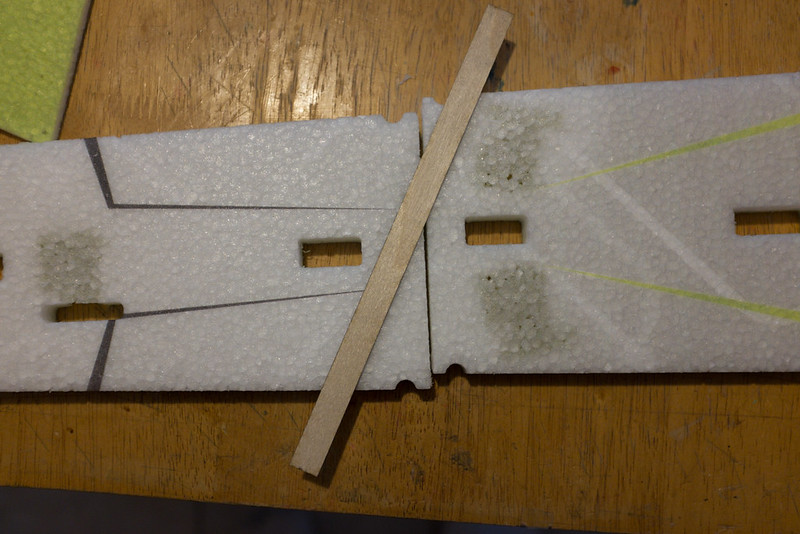
When the tabs are removed the two sections of the fuse will be flush with each other, and the wings tabs will fit perfectly.
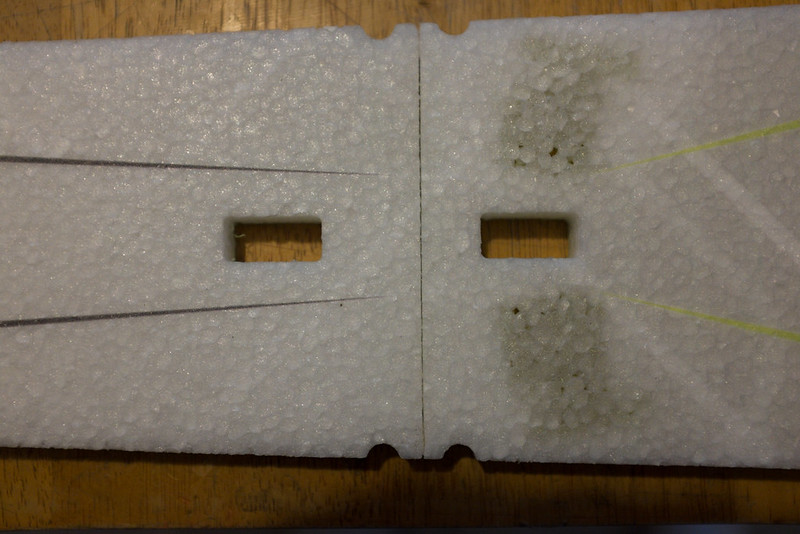
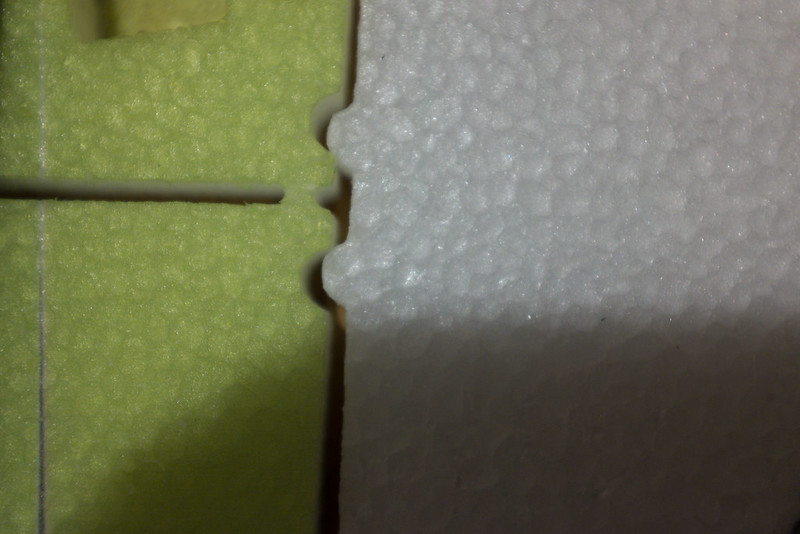
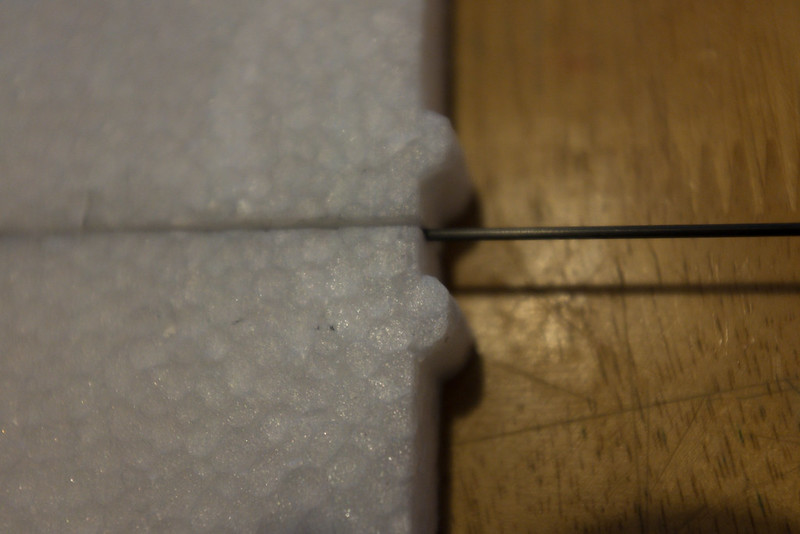
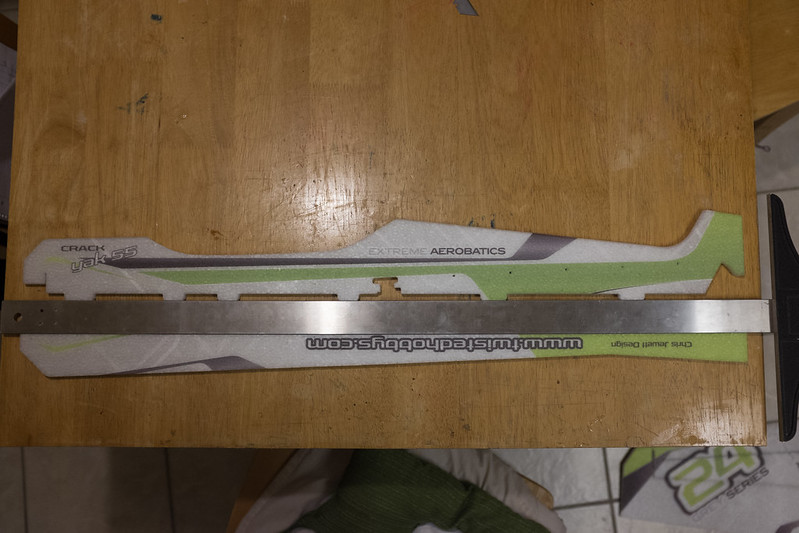
In this picture the fuse is now ready to be lined up with the wings, and the wings cut to hold the overlap in length of the wooden spar.
Here you can see that the wooden spar needs to be sandwiched between the horizontal fuse sections. It also illustrates that the wings need to have a slot cut into them to hold the wooden spar.
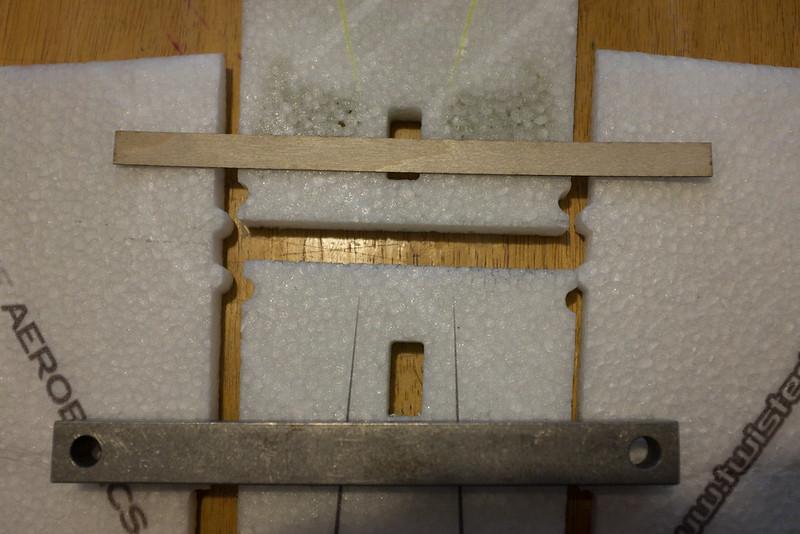
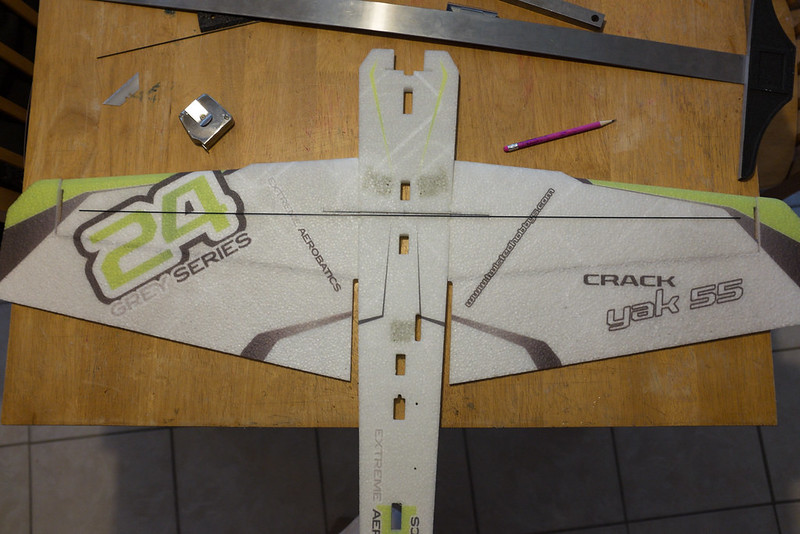
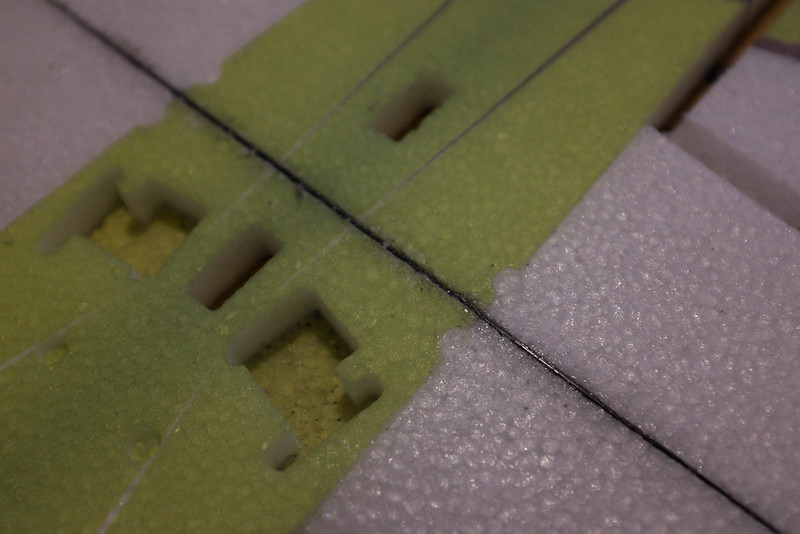
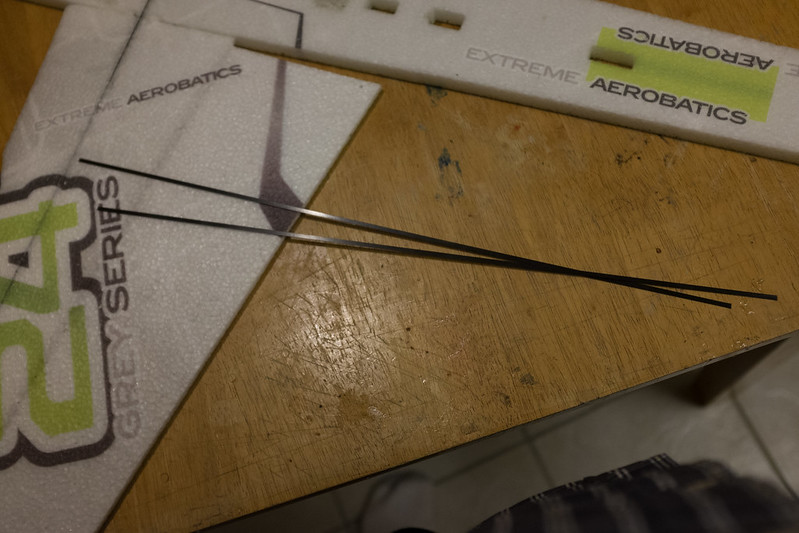
Here the spar has been cut into the wing roots, and we are ready to finish installing the top and bottom carbon fiber spars. You see the main wing has a three piece spar. One wooden strip that spans the front and back section of the horizontal fuse, and the left and right wing root. Then a top and bottom carbon rod that lays on top of the wooden strip, and spans most of the wing.
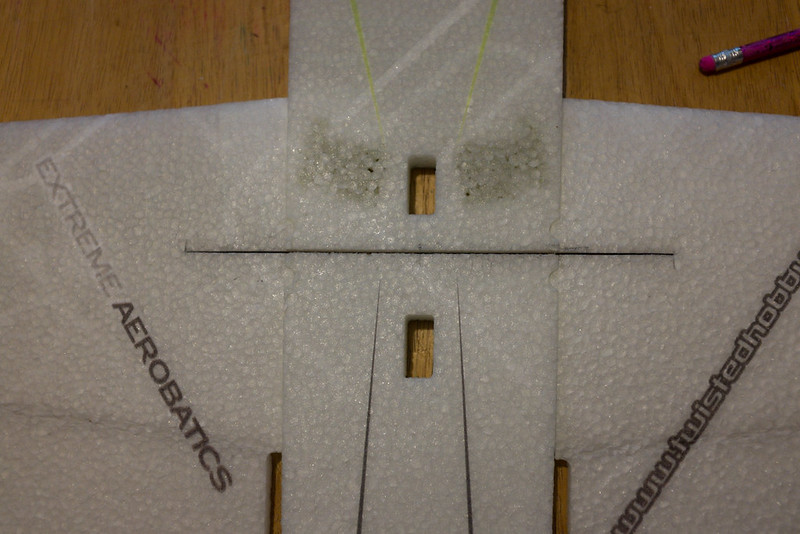
Now you can see how all the parts fit together, but we still need to layout and cut slots for the top and bottom carbon main spars.
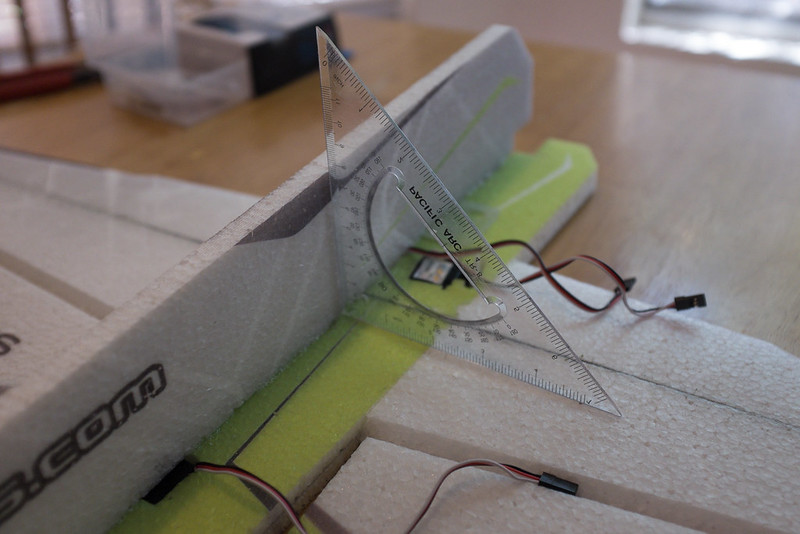
First thing you want to do is lay the carbon fiber spar across the wing, and make sure its centered.
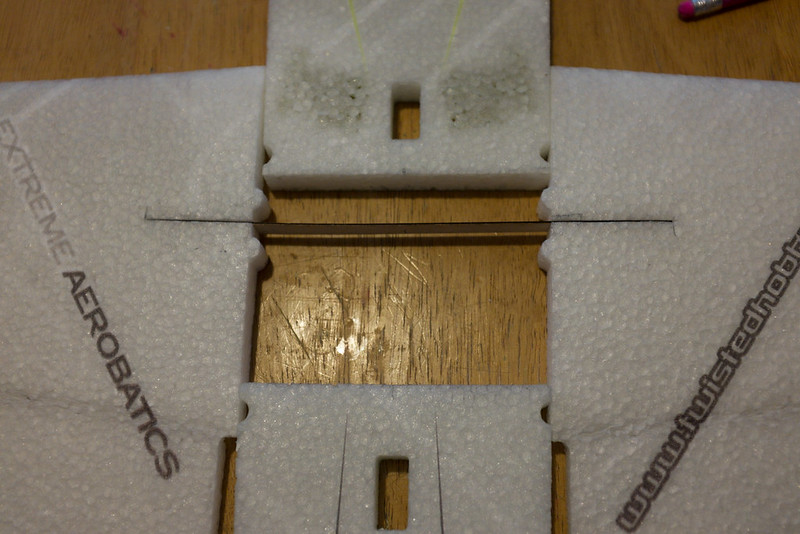
to insure the caron spar was centered, I use a tape measure to insure a equal distance from the edge of the carbon rod to the edge of the aileron on each side. Then I made a light pencil mark at the edge of the carbon rod so I knew where to stop the recess cut for the top spar.
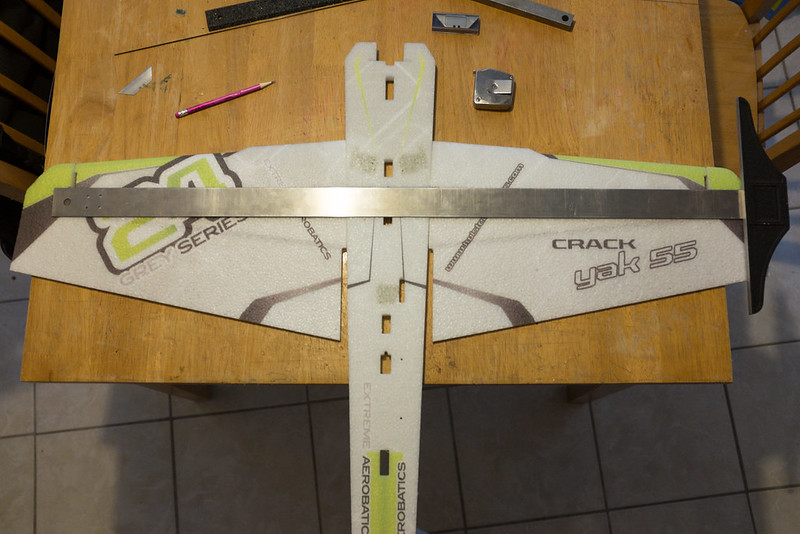
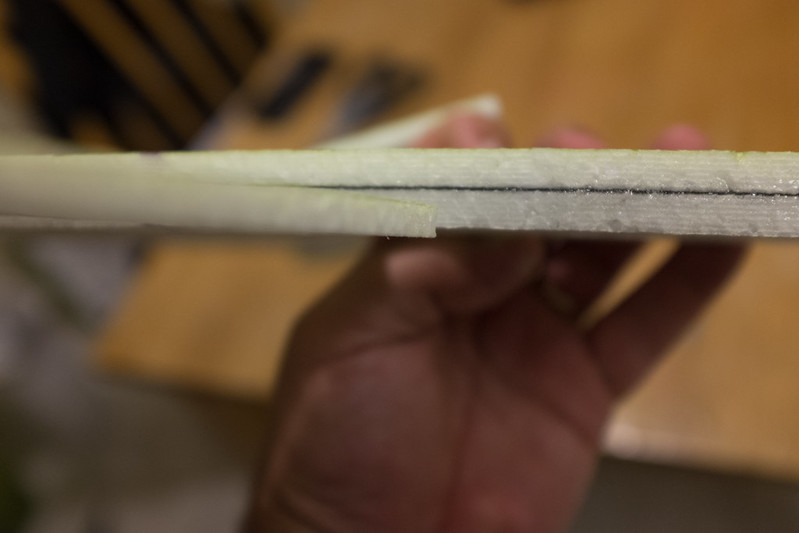
Next you want to lay a long straight edge directly across the wooden spar. Remember the carbon spar will lay on top of the edge of the wood spar. The carbon spar will push down on top of the wooden spar so that the carbon rod is flush with the surface of the horizontal fuse. it sounds tricky, but its easy.
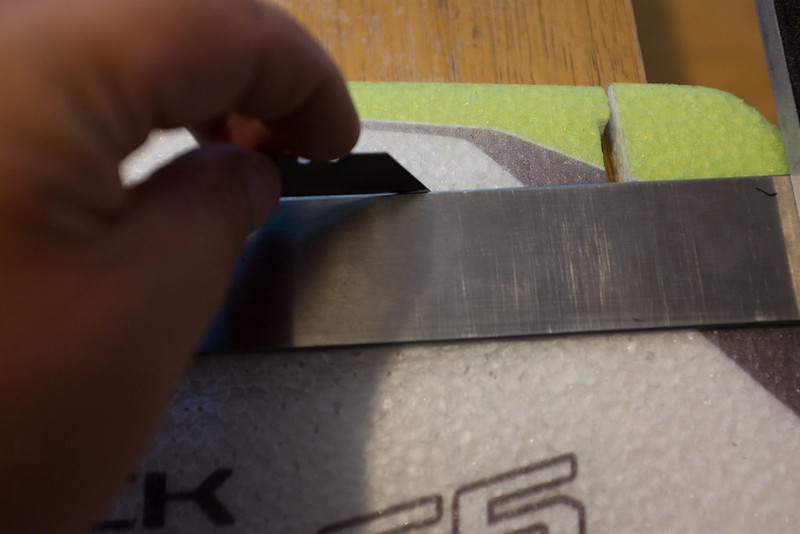
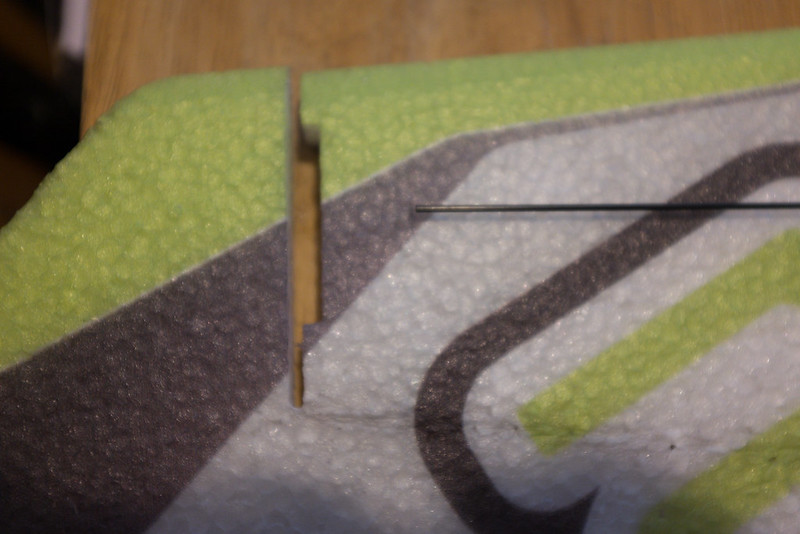
Next, make your slot cut just deep enough to hold glue, and the carbon rod. But remember, don't glue anything until you layup and cut the carbon rod on the bottom side. You need to be able to take everything apart to make all your cuts, then glue everything at once.
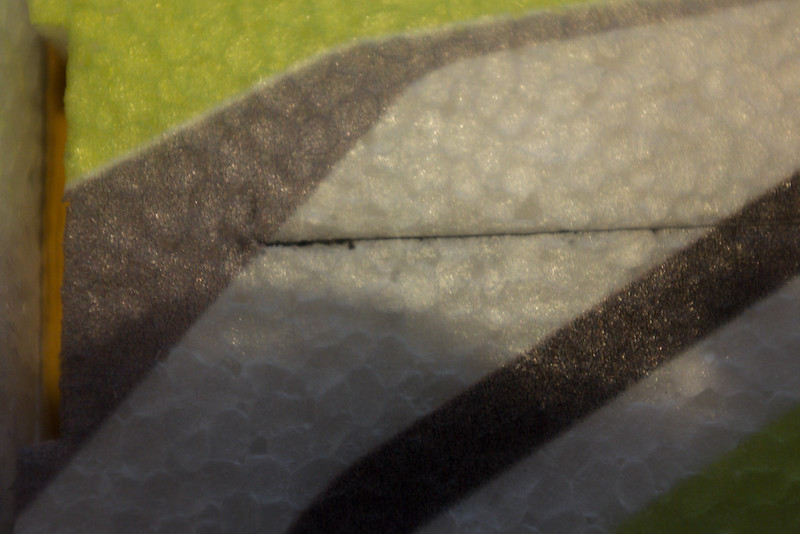
Here you see the depth of the cut, but again I have not glued anything yet.
Above is the top side of the fuse and wing, with the carbon rod cut and fitted.
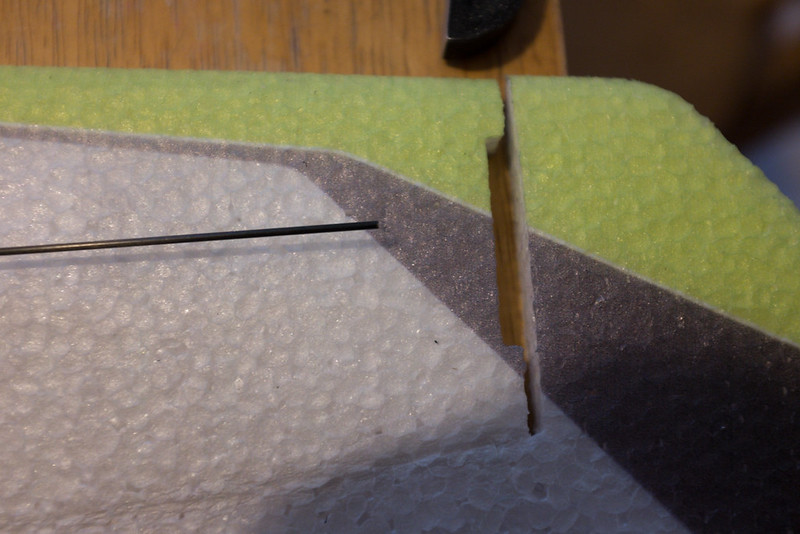
Now flip everything over and do the same exact thing as before, except this will be the bottom side.
At this time, take everything apart, and put glue on both sides of every joint, also the front and back of the wooden spar, and in the slits of the top and bottom slots where the carbon spars go. If you are worried about glue getting on your work surface, cover the surface with wax paper.
Working with Foam Tac is really easy. You wet up all surfaces, press them together tightly, then pull them back apart. Then you let things sit for 2-3 mins, and the glue will tack up and become almost dry to the touch. At this point, press all your parts together and they will bond very well (its like contact cement).
A Tip On Foam Tac: don't wait until the glue is completely dry to assemble your parts. I say this because you will not be able to shift any of the parts around. This stuff sticks extremely well, heck, its the best glue I have ever used for foam, especially EPP. I even recommend you find some foam pieces and do some testing, specifically if you have never used welders. Ill say it again, if you let this stuff get to dry, you wont be able to shift anything, it will grab and stick as soon as the two glued surfaces touch. Welders does this too, and this over explanation is for the folks who have never used this kind of glue before.
Here is a video for spar install tips.
[video=youtube_share;RqBiEKk3l4I]http://youtu.be/RqBiEKk3l4I[/video]
Here is a video tip for proper wing alignment.
[video=youtube_share;QqKMh5VVtOw]http://youtu.be/QqKMh5VVtOw[/video]
AKfreak
150cc
Moving on, we need to prepare the bottom of the horizontal Fuse to accept the landing gear. This leads us to prep la landing gear plate that's made of G10, which mounts to the bottom of the horizontal fuse.
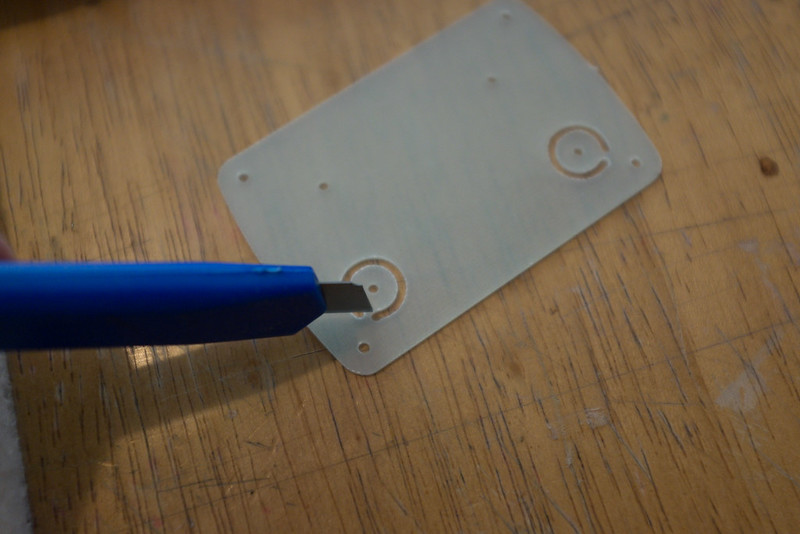
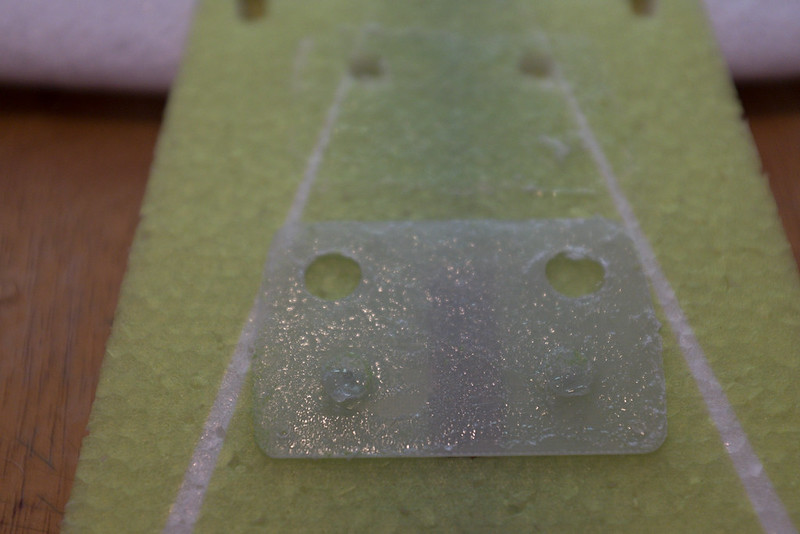
Remove the two little disks, they ill serve as doublers and need to be CA glued to the bottom of the G10 plate. They beef up the plate and eventually accept the two screws that mount the carbon fiber landing gear at a later stage of the build. The doublers also serve to locate the plate on the bottom of the horizontal fuse.
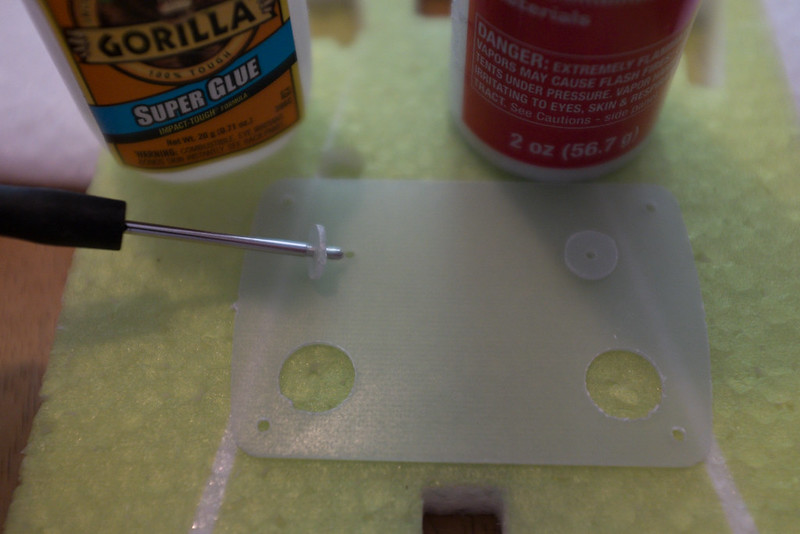
Once you get the doublers cut out, they need to be glued down, yet aligned with the two holes as shown in the images above. You need to use some sort of pin to hold the doublers when you glue them. Its kind of a pain in the neck, but its one of the only times you have to use CA on this entire build.
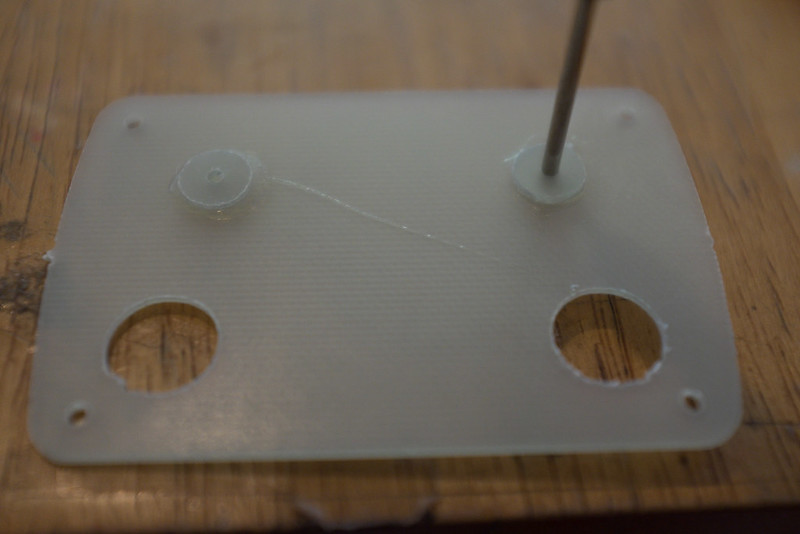
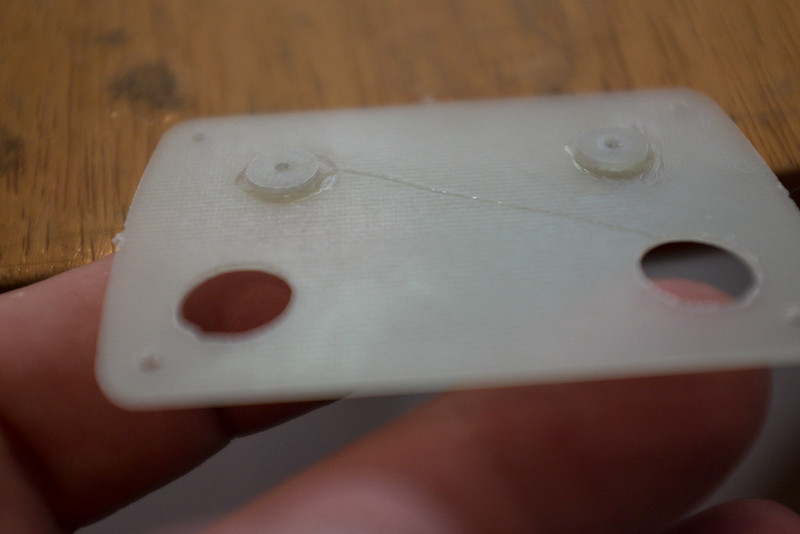
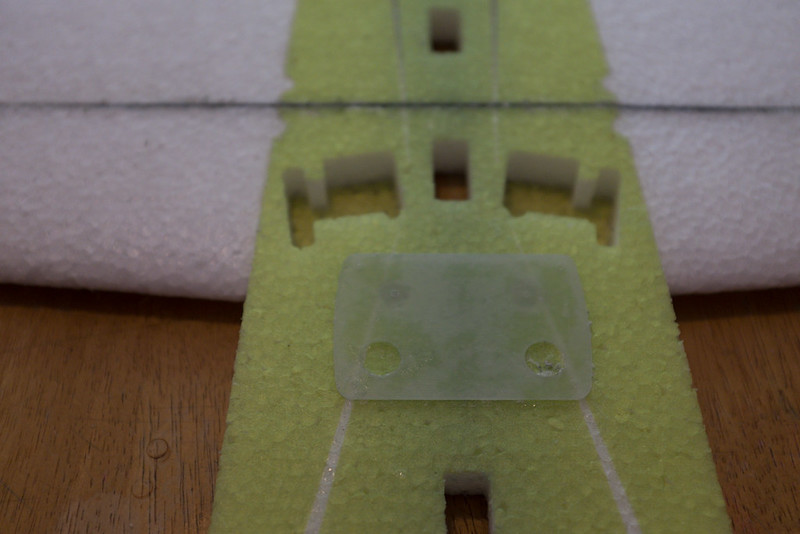
Once they are glued into place, they will look like this. Remeber the doublers serve to align the G10 plate ion the bottom of the fuse.

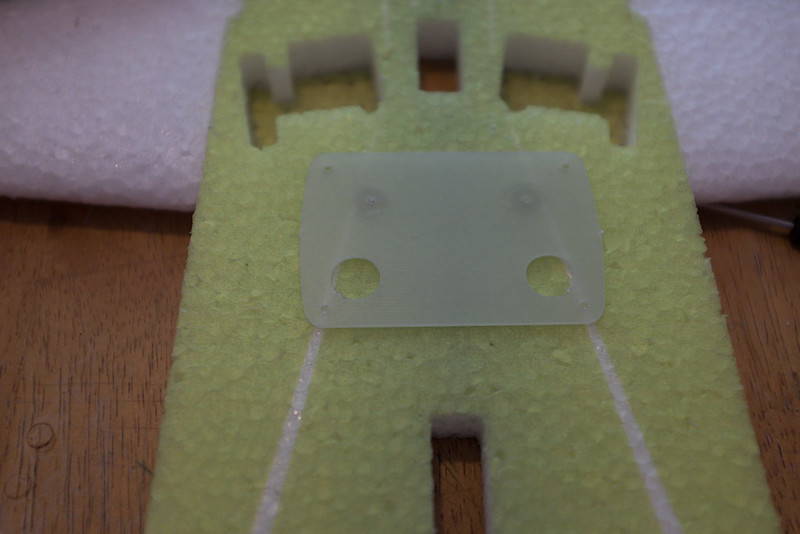
Next find the little recessed holes in the horizontal fuse, and flip your G10 plate over so it will just drop into place (just a test fit) on the fuse.

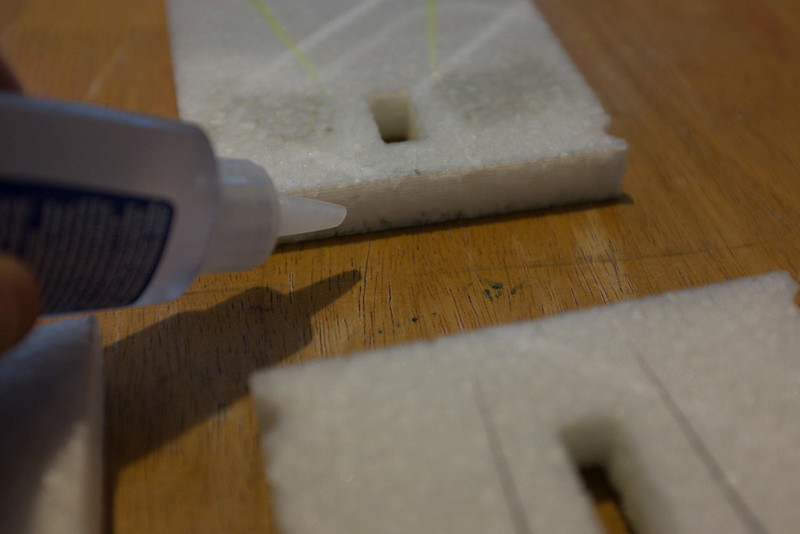
Now its time for Foam-Tac, be liberal in this case. You see you can coat both surfaces, or coat one side heavy and press it in place to get it on the mating surface. You see there are several tricks to working with this kind of glue.
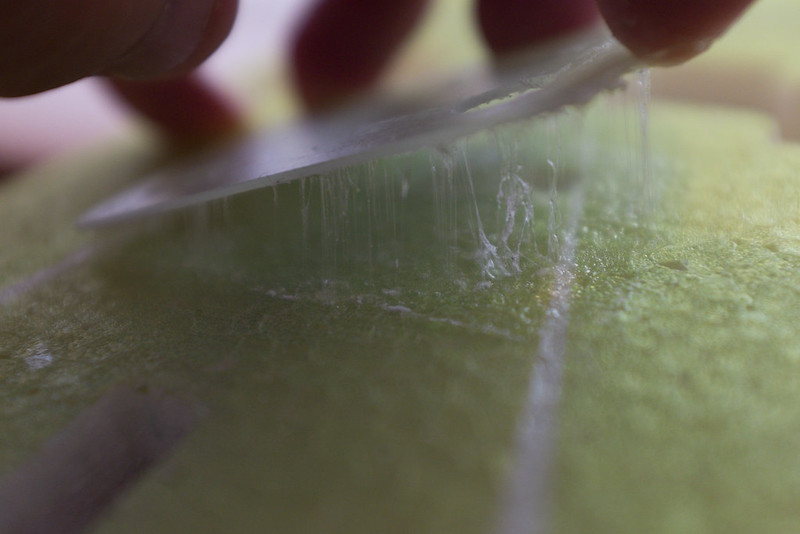
One trick is to press fit the glued surface, and then pull it apart. You will see a messy spider web like this when done correctly.
Once you pull it apart, let it sit for a few mins (2 to 3 mins max). Then once both sides are dry to the touch (like contact cement) press both surfaces together and you have a rock solid joint.
This is what the landing gear plate will look like when its glued down in the correct position. I know, I know, what a lot of description for doing such a small task. I did this so in later portions of the build, I wont have to describe the, "contact cement" method in so much detail. Also remember that plate has to hold tight the carbon fiber landing gear, it's a informational element and needs to be strong. Lets move on.
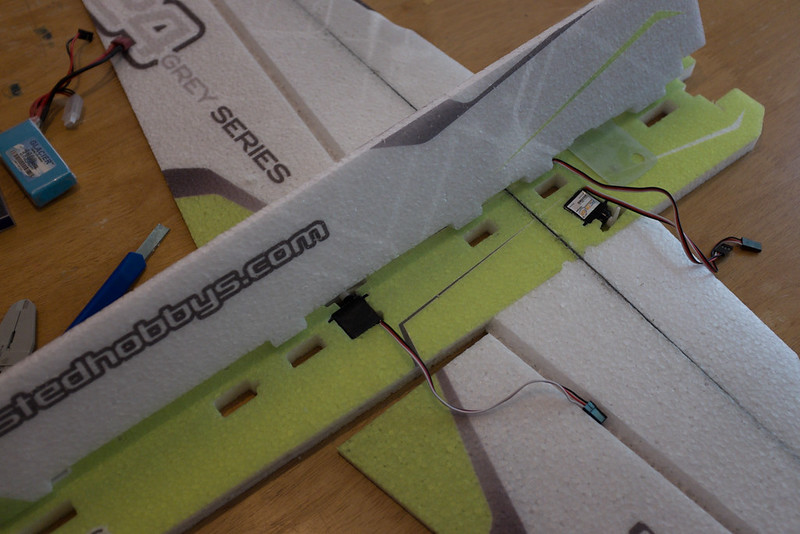
Now we need to start fitting the servos. If you haven't already, you need to get your RX ready and set up a model memory for this plane. We need to center our servos, and define a right from a left. Be sure to remember you are working upside down, so right is left. We need to center the servos with the radio and have RX powered up so we can put the servo arms at as close to 90° as possible. I like to use as close to Zero sub trim as possible when building. However, when you flip servos 180° from each other (left and right servos both facing forward) , you will have to use sub trim to set one of the arms at 90° (my case was right 64).
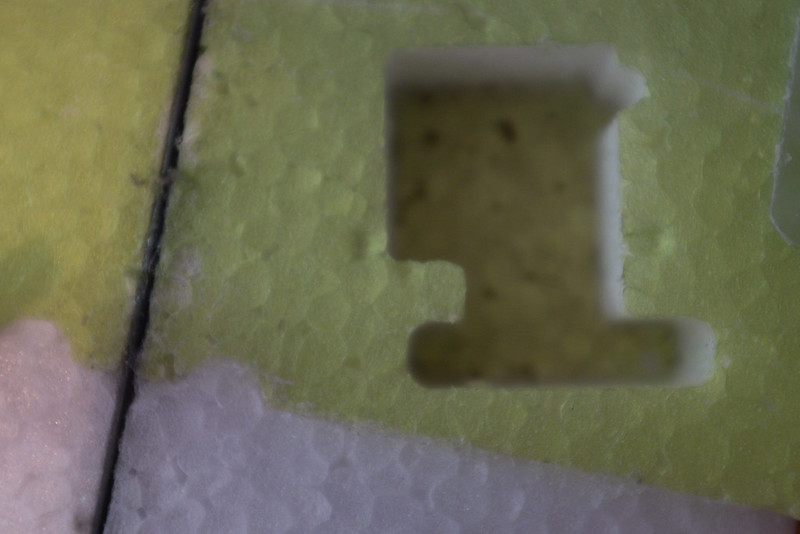
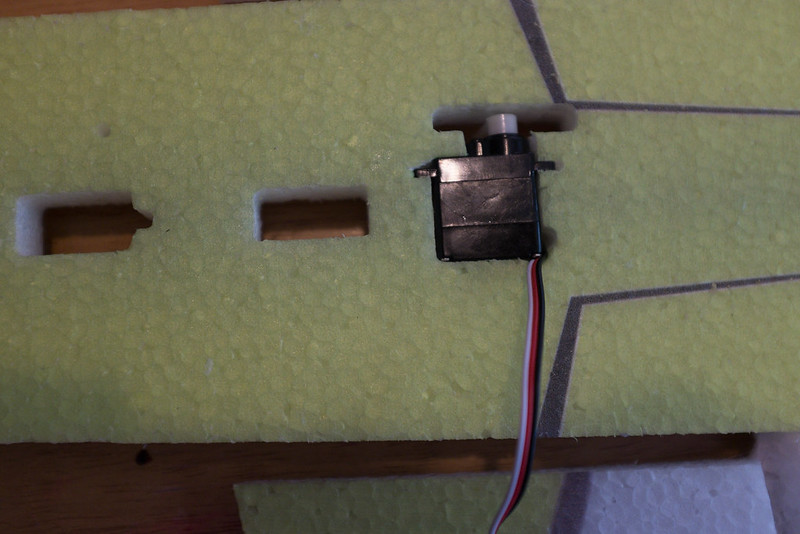
Here you see a servo pocket for one of the the aileron servo. Note there is an orientation, however there are no cutouts for the servo mounting tabs.
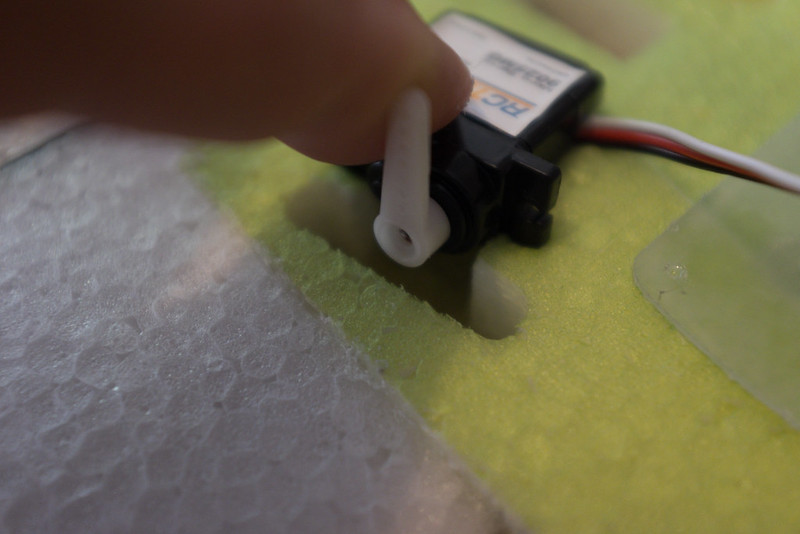
I find if you are careful and press down on the servo with it aligned over the servo cutout, it will make little indentions that will serve as a guide to cut the tab slots with a sharp razor blade/knife.
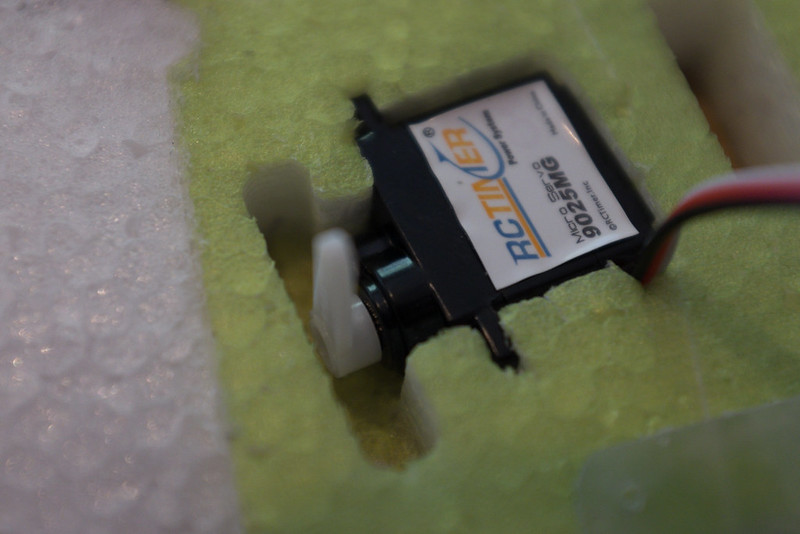
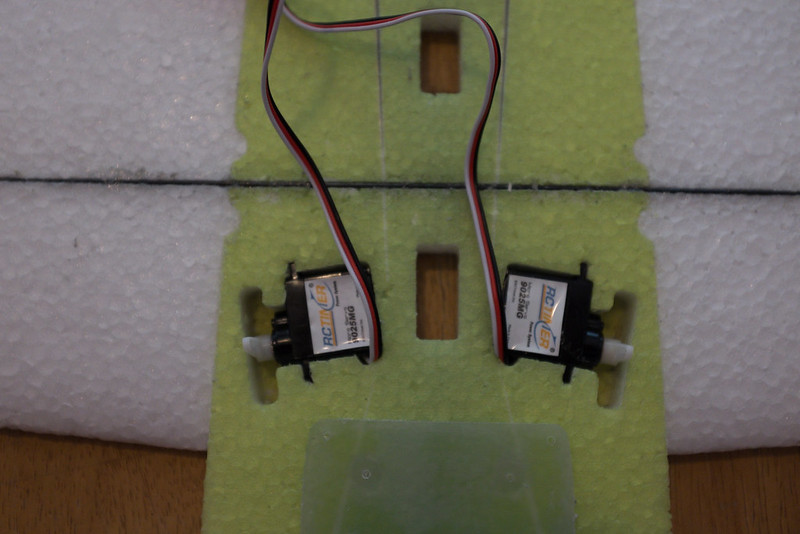
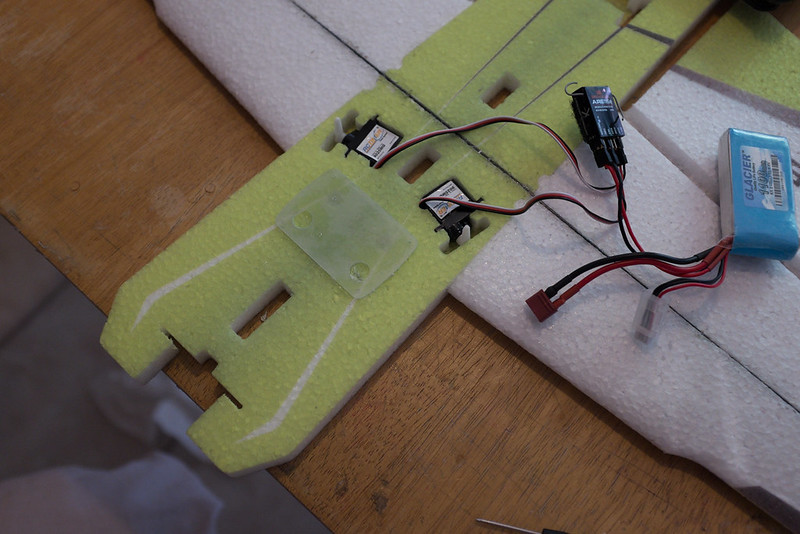
Its pretty easy to make the tab slots, and this is what it should look like when you are done. Remember to set them up with the Radio and the RX powered and with everything working (arms at 90°). Note, do not glue the servos in place until the very end of the build (we will use low temp hot glue to hold them in place, but not just yet).
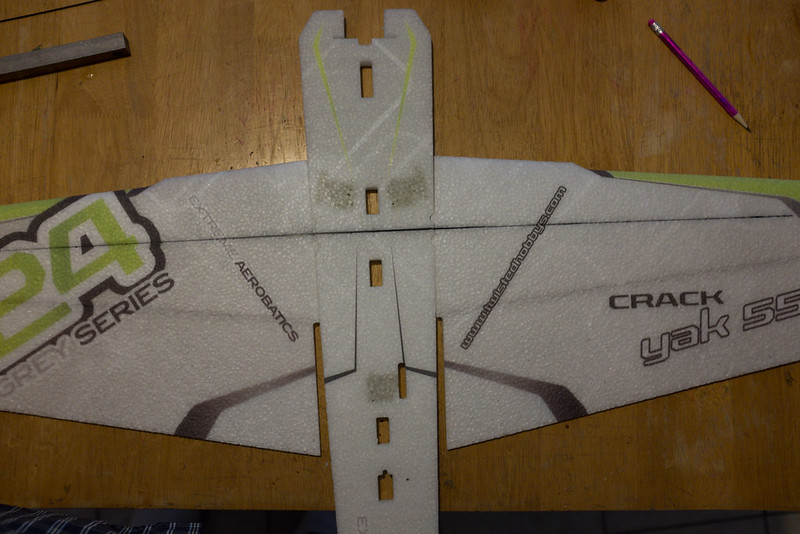
Next step, is to attach the elevator. Be careful, and do not glue it on wrong, because its much thinner than the horizontal fuselage, and need to be glued flush to the top of the horizontal fuselage (not the bottom as shown above).
The above image is wrong, and you would know whats wrong until much later after the glue has dried. (its a simple mistake)
This is what it looks like when you try to mate the bottom vertical fuse, if you have attached the elevator/horizontal stabilizer wrong. You will have a huge gap, and the fuse section will not sit flat.
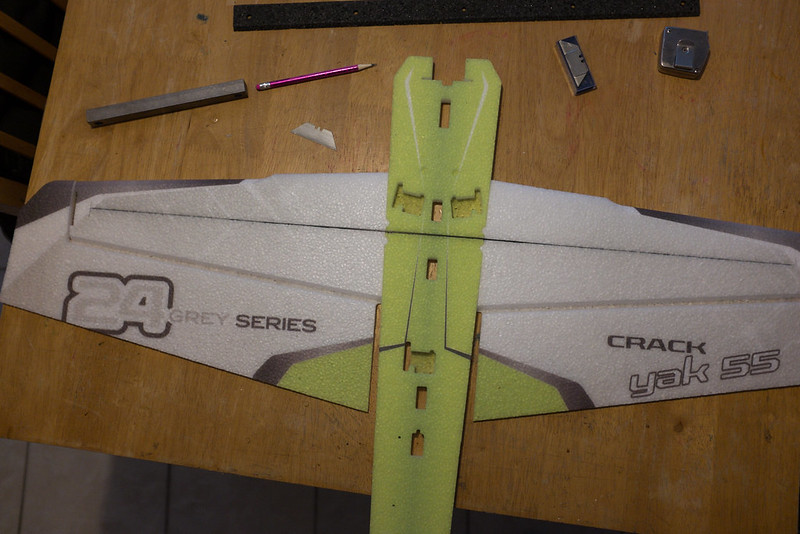
This is correct, the elevator is flush to the top of the horizontal fuse and life if good. Use a tape measure and measure the corner of the elevator to the corner of the outside wing tip. Then do the same on the other side of the elevator and other wind tip corner. When both measurements are the same, the elevator is properly aligned, and ready to be glued into place. Use the Contact Cement method with Foam-Tac.
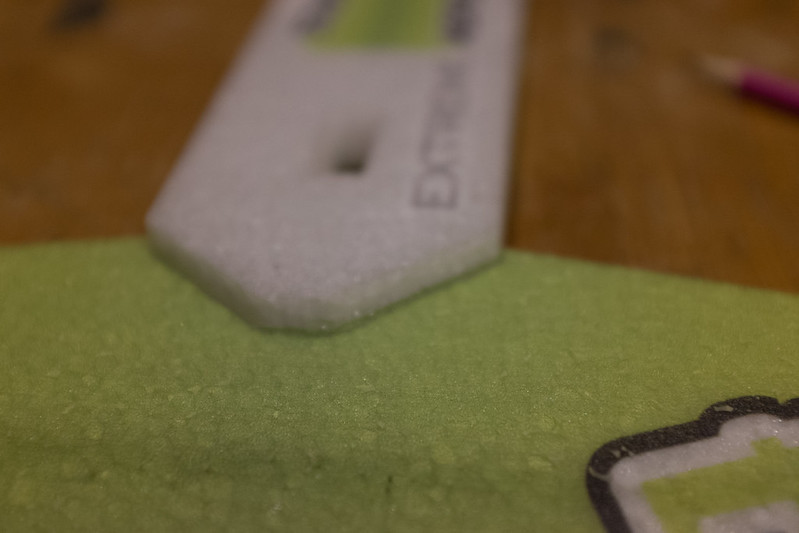
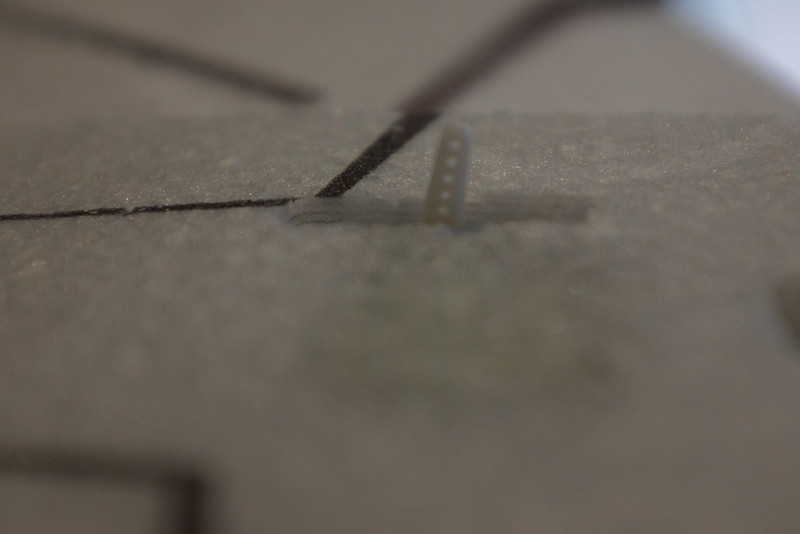
In your kit, you will find some carbn fiber flat stock. This cf stock is to be embedded front to back of the horizontal fuselage as a stiffener.
If you look close at the edge of the horizontal fuse, you will find a slot started for you. Just take a #11 blade, and open the slot more. Make it just deep enough to hold the CF strip flush to the outside of the fuse. Do a test fit, and then pull out the strip back out. Next put the tip of the Foam-Tac in the slot, and squeeze some glue in down the length of slot. This time do not wait for the glue to dry, put the CF strip in the slot. Now, let the Foam-Tac dry to the touch, and pinch the seam closed. That slot will all but disappear. Better yet, the horizontal fuse is now stiff.
https://farm6.staticflickr.com/5558/15080290855_9b964d6a7f_c.jpg[
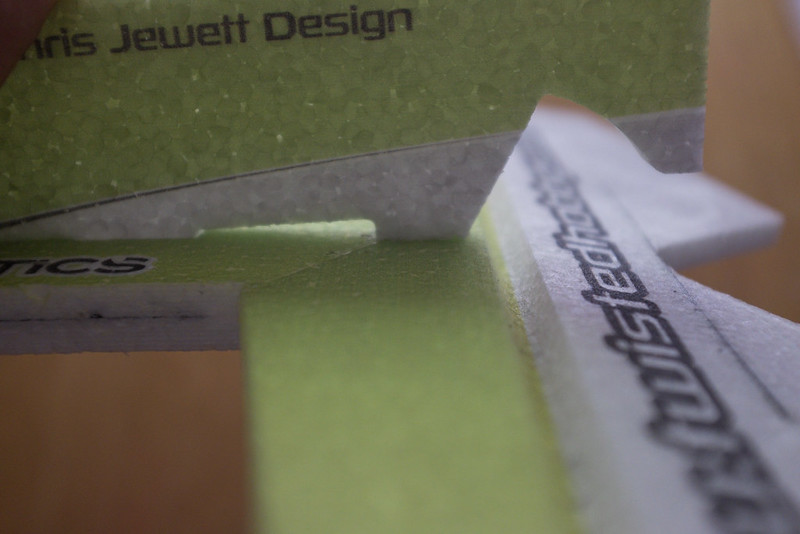
Now its time to split the vertical fuselage (vert fuse) section, and glue in place the canopy. Take note that the vert fuse has little radius cutouts (sideways mouse houses in the bottom image above) they will help you align your straight edge. This is where you want to cut the fuse.
[img]https://farm4.staticflickr.com/3841/15079929252_0d57201256_c.jpg
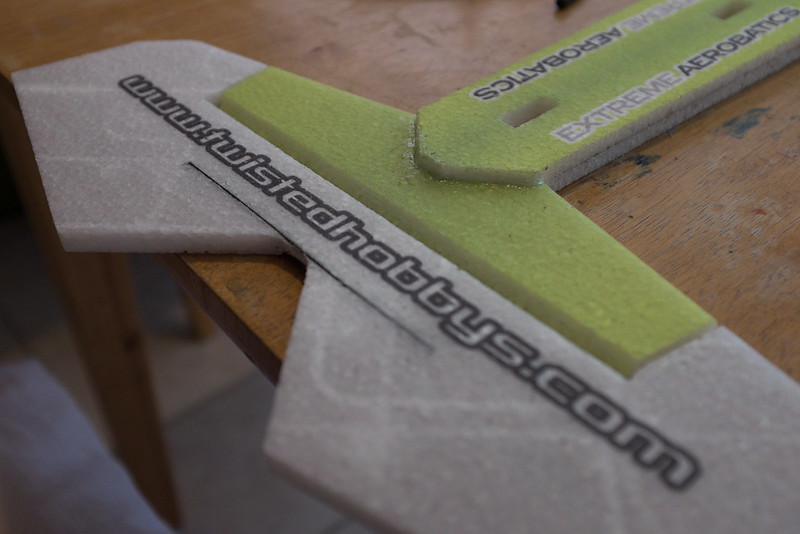
With the vert fuse now divided, its time to glue on the canopy. Note the little notch faces to the rear, this notch is for the cantilever (fin), and will be installed later. Use the, "contact cement" method to attach the canopy.
Now we need to install the elevator servo in preparation to glue on the lower vert fuse half. Do the same thing as before, by marking and cutting your servo tab slots, then set up the elevator servo arm with the Radio and RX so it's 90° to the horizontal fuse section. If you wait and not install this servo now, and or to set up the arm in the right location, it will be a bear later down the road. Do it now and do it right")

Now it's time to install the lower vert fuse. When you glue this time, be sure to closely inspect and glue all mating surfaces. Glue the horizontal fuse, and the lower vert fuse separately, get it in all of the key way rectangle holes. Now press fit all of the wet glue surfaces together,fitting them tightly. Let the glue squish out of where it will. Now, quickly remove the lover vert fuse, and inspect that all surfaces have mated, and the glue has spider webbed as before. However, this time do not wait for the glue to dry to the touch. We want to wet fit the parts this time, if any glue is not contacting both surfaces, add a little more, and smear it with your finger.
Now grab your square and fit the wet parts back together again. Really press firmly and seat everything. Any glue that squishes out, just rub a bead on it like you are trying to fix a caulk like. Check and recheck that your lower vert fuse is straight. Use the square in the front, back and middle of the fuse to check squareness.. Stand back and look down the fuse. It's critical that the lower vert fuse not crooked in any way, as this will affect how the plane flys in knife edge.
Well that's iot for now. I will continue as soon as I can. Akf
Now
Remove the two little disks, they ill serve as doublers and need to be CA glued to the bottom of the G10 plate. They beef up the plate and eventually accept the two screws that mount the carbon fiber landing gear at a later stage of the build. The doublers also serve to locate the plate on the bottom of the horizontal fuse.
Once you get the doublers cut out, they need to be glued down, yet aligned with the two holes as shown in the images above. You need to use some sort of pin to hold the doublers when you glue them. Its kind of a pain in the neck, but its one of the only times you have to use CA on this entire build.
Once they are glued into place, they will look like this. Remeber the doublers serve to align the G10 plate ion the bottom of the fuse.
Next find the little recessed holes in the horizontal fuse, and flip your G10 plate over so it will just drop into place (just a test fit) on the fuse.
Now its time for Foam-Tac, be liberal in this case. You see you can coat both surfaces, or coat one side heavy and press it in place to get it on the mating surface. You see there are several tricks to working with this kind of glue.
One trick is to press fit the glued surface, and then pull it apart. You will see a messy spider web like this when done correctly.
Once you pull it apart, let it sit for a few mins (2 to 3 mins max). Then once both sides are dry to the touch (like contact cement) press both surfaces together and you have a rock solid joint.
This is what the landing gear plate will look like when its glued down in the correct position. I know, I know, what a lot of description for doing such a small task. I did this so in later portions of the build, I wont have to describe the, "contact cement" method in so much detail. Also remember that plate has to hold tight the carbon fiber landing gear, it's a informational element and needs to be strong. Lets move on.
Now we need to start fitting the servos. If you haven't already, you need to get your RX ready and set up a model memory for this plane. We need to center our servos, and define a right from a left. Be sure to remember you are working upside down, so right is left. We need to center the servos with the radio and have RX powered up so we can put the servo arms at as close to 90° as possible. I like to use as close to Zero sub trim as possible when building. However, when you flip servos 180° from each other (left and right servos both facing forward) , you will have to use sub trim to set one of the arms at 90° (my case was right 64).
Here you see a servo pocket for one of the the aileron servo. Note there is an orientation, however there are no cutouts for the servo mounting tabs.
I find if you are careful and press down on the servo with it aligned over the servo cutout, it will make little indentions that will serve as a guide to cut the tab slots with a sharp razor blade/knife.
Its pretty easy to make the tab slots, and this is what it should look like when you are done. Remember to set them up with the Radio and the RX powered and with everything working (arms at 90°). Note, do not glue the servos in place until the very end of the build (we will use low temp hot glue to hold them in place, but not just yet).
Next step, is to attach the elevator. Be careful, and do not glue it on wrong, because its much thinner than the horizontal fuselage, and need to be glued flush to the top of the horizontal fuselage (not the bottom as shown above).
The above image is wrong, and you would know whats wrong until much later after the glue has dried. (its a simple mistake)
This is what it looks like when you try to mate the bottom vertical fuse, if you have attached the elevator/horizontal stabilizer wrong. You will have a huge gap, and the fuse section will not sit flat.
This is correct, the elevator is flush to the top of the horizontal fuse and life if good. Use a tape measure and measure the corner of the elevator to the corner of the outside wing tip. Then do the same on the other side of the elevator and other wind tip corner. When both measurements are the same, the elevator is properly aligned, and ready to be glued into place. Use the Contact Cement method with Foam-Tac.
In your kit, you will find some carbn fiber flat stock. This cf stock is to be embedded front to back of the horizontal fuselage as a stiffener.
If you look close at the edge of the horizontal fuse, you will find a slot started for you. Just take a #11 blade, and open the slot more. Make it just deep enough to hold the CF strip flush to the outside of the fuse. Do a test fit, and then pull out the strip back out. Next put the tip of the Foam-Tac in the slot, and squeeze some glue in down the length of slot. This time do not wait for the glue to dry, put the CF strip in the slot. Now, let the Foam-Tac dry to the touch, and pinch the seam closed. That slot will all but disappear. Better yet, the horizontal fuse is now stiff.
https://farm6.staticflickr.com/5558/15080290855_9b964d6a7f_c.jpg[
Now its time to split the vertical fuselage (vert fuse) section, and glue in place the canopy. Take note that the vert fuse has little radius cutouts (sideways mouse houses in the bottom image above) they will help you align your straight edge. This is where you want to cut the fuse.
[img]https://farm4.staticflickr.com/3841/15079929252_0d57201256_c.jpg
With the vert fuse now divided, its time to glue on the canopy. Note the little notch faces to the rear, this notch is for the cantilever (fin), and will be installed later. Use the, "contact cement" method to attach the canopy.
Now we need to install the elevator servo in preparation to glue on the lower vert fuse half. Do the same thing as before, by marking and cutting your servo tab slots, then set up the elevator servo arm with the Radio and RX so it's 90° to the horizontal fuse section. If you wait and not install this servo now, and or to set up the arm in the right location, it will be a bear later down the road. Do it now and do it right
Now it's time to install the lower vert fuse. When you glue this time, be sure to closely inspect and glue all mating surfaces. Glue the horizontal fuse, and the lower vert fuse separately, get it in all of the key way rectangle holes. Now press fit all of the wet glue surfaces together,fitting them tightly. Let the glue squish out of where it will. Now, quickly remove the lover vert fuse, and inspect that all surfaces have mated, and the glue has spider webbed as before. However, this time do not wait for the glue to dry to the touch. We want to wet fit the parts this time, if any glue is not contacting both surfaces, add a little more, and smear it with your finger.
Now grab your square and fit the wet parts back together again. Really press firmly and seat everything. Any glue that squishes out, just rub a bead on it like you are trying to fix a caulk like. Check and recheck that your lower vert fuse is straight. Use the square in the front, back and middle of the fuse to check squareness.. Stand back and look down the fuse. It's critical that the lower vert fuse not crooked in any way, as this will affect how the plane flys in knife edge.
Well that's iot for now. I will continue as soon as I can. Akf
Now
Last edited by a moderator: