You are using an out of date browser. It may not display this or other websites correctly.
You should upgrade or use an alternative browser.
You should upgrade or use an alternative browser.
Scale Pitts S1-T, S1-S, and a Challenger.
- Thread starter acerc
- Start date
WMcNabb
150cc
Sometimes things just bite it big time. I went out this morning to start cutting up the fabric for everything and don't have anywhere enough. I have enough for the tail feathers and bottom wings so unless the order gets here really quick I'll be coming to a stop by end of tomorrow at the latest.
The order is coming from one state up by way of UPS so well see.
I have enough for the bottom wing halves, stab/ele, rudder, and struts.
Insert DON’T LIKE button here!!
So how many yards is required to cover the entire airframe?
Snoopy1
640cc Uber Pimp
You do use the super light fabric the won that is not certified.Sometimes things just bite it big time. I went out this morning to start cutting up the fabric for everything and don't have anywhere enough. I have enough for the tail feathers and bottom wings so unless the order gets here really quick I'll be coming to a stop by end of tomorrow at the latest.
The order is coming from one state up by way of UPS so well see.
acerc
640cc Uber Pimp
Somewhere around four or five, if I had ordered some from the start I would have ordered six. It all depends on how well the individual can cut the pieces without waste and how little one needs extra on lapping.Insert DON’T LIKE button here!!
So how many yards is required to cover the entire airframe?
acerc
640cc Uber Pimp
Yes! The Poly Lite.You do use the super light fabric the won that is not certified.
acerc
640cc Uber Pimp
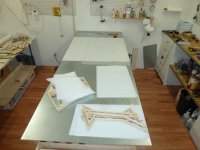
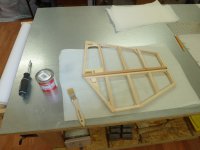
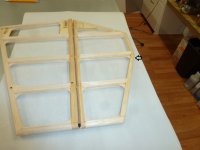
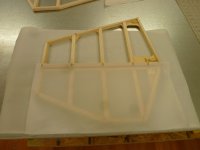
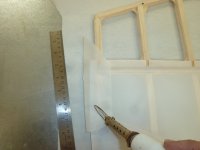
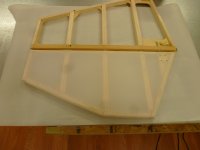
Pic one is the bottom side of the right stab/ele, I am going to cover the ele first. Pick 2, I will brush a coat of adhesive around the perimeter taking care to not slather it on the hinge, some won't hurt it but try to keep it clean, and let it dry. If there is any shiny like noted by the arrow it is not dry. Pic three is the fabric cut to fit closely and notched for the hinges. Pic four is in progress, I like to use a piece of parchment paper as much as possible so less cleaning of the iron is needed. Pic five is the fabric ironed in place. This part is not any different than any iron on method as far as technique. The next part is the more involved part and may have to wait until tomorrow as it requires the use of Poly brush of which I don't want to do inside. And I do not I think I want to get that involved today. Just not feeling it today.
Attachments
Snoopy1
640cc Uber Pimp
Nice like the idea on the parchment paper will have to try that. Looking at the pictures. You have cut in the covering at the hinges so that you cat slip the covering through to the other side when on the other side do glue it all the way around that stick.Pic one is the bottom side of the right stab/ele, I am going to cover the ele first. Pick 2, I will brush a coat of adhesive around the perimeter taking care to not slather it on the hinge, some won't hurt it but try to keep it clean, and let it dry. If there is any shiny like noted by the arrow it is not dry. Pic three is the fabric cut to fit closely and notched for the hinges. Pic four is in progress, I like to use a piece of parchment paper as much as possible so less cleaning of the iron is needed. Pic five is the fabric ironed in place. This part is not any different than any iron on method as far as technique. The next part is the more involved part and may have to wait until tomorrow as it requires the use of Poly brush of which I don't want to do inside. And I do not I think I want to get that involved today. Just not feeling it today.
acerc
640cc Uber Pimp
Just to the top edge then the other side will overlap to the hinge.Nice like the idea on the parchment paper will have to try that. Looking at the pictures. You have cut in the covering at the hinges so that you cat slip the covering through to the other side when on the other side do glue it all the way around that stick.

