• If you are new to GiantScaleNews.com, please register, introduce yourself, and make yourself at home.

    We're 1st in Giant Scale RC because we've got the best membership on the internet! Take a look around and don't forget to register to get all of the benefits of GSN membership!

    Welcome!
  • Unless you are a paid advertiser NO more posting advertisement in the individual vendor forums. You may post in the Manufacturer's Announcements section only but only ONCE a month unless your a paid advertiser.

Redwing 30cc Yak55 Buid Log

Ok, I am going to attempt a build thread on my new 30cc Redwing RC Yak 55 that I picked up at the Austin 3D bash a while back. I will begin posting pics tomorrow evening when I get off work. Overall, my initial impressions of the quality of the plane are excellent. Everything was packaged well and the box was made out of very thick cardboard to protect the contents from damage in shipping. Upon unboxing the contents, I found everything packaged neatly and separated into its own package according to the build process; wing control horns ,ball links, and rods were in one bag as well as bolts for the main gear, all items to complete the stabs, rudder etc. The covering was nearly flawless except for the expected wrinkles which only took a bout 5 minutes with an Iron to straighten out. The fiberglass cowling, canopy and wheel spats are a work of art and match the colors on the plane perfectly. Included in the box were a carbon main gear and tail wheel, carbon wing and stab tubes and carbon control horns. I will be installing Savox 1256 servos an all fight surfaces and a DLE 35ra up front. All of the hardware appears to be top quality and I see no reason to substitute for anything else at this point. Stay tuned..........:popcorn:
 
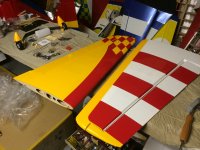
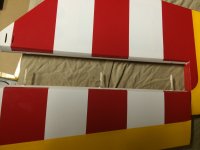
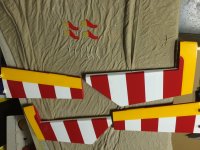
Ok, I will be starting with the wings. I removed the wings from the plastic wrap and the finish was nearly perfect. As I stated before, just a few minor wrinkles near the hinge line was all the touch-up needed. This gave me the opportunity to go over all seams with the sealing iron as well. Be sure to check all edges of the checkers, I did find a few lose edges but tacked them back down with little effort. All-in-all, Great job on the covering.
IMG_0002.JPG

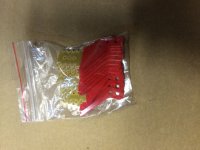
As I examined the hardware in the box I was very impressed. The hardware appeared to be top quality with adjustable linkages for the control surfaces and all was bagged separately for the task at hand.
IMG_0004.JPG

The painted control horns are a nice touch and add to the overall finished look when complete. You still have a choice though, the original horns are included as well.
 
Last edited by a moderator:
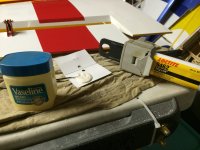
I continued by hinging the ailerons. The wings come with the hinges already drilled and installed, you just have to glue them in place. Everyone has their own way of hinging but I prefer to use Hysol. It gives me a longer working time for those unforeseen moments when I get distracted or wind up with the inevitable finger print on the most obvious place.
IMG_0008.JPG

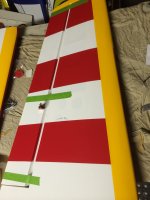
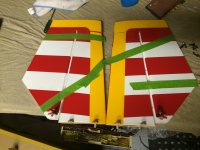
Start by removing the aileron and checking to make sure that all the hinges are set to the proper depth. I like to see them sink into both surfaces evenly usually right up to the pin in the hinge. Re install the aileron and make sure that it moves from bevel to bevel with little to no binding. Once this is confirmed, remove the aileron again and pull out all of the hinges. I like to take a little Vaseline and put it on the ball of the hinge before gluing, this keeps the glue from entering the hinge and making it stiff or locking up completely. Use a toothpick to apply glue down into the hinge hole in the wing or aileron(whichever you prefer to do first). Apply a small amount of glue onto the hinge and insert it into the aileron/wing. Once this done and you are happy with the placement of the hinges, move to the mating surface and apply glue into the hole with the toothpick, apply glue to the hinge and insert the two surfaces together. Once the hinges are glued, I like to take some masking tape and wrap it around the back of the aileron keeping it snugly against the wing. Then allow it to set up overnight to dry. Follow the same procedure for all the surfaces. I try and do all the hinging in one evening.
IMG_0010.JPGIMG_0016.JPG

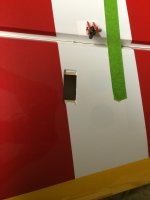
Also, while I have the Hysol mixed up I go ahead and install the control horns into the control surfaces. The ailerons and elevator horns slide in with little effort, you will have to locate the slots for the horns to slide into but just use an sharp hobby knife to open these up, apply glue into the slots and the control horn and slide them all the way in. Don't forget to roughen up the surface of the horn with some sandpaper before applying the glue.
IMG_0014.JPGIMG_0011.JPGIMG_0017.JPG
 
Last edited by a moderator:
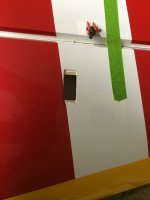
Tonight I decided to work on the aileron linkages. Pretty straight forward here with the included ball links and rods. Once you have cut the servo openings out of the wing be sure and tack the edges of the covering back down with an iron.IMG_0011.JPG

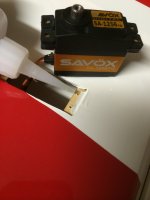
I will be installing Savox 1256 servos on all flight surfaces. Place the servo in the wing with the output shaft toward the leading edge of the wing and drill a small hole through the plywood mounting blocks where your mounting screws will go. I then remove the servo and place a small amount of thin CA into the holes to strengthen the wood and prevent them from stripping. Then re-install the servo. The servo wire will feed pretty easy through the wing but if needed use an old pushrod to pull the wire through.
IMG_0012.JPG
 
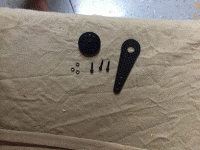
I wanted to use the carbon arms supplied with the kit for the servos but that meant using the plastic servo wheels that come with the servos. I didn't like that idea so I did some checking. I found these neat metal servo wheels from Redwing RC that you can get to fit almost any servo spline. The neat part is that they line up with the holes in the carbon arm and fit really snug on the output shaft, creating a slop free installation!
IMG_0072.gif
Yes, there are only three nuts and bolts in the pic, but it uses four and all are included! you can get 5 for $20 from Redwing!
 
Last edited by a moderator:
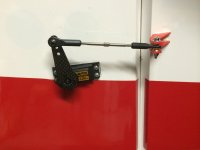
Here is a completed pic of the aileron linkage...petty straight forward....
IMG_0073.JPG
 
Last edited by a moderator:
With the all the hinging except for the rudder out of the way, it was time to start on the fuse. Upon removing the fuse, again the covering was flawless and beautiful. The fit and finish of the structure also appeared neat and joints were secure. The firewall appeared to have been joined with epoxy rather that the light glue that I have seen in some of the other arfs. Triangle stock was placed in all the right places providing the extra strength needed. I like to finish the firewall with some gray primer and a spackled finish, so that was the first on the list to done....I could easily complete from the tail forward while the paint dried...IMG_0026.JPGIMG_0027.JPG

After the firewall was painted, I moved onto the tail. I started by installing the carbon tailwheel assembly. You will need to assemble the tailwheel assembly, but this is easily done. Don't forget to grind a flat spit in the metal shaft anywhere your wheel collar sits just as a little extra security that it will stay put!
View attachment 24902View attachment 24903
 
Last edited by a moderator:
Top