So no time like the present to install all those new updates on the new 106cs, right? Zactly...
First remove the original phenolic carb base and "rubberized" coated reed cage assembly. Sorry everyone. For those that do not know, 3W originally manufactured their engines with phenolic or plastic post carb components. That being the carb base, reed cage assembly and reed block assembly. Though they worked fine for some and for a good number of years, there have been many cases where after a period of time, the parts will start distorting and warping due to heat and cool down cycles. And age too. Causing air leaks and poor tuneability of the carburation system. The rubberized reed cages would "peel" after a period of time and also causing some issues. The reed blocks would split down the sides where the bolts go through. To stay on top of the game and maintain the highest degree of quality, 3w revised all the components. Now made of high quality aluminum components separated with gaskets, the "dub" engines continue to produce amazing power and dependability. And no more worries with worn out or faulty carb parts.
View attachment 97931 View attachment 97932
The carb is held on just like all other engines. Two nuts atop the carb and off it comes.
View attachment 97933
Next we remove the four retaining bolts in each of the four corners of the fuel induction system. Then remove the black plastic carb base plate.
View attachment 97934
Once the base plate is removed, gently lift off the rubberized coated reed cage assembly. After removing the reed cage assembly, the reed block housing can now be removed.
View attachment 97935 View attachment 97936
I really didn't need to do this step as it will stay the same. But even though this engine had never seen fuel or even started, I still wanted to put "ALL" new gaskets throughout. Besides, I needed a reason (excuse) to gander inside the workings of this little monster giant. Oh how I love looking inside a red head. LOL
View attachment 97937 View attachment 97938
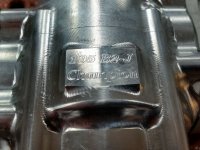
Once I was satisfied all the parts were present and accounted for....LOL....I began re-assembling the 106. First, the same gasket sealer used by 3w in Germany.
View attachment 97939
In fact, it turns out there are many manufacturers that "insist" on this particular assembly sealer. Mercedes, Lexus, Ferrari, Jaguar just to name a few. Hmm, "dubs" are in good company. Anyway, a little gasket sealer, (not much, just enough to lightly coat the parameter of the mated parts, and a gasket between the engine and the reed block housing.
View attachment 97940 View attachment 97941
Another film of sealer and then the gasket that separates the reed block and the reed cage assemblies.
View attachment 97943
Must not forget the sealer between the gasket and the reed cage.
View attachment 97944
Next comes another film of sealer and the gasket between the top of the reed cage and the carb base plate. Must also remember to line up the slot in the gasket with the "vent" holes in the reed cage assembly.
View attachment 97946
By the way, putting the gaskets on dry is ok. The parts will actually seal quite nicely without it. However it was recommended by the "G" man to do it like 3w does at the factory. Plus the sealer is a little insurance policy of no leaks. So, no skimping on this step.
Next...yup, you guessed it. Another light film of sealer on the gasket between the reed cage and the carb base plate. And this plate also needs to have the vent holes lined up as well.
View attachment 97947 View attachment 97948
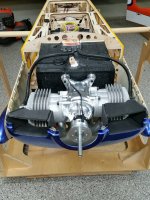
Once all the pieces are set into place, the retaining bolts can be re-inserted. Before I tighten them down, I will make sure everything is aligned and squared up.
View attachment 97949 View attachment 97950 View attachment 97951
Once I was satisfied with a true fit of all the parts, I snugged the bolts down in a criss cross pattern. Then a good "tight" torque with a nut driver. That is about all that is needed to secure these parts. No need for tension torque on any of these bolts.
Once final tightening is done, two carb gaskets sandwiching a "heat" insulator between them, then the Tillotson carb and the "3w snorkel intake".
View attachment 97952 View attachment 97953
Install the two retaining nuts and the diaphragm balance tube. Another side note here: The carb retaining nuts need no tension torque on them. They strip out very easily. Ask me how I know this little artifact of information. Just snug them down and a final "hand tighten" with a socket and you're good to go.
View attachment 97954
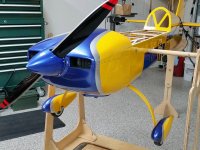
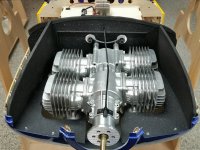
And looking even more sexy than she did an hour earlier, the 106cs is ready for the exhaust.
View attachment 97955
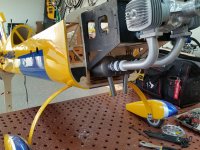
Alas, the 3w headers I purchased for this engine do not have a "deep" enough drop. Plus the geometry is off so they will have to go back to Aircraft International. I took a stab in the dark hoping they would be the right fit. I will have to go with the alternative headers. They are the double bend headers and should give me exactly what I will need to make the connection to the KS 5 canisters that are on the way. I was hoping to get the now 3w powered Pilot Edge out this weekend for some trial runs and fun in the sun. I guess it will have to wait until next weekend. Oh well, not like I don't have some projects to keep me busy until then right?
I did get the new cowl for the Cessna fitted and ready to install. So I may take it and the 3w 70 twin Pitts out flying this weekend. The assembly of the Behemoth Yaks brother has been going slow. But mostly because I want it "PERFECT". Well, as perfect as I can make it that is. LOL
 .
.


 is knowing you helped a buddy get his plane running good and your ability to share with out bias
  is the best tool in your shop. Of course it helps when the equipment behaves as it should making you look good
  .
.