• If you are new to GiantScaleNews.com, please register, introduce yourself, and make yourself at home.

    We're 1st in Giant Scale RC because we've got the best membership on the internet! Take a look around and don't forget to register to get all of the benefits of GSN membership!

    Welcome!

3D Vertigo build, any interest in a build?

-Rick-

100cc
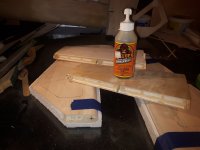
Elevator done. used gorilla glue instead of the west epoxy system. Epoxy would work much better if using the vacuum system or putting 400 pounds of weight on the parts!
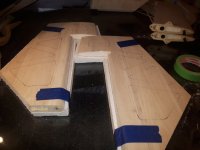
20201204_143457.jpg Elevators are done, turned out much nicer then the rudder when using epoxy.
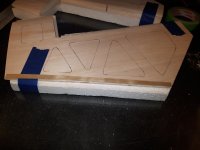
20201204_143753.jpg Also added a 1/64 ply strip to the back and bottom of both elevators to hopefully stop some of the "dings" while moving it, like putting it in the van. Did not like that it only had 2 millimeters of balsa on the trailing edge, I know that I would damage that real quick!! This was latinated under the balsa skin.
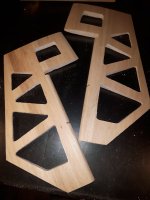
20201204_183824.jpg Almost done. Saved 1.5 oz.
20201204_143547.jpg Yup, the way to go for me! Next the wings!!
 

Snoopy1

640cc Uber Pimp
How do you spread the gorilla glue and do you have enough working time. When I use the west system it gives a good 45 minutes to work with it and it is spread with a roller. And I also mix some colour dye in it to see how thick it is.
Looking good so far.
 

dhal22

GSN Sponsor Tier 1
I use a foam paint roller. The gorilla glue spread on a paper plate then pick it up with the roller. Roll the glue until only a sheen is visible when holding the foam up to the light. That's all, virtually zero weight gain.
 

TonyHallo

150cc
I use a foam paint roller. The gorilla glue spread on a paper plate then pick it up with the roller. Roll the glue until only a sheen is visible when holding the foam up to the light. That's all, virtually zero weight gain.

Now did I read that you put the glue of the core? Or was that another person?

I spread the glue on the skins with a credit card just like epoxy, there sufficient amber color in the glue to assess coverage. If there are hard points in the core like servo rails and control horn hard points, I will paint these surfaces as well. These will get vacuum bagged with sufficient weight to ensure the cores are flat.
 

-Rick-

100cc
How do you spread the gorilla glue and do you have enough working time. When I use the west system it gives a good 45 minutes to work with it and it is spread with a roller. And I also mix some colour dye in it to see how thick it is.
Looking good so far.

I was using a scraper to put the epoxy, west system, on. I put it on very thin. I also use a scraper to put on the gorilla glue. Put it on thin and do not mist it with water. I always have the parts and the forms ready to go so I can move quickly. I have not had any problems with the glue drying before I get the parts together.

I have not sheeted any part of a RC plane in over 35 years so, yes I could be doing it wrong. If you have better ways of doing this by all means let me know! Can I use a roller with gorilla glue?
 

-Rick-

100cc
I use a foam paint roller. The gorilla glue spread on a paper plate then pick it up with the roller. Roll the glue until only a sheen is visible when holding the foam up to the light. That's all, virtually zero weight gain.
I do like this method of working with gorilla glue. I will try it on the wings.
 

-Rick-

100cc
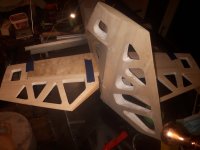
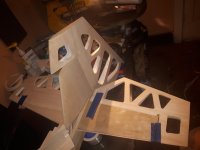
A few pictures of the tail feathers fitted to the fuse. They are still rough and will need some sanding to get them ready to cover. The hinges are working out good.

The wings. The previous builder glued in the wing spars with gorilla glue which is okay but I think he went a little overboard with the glue. No fun trying to get the spars level with the foam. I do not know what kind of hardwood they use for the spars but they are a B*t*h to sand. I drew lines on the spars and on the foam beside the spars to make sure I don't sand a flat spot into the foam. Took about six hours to get them level with the foam. Next up, getting the ailerons to fit to the wings.
20201209_200727.jpg 20201209_200750.jpg 20201209_200750.jpg
 

Attachments

  • 20201207_143027.jpg
    3 MB · Views: 313
  • 20201207_144732.jpg
    3.3 MB · Views: 314
  • 20201207_151856.jpg
    3 MB · Views: 299
Top