• If you are new to GiantScaleNews.com, please register, introduce yourself, and make yourself at home.

    We're 1st in Giant Scale RC because we've got the best membership on the internet! Take a look around and don't forget to register to get all of the benefits of GSN membership!

    Welcome!
  • Unless you are a paid advertiser NO more posting advertisement in the individual vendor forums. You may post in the Manufacturer's Announcements section only but only ONCE a month unless your a paid advertiser.

Xpress does a BANSHEE build...

Xpress

GSN Sponsor Tier 1
This post is mostly for my reference so I know what I need to gather or buy for the airplane, but please by all means use it to put yours together!

-Desert Aircraft DA70, x1 (CHECK)
-Falcon 24x9 propeller, x1 (CHECK)
-4" spinner, red to match, x1
-Fromeco Sahara 6.0v regulator, x1 (CHECK)
-Fromeco Wolverine switch, x1 (CHECK)
-Fromeco Badger switch, x1 (CHECK)
-Thunder Power 2s 1900 RX pack, x3
-Hitec HSB-9485SH servo, x5 (CHECK)
-Hitec HSB-9465SH servo, x1 (CHECK)
-Hitec Maxima 6 receiver, x2 (CHECK)
-Hitec 36" HD Twisted extension, x2 (CHECK)
-Hitec 12" HD Twisted extension, x4 (CHECK)
-SWB 1.5" Futaba spline arm, x4 (CHECK)
-SWB 1" Futaba spline arm, x1 (CHECK)
-SWB 4" offset Futaba spline arm, x1 (CHECK)
-Secraft easy couplers, x1 (CHECK)
-Secraft wing bolts, x1

I think that's about all I need for the airplane, the hardware included with it is impressive and saves on a lot of the cost..
 
Last edited by a moderator:

Xpress

GSN Sponsor Tier 1
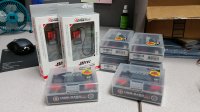
Can cross some stuff of my list now. My airplanes only get the best equipment :thumbup:

20160114_131048.jpg
 

Bushwacker

3DRCF Moderator
This post is mostly for my reference so I know what I need to gather or buy for the airplane,

LMAO :grrreat:

Are you sure its not more for Bragging and trying to making us jealous???

You could of just kept a list on your desktop like the rest of us do. Actually it's pretty clever... so others can use as a guide... I think you just showing off.

Now don't take what I said the wrong way I mean no disrespect. It is only what I thought when I read it and it made me laugh in a good way. :)
 

Xpress

GSN Sponsor Tier 1
LMAO :grrreat:

Are you sure its not more for Bragging and trying to making us jealous???

You could of just kept a list on your desktop like the rest of us do. Actually it's pretty clever... so others can use as a guide... I think you just showing off.

Now don't take what I said the wrong way I mean no disrespect. It is only what I thought when I read it and it made me laugh in a good way. :)

Ah, you see, if I made a desktop list then it would get lost the moment I set it down. Put it on the forums and it doesn't get lost :thumbup:
 

Bushwacker

3DRCF Moderator
Tell me about man. I need to clean up my own desktop. Got icons for days....:megaroll:

So are you going to keep the graphics completely stock or get some custom stuff? Ive been curious to see if someone can come up with something that will work with that airframe.
Really it looks great by itself, but you know people like to make it there own too.
 

Xpress

GSN Sponsor Tier 1
Tell me about man. I need to clean up my own desktop. Got icons for days....:megaroll:

So are you going to keep the graphics completely stock or get some custom stuff? Ive been curious to see if someone can come up with something that will work with that airframe.
Really it looks great by itself, but you know people like to make it there own too.

I always like to customize a bit, obviously it'll be getting some Hitec swag, not sure about much else.
 

Xpress

GSN Sponsor Tier 1
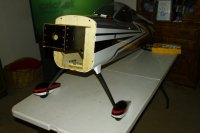
Finally got to get started with the build. The first thing you will want to do is get the main gear onto the airplane and sitting on its wheels. First up is bolting the main gear onto the fuselage. You may want to use blue threadlocker on these bolts/grub screws as I did.

The kit provides you with all of the landing gear hardware in the same bag- the axles are in the same bag. The main gear legs use the large 4 bolts, 4 large washers, 4 lock washers, and 4 nuts.
_MG_5521.JPG

You will want to glue the cuffs in place before you get the axles and pants on, I used a silicone rubber glue to make it sturdy.
_MG_5522.JPG

Bolt the axles in place, simple enough. Make sure the bolt head on the outside of the gear is oriented to allow your wheel plants to sit level.
_MG_5528.JPG

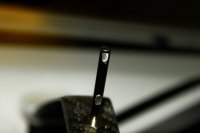
Another important step in the assembly is to grind a couple of flat spots onto the axles to allow the grub screws in the collars to sit on a flat section. Just use your Dremel and a cutoff disk, makes quick work of it. You may want to test fit the wheel and pant to see where the wheel needs to sit, and then mark a couple of spots to grind.
_MG_5529.JPG

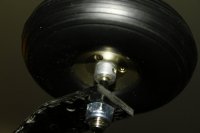
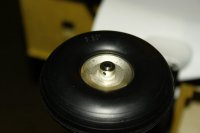
Inside collar on, wheel slipped on.
_MG_5530.JPG

Outside collar in place.
_MG_5531.JPG

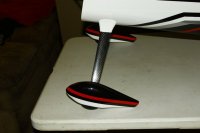
Last thing you need to do now is slip the pant in place and use 2 bolts and 2 washers to secure it in place. The pants use the smaller bolts and smaller washers.
_MG_5536.JPG

Since the airplane was sitting here, I went ahead and bolted the vent doors in place on the bottom using the included bolts and washers. These do not use self tapping wood screws, instead they use machine screws that thread into blind nuts on the other side- should last a LONG time like this! You will not want to thread lock these in place as you will need to remove them to access the bottom cowl bolts at one point or another.
_MG_5535.JPG

That's all for last night, tonight I think we will start to glue control surfaces and horns in place.
_MG_5537.JPG
 

Xpress

GSN Sponsor Tier 1
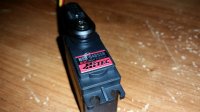
For this airplane, I selected the Hitec HSB-9485SH brushless servos. These are the more budget friendly brushless servos in our lineup that do not feature a heatsink and have steel gears inside. The performance isn't high enough that they mandate a heatsink, but they still have plenty of power for the Slick. They feature 361oz/in of torque regardless of what voltage you run them at, so for those who don't feel comfortable running LiPo, they will still have all of the torque on a 6.6v LiFe battery. The only thing that you sacrifice by running a lower voltage is some speed. At 7.4v these are still plenty fast enough at 0.15, plus with the constant torque output it'll feel like they are faster as they won't slow down as the servo reaches its max endpoints.

20160115_065633.jpg

Another added benefit to our brushless servos is they feature lower current draw than a conventional equivalent digital coreless servo- about 1/3-1/5 the current draw. Some of the guys that have been using them report back that they're only consuming around 200-300 mah per flight on a 40% airplane with 14 servos! If you manage to stall the servo, the circuit board will identify this and adjust the power flow accordingly so that you don't burn up the servo. You can save on weight by using smaller rx packs since you won't need big batteries to get a days worth of flying in. I have selected the Thunder Power 1900mah rx batteries to power this aircraft, they should offer solid performance and give me plenty of flying time all the while saving on weight. Weight isn't so much an important factor on a 35-40% airplane, but on these 70cc and smaller airplanes, saving an ounce or two here and there can really start to add up.

The equivalent digital coreless servo in our Hitec lineup to the HSB-9485SH servo is the HS-7954SH servo, so if you're running 7954's already and want to try out the brushless servos without breaking the bank, give the 9485's a try! Keep in mind that you do not need to regulate these servos, but if you are using a regulator then you will need to run the included PAD to absorb the backflow of current from the servos regenerative function.
 

Xpress

GSN Sponsor Tier 1
Got more work done this weekend.

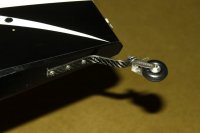
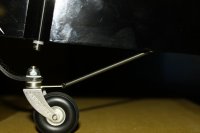
Tailwheel bolted in place.
_MG_5539.jpg

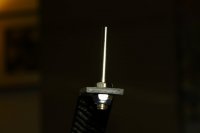
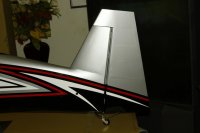
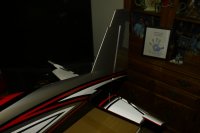
Rudder is hinged- took all of 10 seconds using the supplied rudder wire.
_MG_5540.jpg

_MG_5541.jpg

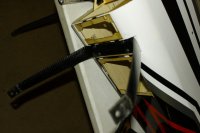
Tiller spring in place. Notice the collar that secures the rudder wire in place as well.
_MG_5542.jpg

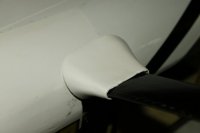
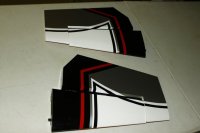
Up until this point, everything has essentially been bolted in place. I did have to trim some of the elevator hinges but that didn't take much effort or very much time- this is why it's always a good idea to dry-fit all of your hinges beforehand. I also like to use a marker to mark the hinge positions so there's no guess work when gluing them back in place. Some 30 minute epoxy (thinned slightly with a couple drops of rubbing alcohol) was all that was needed to glue the hinges in place.
_MG_5543.jpg

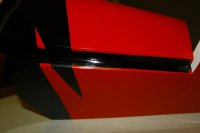
I also sealed the hinges while I was at it using the supplied spare covering since it matched.
_MG_5545.jpg

Hey it's starting to look like an airplane now!!!!
_MG_5549.jpg
 
Last edited by a moderator:
Top