• If you are new to GiantScaleNews.com, please register, introduce yourself, and make yourself at home.

    We're 1st in Giant Scale RC because we've got the best membership on the internet! Take a look around and don't forget to register to get all of the benefits of GSN membership!

    Welcome!

Scale 1/3 Scale Extra 330L Build.

Bartman

Defender of the Noob!
Thanks for the info I will be installing MKS 777 I believe and about 500oz . I will go and double check.
Can you explain the death slide.

Just looked it up 507 oz on the box so it looks like the plane is ok now we have see if the pilot is ok. Thanks for the help again.

My H9 1/3 scale Cap 232 has two holes in the tail for rudder servos but I put in one MKS 777 and figure it'll be fine. 7.4 volts so should have more than enough power.
 

Snoopy1

640cc Uber Pimp
Ok still messing around with small items. This time the wheels, made up set of aluminum wheels but did not have tiers for them so as normal it raining again. So trying to come up with something found some old “O” ring material made a couple of donuts. Could not grind a flat face on the inside just would not work. Set o ring on the aluminum wheels, ran a very little CA to hold everything in place and then ran a bead of epoxy around either side. Hopefully this will hold the o ring in place time will tell. Not to bad 4.23 oz for a 5 inch wheel.

81BCBA78-3D79-43B8-B15F-1E50542646D9.jpeg
 
Last edited:

acerc

640cc Uber Pimp
You could have lightly ca'd them to the rim, chucked the rim, and spun them on a grinding stone. Once you have the flat side done throw them in some boiling water for five minutes, crystalizing the ca, then just pull the rubber off and flip over. Use to do it that way with wheels for my race cars.
 

Snoopy1

640cc Uber Pimp
You could have lightly ca'd them to the rim, chucked the rim, and spun them on a grinding stone. Once you have the flat side done throw them in some boiling water for five minutes, crystalizing the ca, then just pull the rubber off and flip over. Use to do it that way with wheels for my race cars.
Never seen that done interesting if they come off I will be asking you for help. Thanks
 

Snoopy1

640cc Uber Pimp
You could have lightly ca'd them to the rim, chucked the rim, and spun them on a grinding stone. Once you have the flat side done throw them in some boiling water for five minutes, crystalizing the ca, then just pull the rubber off and flip over. Use to do it that way with wheels for my race cars.
I have read this a couple of times understand everything but have two questions.
1. Why would not flip or turn them around first and then CA to rim for grinding.
2. Boil them for 5 minutes to crystallize the CA what happens to the CA or the rubber.
 

acerc

640cc Uber Pimp
I have read this a couple of times understand everything but have two questions.
1. Why would not flip or turn them around first and then CA to rim for grinding. You can place them however you wish for wherever you want the flat side.
2. Boil them for 5 minutes to crystallize the CA what happens to the CA or the rubber. The ca crystalizes, turns to dust, I have never had an issue with any rubber or foam that I have used.
 

49dimes

Damn I'm hungry
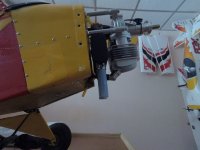
Now that I have a good idea how this Cub flies at 17.5 pounds (wet) it was time for some accurate CG placement. I had added a 9oz weight in the compartment that is just behind the fire wall when the 26cc engine was up front. Now that the 35cc engine is up front the Cub flew pretty nose heavy. Power off glide slope was horrible and roll / yaw axis stability was poor. That weight is now gone and the Cub is now balanced perfectly at 3.5" from the wing LE. The Cub now weighs 16 pounds 7oz dry.

I got back to the cowl for some more filling / sanding and the two large cracks and large hole (for old spark plug) along with the rough splintered cowl areas are now gone. Some primer and light sanding is in order next.

Looked over the engine for irregularities and found nothing :). Nice pretty and shiny as when it came out of the box. Muffler nice and secure and bolts still nice and snug.

GOPR0615.JPG GOPR0612.JPG GOPR0611.JPG GOPR0613.JPG GOPR0614.JPG
 
Last edited:

Snoopy1

640cc Uber Pimp
Now that I have a good idea how this Cub flies at 17.5 pounds (wet) it was time for some accurate CG placement. I had added a 9oz weight in the compartment that is just behind the fire wall when the 26cc engine was up front. Now that the 35cc engine is up front the Cub flew pretty nose heavy. Power off glide slope was horrible and roll / yaw axis stability was poor. That weight is now gone and the Cub is now balanced perfectly at 3.5" from the wing LE. The Cub now weighs 16 pounds 7oz dry.

I got back to the cowl for some more filling / sanding and the two large cracks and large hole (for old spark plug) along with the rough splintered cowl areas are now gone. Some primer and light sanding is in order next.

Looked over the engine for irregularities and found nothing :). Nice pretty and shiny as when it came out of the box. Muffler nice and secure and bolts still nice and snug.

View attachment 110231 View attachment 110232 View attachment 110233 View attachment 110234 View attachment 110235
By the way by the time you are all done Acerc is going to make a claim on the cub.
 
Top