• If you are new to GiantScaleNews.com, please register, introduce yourself, and make yourself at home.

    We're 1st in Giant Scale RC because we've got the best membership on the internet! Take a look around and don't forget to register to get all of the benefits of GSN membership!

    Welcome!

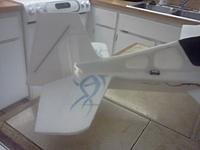
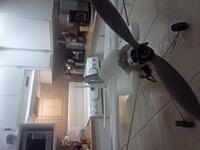
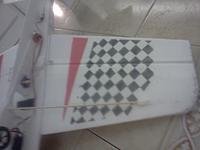
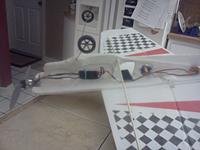
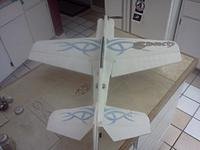
3d sbach homemade

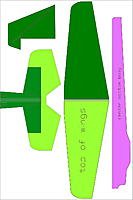
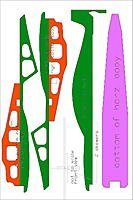
i made this the other day plans are here for you if you have questions ask....its a super easy build and super cheap!!!
[video=youtube_share;qTO812edi6Q]http://youtu.be/qTO812edi6Q[/video]\
[video=youtube_share;Yprs2kf0vrI]http://youtu.be/Yprs2kf0vrI[/video]
 

Attachments

  • sbach3 Model with notes.pdf
    28.5 KB · Views: 1,097
Last edited by a moderator:
[video=youtube_share;Yprs2kf0vrI]http://youtu.be/Yprs2kf0vrI[/video]

[video=youtube_share;qTO812edi6Q]http://youtu.be/qTO812edi6Q[/video]
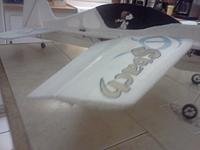
thumb-IMG_20121220_170625.jpgthumb-IMG_20121220_170645.jpgthumb-IMG_20121220_170655.jpgthumb-IMG_20121220_170708.jpgthumb-IMG_20121220_170716.jpgthumb-IMG_20121220_170722.jpgthumb-IMG_20121220_170733.jpgthumb-IMG_20121220_170750.jpg


thumb-sbach3~2.jpgthumb-sbach3~3.jpgthumb-sbach3~4.jpg
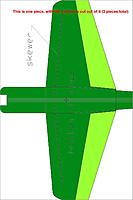
One more thing that might help decipher our plans, the bottom wing shown on the first sheet is one piece, in spite of the extra lines. The ailerons are cut out of it and the lines simply show the relationship of the other parts to it. The same for the main tail section shown at the top of the second sheet. If you cut it out right you end up with 15 total pieces (after you cut the ailerons and elevator out of the original pieces).
1. the front horiz. top body that includes the bottom half of the wings and ailerons.(1,2,3)
2. the rear horiz top body that includes the tail and elevator (4,5)
3. the bottom hroiz. body (6)
4. two top wings (7,8)
5. three layers vertical top body (9,10,11)
6. three layers vertical bottom body (12,13,14)
7. the rudder (15)

By keeping the pieces as large as possible you waste a little foam (at $1 per sheet, who cares) but you gain the advantage that the critical alignments become much easier.
 
Last edited by a moderator:

njswede

150cc
I've got the power system and servos from an Airfoilz that I crashed recently. This may be a fun project to use those parts for. I'll watch the videos more carefully when I'm done celebrating new year's eve. :) Thanks again for sharing!
 
AUW including battery just at 320 grams. The motor is a ax2306n-1300kv rewound with 24t 26awg delta (same kv+/- but a little more power than stock) with an 8x3.8 slo fly prop. It does fly good with the stock motor wind but the verticals are better with the rewind. Battery is a nanotech 3s 850 mah.
 
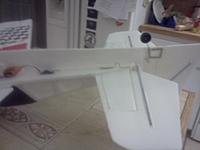
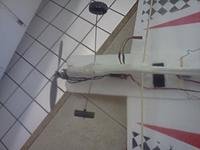
Great hope you had a great new year!! i added some things that might make it easier to see how we built it not that you need this NJSwede but some beginners might

Well, A step by step would not be much, because it really is a simple build. Everything really only fits together one way.

Here are the basic steps:

1. cut everything out exactly like the patterns.

2. Hinge the ailerons and elevator back to the pieces they were cut from

3. sand an airfoil on the top wing pieces leaving the bottom flat

4. sand a grove in both the top and bottom sections of each wing for a bamboo skewer for reinforcement (we put ours about 1" in back of the leading edge)

5. glue the top wing pieces to the bottom piece (we used gorilla glue) leaving exactly 3 thicknesses of foam down the center for the top body.

6. glue the bottom horizontal body to the bottom of the wings and ad the tail (elevator) section to the rear using the bottom horizontal body to keep things square.

7. glue the three sections of bottom body together and then glue that to the bottom of the horizontal body.

8. cut the points off two bamboo skewers for the top body reinforcement, glue the three top body sections together and while the glue is not yet set put the skewers under the center piece and glue the whole thing to the top of the wing section.

9. hinge the rudder, add linkage and equipment, a plywood firewall and work out the battery placement to get the right CG.


The biggest thing is to get the initial cuts made accurately so the thing fits together in alignment and flat.
 

SnowDog

Moderator
I've got the power system and servos from an Airfoilz that I crashed recently. This may be a fun project to use those parts for. I'll watch the videos more carefully when I'm done celebrating new year's eve. :) Thanks again for sharing!

Ha ha which Airfoilz did you crash? I had an Airfoilz Yak54 FF airframe that I flew and crashed a bunch of times before the last crash wrote off the airframe...I probably could have repaired it again, but the weight of the repairs had started to add up. :)
 
Ha ha which Airfoilz did you crash? I had an Airfoilz Yak54 FF airframe that I flew and crashed a bunch of times before the last crash wrote off the airframe...I probably could have repaired it again, but the weight of the repairs had started to add up. :)

this is a great one to just replace that with and it flies better
 
Top