njswede
150cc
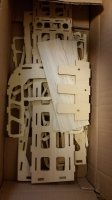
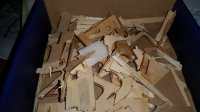
My popsicle-stick based repair only lasted so long. The weekend before the NJ FLI, I pulled out the firewall in a KE-spin and pancaked hard. Obviously, the motor box was now junk, but I also pulled out the landing gear. So I went and ordered a motor box repair kit from 3DHS. For about $30, you get a box of wood that looks like it would be enough for an entire airplane. The task looks daunting, to say the least when you look at all those pieces of wood.
[h=1] Step 1: Inspection[/h]
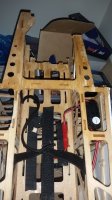
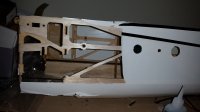
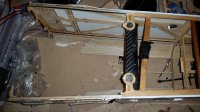
I took off the as much covering as I needed to inspect the damage. The three front formers were cracked, along with the, sides, top and bottom (battery tray) of the motor box. There was also some damage on the sheeting on one side. The motor box kit would cover 95% of the damage, i.e. everything except the sheeting.
[h=1]Step 2: Demolition[/h]
Next I proceeded to remove the broken pieces. I decided to remove the entire motor box, i.e. the top, sides and battery tray all the way back to the wing tube. To do this, I first wet every joint with de-bonder. Then, while the de-bonder did it's job, I used a pair of pliers to snip off the large pieces. This way, I got more room to work with and smaller pieces of wood to remove once the de-bonder had dissolved the glue joints.

[h=1]Step 3: Dry fit[/h]
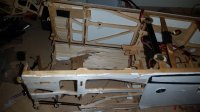
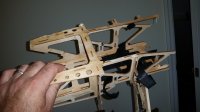
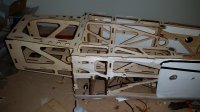
Now that everything is removed and cleaned up, it's time to dry fit all the pieces. This is so much easier than I thought! Just make sure you do a complete dry fit of ALL pieces before you apply any glue. This way, you'll know the order things have to go in. I did the formers first, then the sides, then the battery tray and finally the top. So far so good...
I think I'll stop here and get myself some dinner. Feels like I've earned it!
To be continued...

[h=1] Step 1: Inspection[/h]
I took off the as much covering as I needed to inspect the damage. The three front formers were cracked, along with the, sides, top and bottom (battery tray) of the motor box. There was also some damage on the sheeting on one side. The motor box kit would cover 95% of the damage, i.e. everything except the sheeting.

[h=1]Step 2: Demolition[/h]
Next I proceeded to remove the broken pieces. I decided to remove the entire motor box, i.e. the top, sides and battery tray all the way back to the wing tube. To do this, I first wet every joint with de-bonder. Then, while the de-bonder did it's job, I used a pair of pliers to snip off the large pieces. This way, I got more room to work with and smaller pieces of wood to remove once the de-bonder had dissolved the glue joints.


[h=1]Step 3: Dry fit[/h]
Now that everything is removed and cleaned up, it's time to dry fit all the pieces. This is so much easier than I thought! Just make sure you do a complete dry fit of ALL pieces before you apply any glue. This way, you'll know the order things have to go in. I did the formers first, then the sides, then the battery tray and finally the top. So far so good...

I think I'll stop here and get myself some dinner. Feels like I've earned it!
To be continued...
