• If you are new to GiantScaleNews.com, please register, introduce yourself, and make yourself at home.

    We're 1st in Giant Scale RC because we've got the best membership on the internet! Take a look around and don't forget to register to get all of the benefits of GSN membership!

    Welcome!
  • Unless you are a paid advertiser NO more posting advertisement in the individual vendor forums. You may post in the Manufacturer's Announcements section only but only ONCE a month unless your a paid advertiser.

3DHS 71" Slick Motor Box Repair

Capt.Roll

70cc twin V2
FUD!!! Now What?
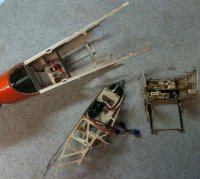
71Slick busted.jpg

I purchased a motor box kit a little over a year ago. I guess it's time to get some good out of it since I dumped my Slick last week. :sadface:

Everything else up front (wings, wheel pants/gear, canopy, cowl) survived and no repairs required.

Don't think it will be a difficult fix but really do not want to spend the time to put it back together. I'll work on it as time allows and should have it done in a couple of weeks. There is an electric fly-in at my club November 3rd, I'd like to have it done by then.

I'll post some updates as I work through the repair. First up is to assemble the new motor box.
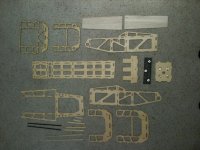
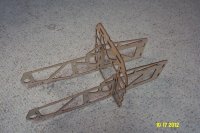
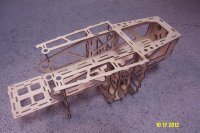
71SlickMB.jpg
 

Capt.Roll

70cc twin V2
Wow, motor box went together pretty fast. Laser cut parts are a tight fit but go together nicely.

Since there were no directions in my MB kit I started with the R & L sides and the first former.

71Slick MB Assy1.jpg

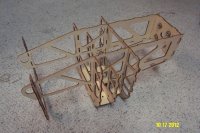
Second step was to fit the wooden landing gear base with the second and third formers then install that assembly into the R & L motor box sides. The fourth former is a very easy fit at this point. This pic shows the firewall in place but I removed it. It was easier to fit later in the assembly.

71Slick MB Assy2.jpg

Third step was to install the battery tray. To get the interlocking tabs in place you have to bow the tray up or down so you have some room to help make everything fit.

71Slick MB Assy3.jpg

Fourth step was to install the motor firewall at the front of the motor box.

71Slick MB Assy4.jpg

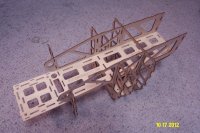
Fifth step was to lock in the top piece. Once installed the motor box is a pretty tight assembly and seems to be square.

71Slick MB Assy5.jpg

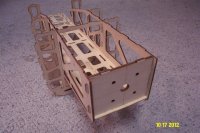
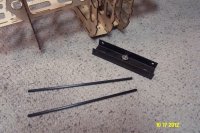
At this point all I have left to do is CA all of the interlocking notches/tabs, epoxy in the carbon fiber LG plate and the two CF rods that run through the bottom of the four bulkheads and epoxy in the CF wing tube sleeve.

71Slick MB Assy6.jpg
 
Last edited by a moderator:

gyro

GSN Contributor
AWESOME! Looking forward to seeing the rest of the repairs!

Thanks Rex for posting this step by step motorbox repair log.... this will be helpful to a great many people!
 

Capt.Roll

70cc twin V2
Made some progress this weekend...........motor box was easy, replacing the front of the fuse outside ply framework is a PITA. Basically I've had to reconstruct almost everything forward of the aft anti-rotation pin holes to the first former. It would be an easier task if I had the correct tools, thank goodness I at least have a drill press and a Dremel.

It's nice being able to purchase a motor box kit from 3DHS but on this repair that covered about half the wood I needed. I think my next ARF will be a Pilot. If I need to ever make a repair like this I'll at least be able to get the cut pieces, that will make it much easier.

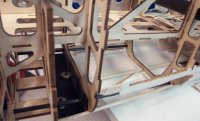
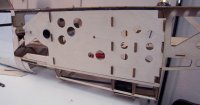
Finished up the motor box assembly; installed the landing gear plate, carbon support rods and a couple of stringers.

71Slick MB Assy7.jpg

Motor box spliced into the Slick fuse. Seems to be fairly well aligned; if it doesn't fly right I'll try to direct it towards the dumpster......LOL.

71Slick MB Assy8.jpg

Right outside motorbox/fuse frame made from 1/16 ply. There is room to lighten it some more. Starting weight of the 1/16 ply was 56 grams, as it is now the weight is 35 grams. Have to repeat the process for the left side now...........not looking forward to that.

71Slick Ply Frame.jpg

I'll work on the stringers this evening along with making new mounting tabs for the cowl......those all have to be hand cut as the old ones aren't usable. I'll pick up some 3/32 or 1/8 balsa sheeting at the LHS tomorrow. I think once the left side is done the sheeting and covering will go pretty quick.
 

Capt.Roll

70cc twin V2
Was able to make a little more progress on the Slick repair the last several days.

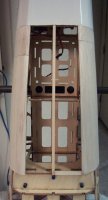
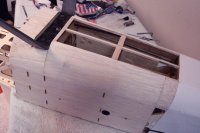
Cut and installed the left side ply frame to the motor box. Wing tube, anti-rotation pins and wing bolts all seem to line up good. We'll see how good on the test flight after I finish the repairs.

71Slick Ply Frame Left.jpg

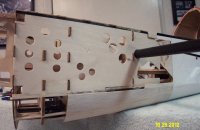
Put on the first two pieces of balsa sheeting. These are the only two pieces of sheeting that come with the motor box kit.

Balsa Sheeting 1.jpg

The repair should be pretty simple and quick from this point; I'm hoping to get the remainder knocked out Friday evening. May be able to get several test flights on Sunday. I will for sure have the Slick ready to go for electric fly-in on Nov. 3rd.
 

gyro

GSN Contributor
Was able to make a little more progress on the Slick repair the last several days.

Cut and installed the left side ply frame to the motor box. Wing tube, anti-rotation pins and wing bolts all seem to line up good. We'll see how good on the test flight after I finish the repairs.

View attachment 2657

Put on the first two pieces of balsa sheeting. These are the only two pieces of sheeting that come with the motor box kit.

View attachment 2658

The repair should be pretty simple and quick from this point; I'm hoping to get the remainder knocked out Friday evening. May be able to get several test flights on Sunday. I will for sure have the Slick ready to go for electric fly-in on Nov. 3rd.

Looking good! Did u say electric flyin in? :p
 

Capt.Roll

70cc twin V2
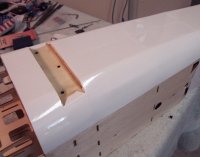
Pretty well have the major parts of the repair complete.

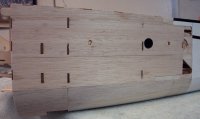
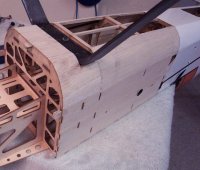
Finished the balsa sheeting.

Balsa Sheeting Finished 1.jpgBalsa Sheeting Finished 2.jpg

First piece of covering. I sure like the Topflite Monokote White over any of the other brands. Much more opaque and very nice finish on the covering. I've heard people say that the Monokote is harder to work with than the Ultracoat. I've used both and really can't tell much difference between them.

First Covering.jpg

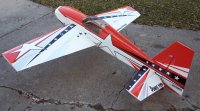
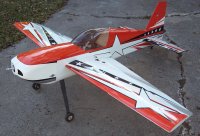
Test fit with both wings, canopy and cowl. Everything lined up pretty good; spinner gap was spot on as well.

Repair 1.jpgRepair 2.jpg

Not much left to do, just some minor things.
1. Finish the star points on the right and left fuse and add the silver/black trim that extends from the cowl on the lower fuse.
2. Drill the cowl mounting holes in the mounting tabs and install the blind nuts.
3. Attach the wheel pants. The LG isn't correct for the Slick, it's actually for a Yak 55. It's a little tall but it allow me to get a couple of test flights in before making or purchasing a new LG. If the plane doesn't fly "right" I won't spend any more cash on it.
4. Install the RX and Lipo's, check the CG, test for proper operation, and range check the RX.
 
Last edited by a moderator:
Top