• If you are new to GiantScaleNews.com, please register, introduce yourself, and make yourself at home.

    We're 1st in Giant Scale RC because we've got the best membership on the internet! Take a look around and don't forget to register to get all of the benefits of GSN membership!

    Welcome!
  • Unless you are a paid advertiser NO more posting advertisement in the individual vendor forums. You may post in the Manufacturer's Announcements section only but only ONCE a month unless your a paid advertiser.

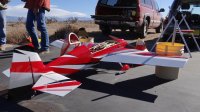
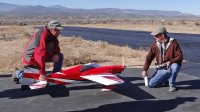
74" Edge 540

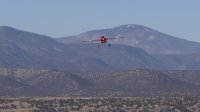
I maidened my 74" Edge today. I had four successful flights with about 30 minutes total flight time. It was actually pretty uneventful which is just the way I wanted it to be.

I didn't do any low level hucking. But by the last flight I was doing some light aerobatics and starting to feel pretty comfortable. My DLE-30 starts easy and runs good and the plane went where I moved the sticks. A guy can't ask for much more. ;)

Marc

DSC00146.jpg

DSC00008.jpg

DSC00026.jpg

DSC00053.jpg

DSC00029.jpg
 
Last edited by a moderator:
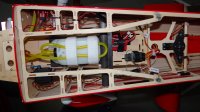
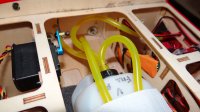
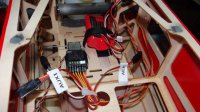
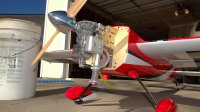
I took some photos of my build and wanted to post them to perhaps help others and so others can let me know what I did wrong! This was my first build of anything with an internal combustion engine so I'm not saying this is the correct way to do it. But I will say that the plane actually flew this way. :D

If you see something that will cause my plane to crash in the near future, please let me know.

Marc

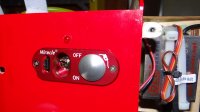
DSC00225.jpg
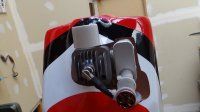
Miracle Switch and fuel dot

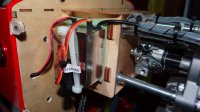
DSC00226.jpg
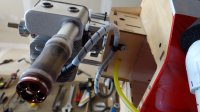
Ignition mounting

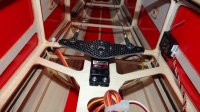
DSC00228.jpg
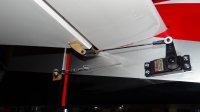
Rudder Servo

DSC00230.jpg
Backside of Miracle Switch

DSC00232.jpg
Elevator Servo

DSC00237.jpg
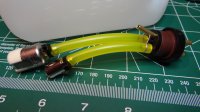
Fuel Clunk plumbing

DSC00239.jpg
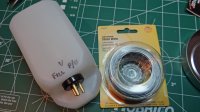
Fuel Tank and safety wire

DSC00241.jpg
Choke actuator

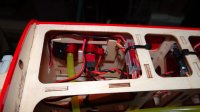
DSC00243.jpg
Layout

DSC00245.jpg
Fuel tank plumbing

DSC00246.jpg
Receiver

DSC00251.jpg
Engine without cowl

DSC00252.jpg
Engine with cowl on

DSC00253.jpg
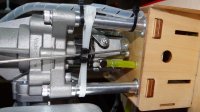
Bottom of engine

DSC00254.jpg
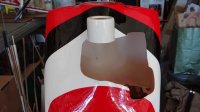
Cowl cutout for DLE-30 rear carb with stock exhaust
 

hosam

70cc twin V2
Marc-

nice build but a couple pointers.
1. The miracle switch is a ticking time bomb. I had one break in my hand during installation and seen 2 planes go in due to switch failures. Get yourself a better switch (Fromco Badger or wolverine) or go to radio shack and get a new toggle switch (~$5) and solder it in place of the OEM on the miracle switch.
2. The brass fuel lines need to have barbs on them, use these http://www3.towerhobbies.com/cgi-bin/wti0001p?&I=LXWH38&P=7. Without them the fuel lines will work themselves off and it will happen in the worst time. Solder them on your brass lines, take a look at your cluncks for “how they should installâ€.
3. Those steal lines will eventually eat through the fuel tubing (my personal experience). I use zip ties everywhere.
4. For the wires (servos or switches) that are running throughout the plane, I encase them in the Expandable Mesh Sleeving, http://www.mcmaster.com/#standard-cable-sleeving/=q4jdwb. Without them the wires will eventually chafe from rubbing against the “razor†like wood edges.

Good Luck
 

Cmala

70cc twin V2
Hosam

Help me please because I've never used this stuff before.

Which mesh for servo wires and which size coil stuff for ignition wire?

I just sent my ignition module back to DA due to chaffing from just a few flights

Craig.
 
Thanks hosam. I really appreciate the feedback. I like your suggestions.

I got some feedback earlier from Gyro and NJSwede that convinced me to install a second switch. I'm still going to have only one battery (so that's still a single point of failure). But I'll have two leads off my battery, each going it's own switch, then each going to the receiver. So if one switch fails I'll still have power to the receiver.

Regards,
Marc

Marc-

nice build but a couple pointers.
1. The miracle switch is a ticking time bomb. I had one break in my hand during installation and seen 2 planes go in due to switch failures. Get yourself a better switch (Fromco Badger or wolverine) or go to radio shack and get a new toggle switch (~$5) and solder it in place of the OEM on the miracle switch.
2. The brass fuel lines need to have barbs on them, use these http://www3.towerhobbies.com/cgi-bin/wti0001p?&I=LXWH38&P=7. Without them the fuel lines will work themselves off and it will happen in the worst time. Solder them on your brass lines, take a look at your cluncks for “how they should install”.
3. Those steal lines will eventually eat through the fuel tubing (my personal experience). I use zip ties everywhere.
4. For the wires (servos or switches) that are running throughout the plane, I encase them in the Expandable Mesh Sleeving, http://www.mcmaster.com/#standard-cable-sleeving/=q4jdwb. Without them the wires will eventually chafe from rubbing against the “razor” like wood edges.

Good Luck
 

hosam

70cc twin V2
Hosam

Help me please because I've never used this stuff before.

Which mesh for servo wires and which size coil stuff for ignition wire?

I just sent my ignition module back to DA due to chaffing from just a few flights

Craig.

Craig,

For the mesh I am currently using 3/8†ID, which helps me run 2 servo wires for duel elevator servos in the same sleeve. But at times I have found it to be too big (expandable from 3/16†to 5/8â€) for single servo runs so I recently purchased a roll of ¼†ID to try and had good results.

For the ignition module I used ¼†OD Spiral Bundling Wrap-Around Sleeving and I cover the whole length of the spark plug cap wire. I use the mesh for the riming wire…

BTW… I just learned that the 89 you have used to belong to aronph… if yes, then that was my old slick and can’t believe that bird is still alive.

Hosam
 

Cmala

70cc twin V2
Awesome.

Thanks for the info. I will order it tonight.


Yes, the 89 I have I got from Aron.

It has been reborn. I either didn't know or forgot that it used to be yours.

That's cool

ImageUploadedByTapatalk1388978179.951857.jpg
 
Top