• If you are new to GiantScaleNews.com, please register, introduce yourself, and make yourself at home.

    We're 1st in Giant Scale RC because we've got the best membership on the internet! Take a look around and don't forget to register to get all of the benefits of GSN membership!

    Welcome!

3D Aeroplus 111" Extra 330LT

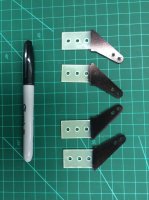
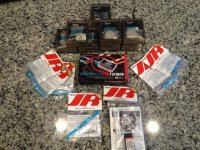
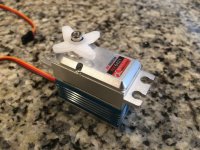
Finally had a chance to start working on the Extra. Im waiting on an order from JR Americas with all of my servos but I wanted to at least get the horns glued in to allow plenty of time for the epoxy to fully cure before getting the servos installed.

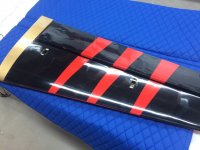
I started off by tightening the covering, I went over all the seems with my iron before touching anything with the beat gun. This helps prevent the seems from pulling apart and will make the covering last much longer. I also used the heat gun to help remove the vinyl Aeroplus logo from the wing, I've got some ideas for a cool JR Logo to go there so the Aeroplus logo had to go. The decal was easy to remove with just a little heat.

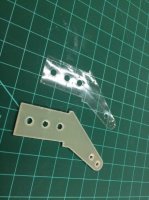
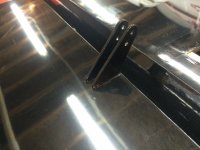
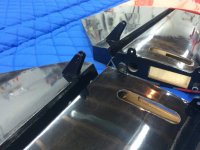
None of the 3 servo openings on for the aileron servos have been cut open from the factory. I'm going to start out with two servos so I opened up the inner and outer bay, if need be the mount and hardware is there for a 3rd servo to go in the middle.
 

Attachments

  • image.jpeg
    image.jpeg
    77.9 KB · Views: 418
  • image.jpeg
    image.jpeg
    51.6 KB · Views: 422
The control horns are your standard fiberglass double truss horns. While I like how these horns work I hate having the raw fiberglass showing. I've painted the horns in the pad with great results but due to the cold weather here I didn't feel the paint would work out well so I decided to try something different. Since the bottom of the wing is black I was able to use a black sharpie to "color in" in exposed portion of the horn. This actually turned out really well and looks much better than the raw fiberglass horn.

I also made sure to sand each horn where it will mount into its respective surface. This does two things, one it gives the epoxy more surface area to adhere to, as well as remove any coating that may be on the fiberglass from when it was originally laid up. Something I did notice is that most of the horns had a clear plastic film covering them. It is EXTREMLY important that this film be removed before gluing to allow for proper adhesion.

I used 30 minute epoxy to glue the horns in, nothing real exciting there. The slots in the ailerons and elevators were sized perfectly and provided a good fit for all of the horns.
 

Attachments

  • image.jpeg
    image.jpeg
    73.2 KB · Views: 436
  • image.jpeg
    image.jpeg
    56.4 KB · Views: 416
  • image.jpeg
    image.jpeg
    56.3 KB · Views: 413
  • image.jpeg
    image.jpeg
    74.9 KB · Views: 414
  • image.jpeg
    image.jpeg
    81.4 KB · Views: 433
Last edited:

Bhughes

70cc twin V2
I even go one step farther and use a file to put a couple small lines in the horn for the epoxy to grab onto. I know that's what the holes are for. But hey why not lol
 
Yesterday my order from JR Americas arrived! There's something so exciting about new electronics that I had to open the box up and look at ( maybe fondle is a better word?) all of these awesome new items from JR.

Here's a full break down of what I'll be using:

Receiver: 11 channel RG1131BPU
This receiver has worked well in every other airplane I have used them in and provides a very simple, robust link. I will also be using the supplied fail safe switch, this will be the only switch in the airplane.

Servos:

Ailerons: NX8921 as I've mentioned previously, I'll be starting with two of these per wing to see if they are up to the task, I have a feeling they'll be just fine!

Elevators/Rudder: NX6421, my original plane was to use the 8921's all the way around, however, JR Americas ran out of them (I ordered the last 4). The 6421's seem to be very similar in specs but have a REALLY impressive aluminum case. I plan on putting these all the way around in my new Dalton 300ML so I figured I would test them out on this extra first. So far, my initial impressions have FAR exceeded expectations. The cases are robust and should last a lifetime, the mounting screws are MUCH larger than your standard servo screw and they included screws are hex heads! Even the servo arm screw is a hex head instead of a standard Phillips. I can wait to get these servos mounted and see how they perform.

Servo Arms:
I went with JR's new aluminum arms, 2" on the ailerons/elevators and a 5" on the rudder. These are machined aluminum and fit the servo splines very well. They also feature a locking screw much like the SWB arms.

Ignition Kill:
I decided to give JR's new TLSI Ignition kill switch a try. This thing should be pretty sweet, it has a built in regulator for 6v or 7.4v, has a built in tach sensor for the ignitions with a tach output that will be down linked to your TX. It also has dual ignition outputs for those of us who run the 4 cylinder quads, as well as the actual ignition kill feature. It's also very light and compact weighing in at .7ounces!

I'll be sure to post more about the ignition kill and servos as I install them. So far I'm very impressed with all the new stuff coming out of the JR camp and am excited to get it in the air. This will be the first airplane I have flown in nearly 10 years with JR servos, it will be interesting to see if I can "feel the difference"

Here's a couple pictures of all the new goodies
 

Attachments

  • image.jpeg
    image.jpeg
    162.2 KB · Views: 430
  • image.jpeg
    image.jpeg
    100.9 KB · Views: 449
  • image.jpeg
    image.jpeg
    121.5 KB · Views: 412
  • image.jpeg
    image.jpeg
    124.4 KB · Views: 426
Top