BalsaDust
Moderator
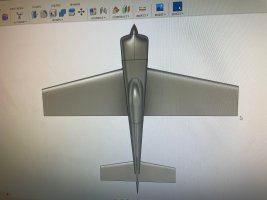
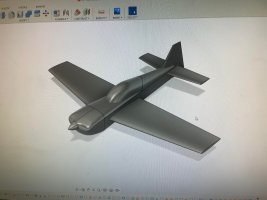
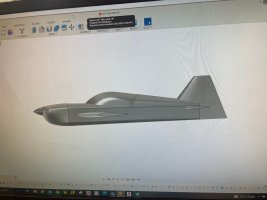
I was wrong decided to get the rest of the solid model finished up today. Here we will use a new command to help in doing the wing tip shape.
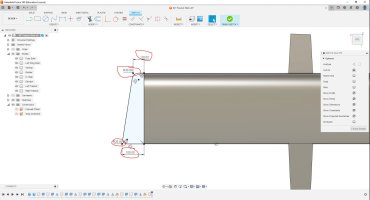
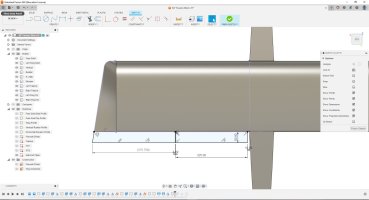
Tristock pic. It got inserted at the end of this group. Basically just sketch onto the wing tip and draw a simple triangle with a 45 deg bevel. Extrude it all the way to the fuse side as a new body.
WT1 Now that the tristock is drawn create an angled workplane at the TE.
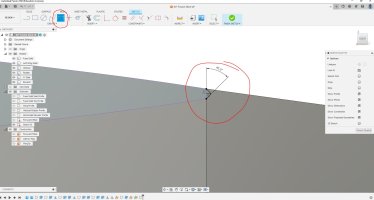
WT2 sketch onto that work plane. First project where the wing profile and tristock cross the sketch. Then go ahead and sketch out the same of the wing tip. You will see all my lines in this sketch are black. This meens they are fully constrained. Click finish sketch
WT3 Now sketch on the wing tip again. project the wing and the trick stock again and then draw a line from LE tip to TE tip. Finish the sketch. At this point go ahead and hover your mouse over the top section and then bottom section of the wing profile. With the line we drew it should highlight each part independently of each other and we need it to do this for the left command to work properly.
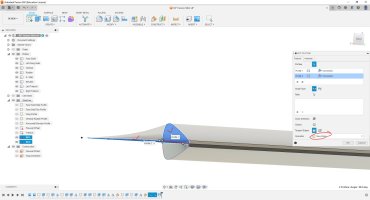
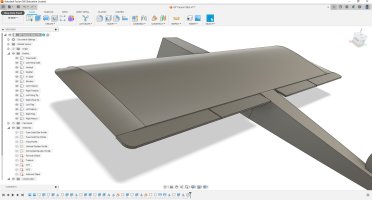
WT4 Now go to the create drop down and find the "Loft" command. click on the top half of the rib and then the wingtip shape sketch and it will model between those sketches. Be sure to click new body.
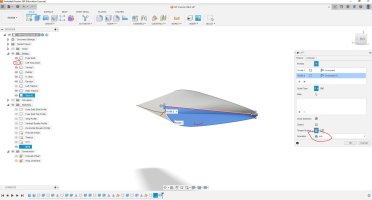
WT5 You will need to turn the wing profile sketch back on and then go ahead and turn the wing solid body off. Loft again between the sketch and the bottom of the previous loft and click join.
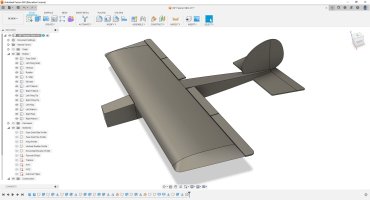
Finally go ahead and mirror the wingtip and turn your bodies back on so you can see all the good work.
Tristock pic. It got inserted at the end of this group. Basically just sketch onto the wing tip and draw a simple triangle with a 45 deg bevel. Extrude it all the way to the fuse side as a new body.
WT1 Now that the tristock is drawn create an angled workplane at the TE.
WT2 sketch onto that work plane. First project where the wing profile and tristock cross the sketch. Then go ahead and sketch out the same of the wing tip. You will see all my lines in this sketch are black. This meens they are fully constrained. Click finish sketch
WT3 Now sketch on the wing tip again. project the wing and the trick stock again and then draw a line from LE tip to TE tip. Finish the sketch. At this point go ahead and hover your mouse over the top section and then bottom section of the wing profile. With the line we drew it should highlight each part independently of each other and we need it to do this for the left command to work properly.
WT4 Now go to the create drop down and find the "Loft" command. click on the top half of the rib and then the wingtip shape sketch and it will model between those sketches. Be sure to click new body.
WT5 You will need to turn the wing profile sketch back on and then go ahead and turn the wing solid body off. Loft again between the sketch and the bottom of the previous loft and click join.
Finally go ahead and mirror the wingtip and turn your bodies back on so you can see all the good work.