rcbirk21
70cc twin V2
65 Vyper Review (Build & Flight)
65 Vyper Review and highlights of build
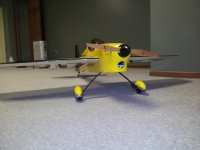
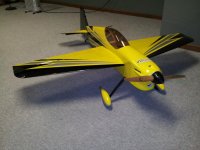
Hey guys! The 65 vyper is one of the most unique aircraft, regardless of company. It can draw straight lines comparable to pattern planes and 40% IMAC airframes, yet still throw down low and slow with the best of them. This is actually my second 65 vyper, the first being the original scheme. One of the best things about my original vyper was the super locked in knife edge and amazing crisp rudder control. I regrettably sold it to afford a much larger plane, but the new scheme gave me enough motivation to want it again. This time, I chose not to skimp out on anything (I went with cheap-0 servos the first time). Down below I will be outline some important aspects of the airframe, certain things that 3DHS does to make the build easier, as well as some extras I have found from various companies that just add that extra touch to turn this from a grade A airframe to an A+. (video and flight review will come later)
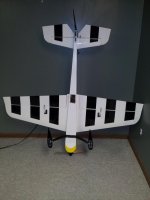
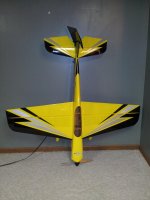
**Please note in this review any products that I use will contain links to the either the website where I bought them, where they are available, or the manufacturers website. for ex: 65 Vyper**
3DHS 65 Vyper Manual
Setup
Motrolfly 4320-450
6s5000 35c packs (will be changing brands soon)
Ice 100 w/castle bec pro
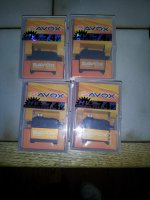
4x Savox SB-2271SG
Hitec Aurora 9 w/ XPS module and 6ch nano rx
Extreme Flight 3" Black spinner
13/16" length, m4 threaded Custom standoffs made by Craig (http://www.customstandoffs.com/)
Xoar 17x10e (will also be trying xoar 18x8e, 18x10e, mejzlik 18x8e)*
Unboxing / First Impressions
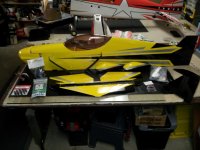
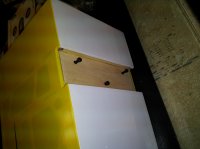
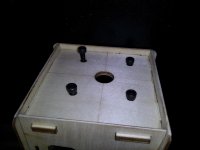
Upon opening the box, you know you have a high quality aircraft just like any other 3DHS airframe. Beautiful, vibrant covering scheme with high contrast will stand out amazingly well against any sky back drop. Covering came out tight, and hatch fit almost properly out of the box. (will go into greater detail later). One nice thing that 3DHS has started doing on their ARF's is putting a lot of the bolts in the fuselage as it is packed in the box. The big advantage of this is that you dont have to go fishing through the different part bags and pull out screws and test them all out until you find the correct size, and then hope that it is the correct length and is not supposed to be used somewhere else. They put them into the firewall, tail wheel bracket holes, and landing gear holes for you as seen in the pictures below. The pull pull wire is also pre-routed through the outside of the tail if you choose to do a pull pull setup. See my article on CG for determining pull pull or push pull configuration. It ended up working out with this particular setup that I can use push pull, which I prefer for simplicity and positive control, but everyone has different opinions and with this setup you can use either one.
Building
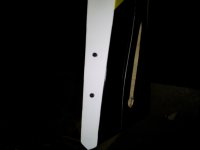
You can tell by the fit of the parts that 3DHS knows what they are doing, however there are a few pit holes to watch out for and be aware of while putting this models together because afterall, they are assembled by factory workers in china who really dont care about how easy it is for us to put together our toys. The first thing I like to do is check cowling/canopy hatch fit, especially since it seems that just about every plane I have ever owned has flung the canopy off at least once. Always always always make sure the latch fully engages. Anyone who has built multiple 3dhs planes can tell you it is vital to making sure that your canopy stays on while you are wringing out your plane. It just so happened that on my vyper the latch was not fully engaging. To check this, first install the cowling. The vyper uses the same tab and receptacle style that the 71 slick uses, so it is very quick to mount it with screws and not worry about canopy hatch fit. Once cowling is installed fully, slide on the hatch. There are two important things to check. The first is that the white tab that is sticking out of the fuse is all the way forward as seen below, exactly as when the hatch is not on.
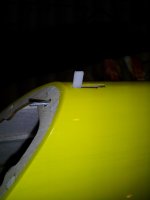
To fix this, enlarge the holes for the locator pins in the cowling until desired fit for the latch is reached. Make sure to do it a small amount at a time as too much grinding out can cause a loose fit for the locator pins and the hatch can fly off. I just use a dremel with a pencil grinding bit to enlarge the holes
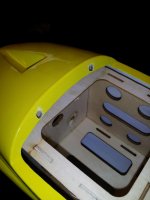
The other thing to make sure is that the pin is fully engaged. I talked to Ben Fisher about this a while back, and he said to make sure approx. 3mm is sticking out through the inside of the canopy. If the tab on the outside of the fuse is all the way forward and you are not getting the required amount of pin inside the canopy, take a pair of pliers and gently pull on the pin to get more length. Sometimes in assembly at the factory the pin gets pushed in, and it just takes a few seconds to ensure a secured canopy during heavy 3D and high speed flight.
As mentioned earlier, I decided to go overboard with servos this time around. Servos are one of those items that you really get what you pay for and they can make or break a setup. I have always wanted to try brushless servos, and this plane has given me the perfect opportunity to try them. I will be doing a separate review on these servos, so stay tuned! Spoiler: They are wicked fast on regulated 8.5v!
Extras
I tried out a bunch of little trinkets I tried out for the first time that really make this build and the plane overall just that much better.
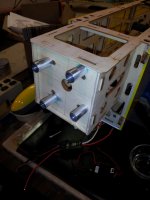
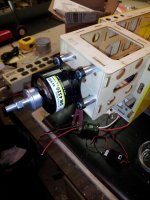
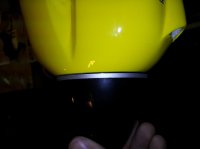
The first item I tried out was custom standoffs from Craig over at customstandoffs.com. There were a few reasons I wanted to try them out. The first is I love the look of them and the rigidity they give the whole motor mount, especially with these high torque brushless motors we use. The main reason is that with this motrolfly, I had to redrill the firewall. I cannot reiterate how much I despise blind nuts, especially installing them. By getting the standoffs threaded, I could just put a bolt and washer on each side (one on the motor side, one inside the motorbox on the firewall) and all done! Also note how tight the spinner gap is with this setup.
The next item I tried out is from Azar over at aztech aeromodel. I ordered a set of the Secraft Wing Bolts. For all of the 3dhs 25% planes (65-74" wingspan), the M6 is the one that you want. The great thing about this is that you can loctite the threaded shaft into the blind nut in the wing, and just thread the head on when you install the wing, which I have found much easier.
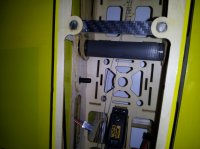
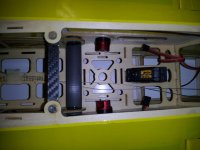
Another nice little item i got from Azar are these fiberglass bracket with rubber bushing. These are awesome for installing in the wing and using as a retainer for aileron servo leads. I always have the problem of the servo leads falling into the wing during transportation and having to get out a mechanical finger to get them out. This is a great little trick to retain them, and the rubber bushing has an opening just small enough to gently retain the servo connector, although a little smaller one would probably be more ideal. The fiberglass bracket needs some trimming to fit in the wing, but a band saw or cutoff wheel on a dremel will work perfectly.
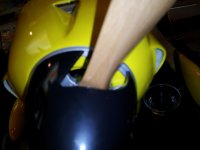
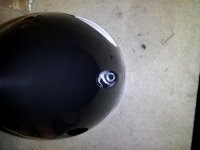
One thing that is very personal is spinner choice. I dont like spending the money on CF spinners, and really dont like cutting out slots or enlarging slots for my prop to fit through. Luckily, the kind folks at extreme flight have the gem of a spinner in their Elite Spinner series. There are quite a few things I really like about these spinners, such as the lightened aluminum back plate, extra wide prop cutouts, and very inexpensive listed price. They even recently started including hex bolts instead of phillips head with their spinners, as seen below. They even include an extra hex head bolts. Its really just icing on the cake, especially when they retail for just $9 for a 3" spinner. A picture of the size of the prop cut out is also shown.
Flight Performance
Because the vyper is such a unique airframe, I would like to break it down by maneuver (at least the maneuvers I have had a chance to perform with it). Keep in mind that this airframe is capable of doing every and anything you can throw at it, but because of it's hybrid nature, it takes learning how the airframe reacts to be proficient in 3D maneuvers. Sometimes the vyper will take more aileron, less rudder, or more elevator to do the same maneuver.
Hovering - Because this is a hybrid airframe, it performs 3D maneuvers differently. Note I did not say poorly, just different. This airframe hovers amazingly well once locked it, but it takes a little bit more effort to get it fully upright. I may just need some more elevator throw or better timed throttle pulses to get the plane perfectly upright, but it was a bit more difficult for me. I will also chalk it up to only having 6 total flights on the airframe now, even though by the 4th flight I was doing tail touches. Once vertical, this is as stable as it gets with any airframe I have ever flown. It actually takes effort to knock it out of a hover.
Harrier - Again, the vyper likes to harrier a bit differently than traditional 3D airframes. It is much more sensitive to wing rock if you do not harrier correctly. If you try to control your altitude by elevator rather than throttle, it will rock a bit. Once you get the hang of it, the vyper harriers extremely stable. Harrier turns are extremely smooth and can take a lot of rudder without falling out.
Rolling Harrier - This thing rolls fast! Definitely start with a middle rate that has lower throw on the ailerons, as this plane can easily get out of hand with how fast it roles. If you like rifle rollers, this is your plane.
Knife Edge Spin - This is one area where the vyper accelerates. Its entry is different then most airframes, requiring correct timing and amount of aileron, but once locked in it is phenomenal. Super crisp, almost completely horizontal, and extremely violent. This is definitely one of the most fun maneuvers to do with this plane.
Weeble Wobble (AKA Rolling Harrier Spin) - I know some differentiate between the two maneuvers, but for the sake of the review there is little difference. This is almost as fun as the knife edge spins, but much easier to enter. This plane does the easiest weeble wobble of any airframe I have flown.
Precision Rolling Circle - This is one of my personal favorites, especially the one roll rolling circle. Because of the massive rudder authority, it takes a very soft rudder input to make the circle look smooth, but once you get the hang of it, the vyper draws beautiful lines, and this maneuver is no exception. Can do the one roll flat circle equally well at high and low speeds.
Hammer Head Stall Turn, Point rolls, Slow Rolls - All of what I am about to say does not only apply to a hammerhead, but to all IMAC sequence style maneuvers. The amount of rudder authority makes it very easy to hide any insecurities with rudder timing, as you can be a little late but still pull off the stunt smoothly by inputting slightly more rudder. All straight lines are beautiful and this really feels like a pattern plane in most aspects. Aileron inputs and reactions are super crisp, stop on a dime, and even make cool noises (if you have ever heard a vyper fly, you know what I mean. I am not sure what causes it, but it sounds like the hinge sealing whistles like a composite arf during point rolls)
Knife Edge - This is the best part about the vyper. I will defend that this is the best airframe for knife edge circuits. I have spent entire flights in knife edge flight, both high speed and slow high alpha. This plane is confidence inspiring while on its side, and requires no mixing. If you are super picky you may be able to add a percent here and there for KE mixing, but it is actually more effort to attempt to mix it out than to fly it out.
Flat Spins - Super smooth, super easy, very stale. Just like every other maneuver, this vyper rocks it out.
Here is a video of my maiden. Unfortunately the video camera (my dad's go pro) had a dead battery after my first flight, so all I have is a video of the maiden. This was my first flight of the year, so cut me a bit of slack and chalk it up to getting used to the airframe.
[video=youtube;HAT3_zBVVtM]http://www.youtube.com/watch?v=HAT3_zBVVtM[/video]
Servo Amp Draw
This has been a big question, and just to settle any arguments I could I enlisted a family member's help and took this short video to show how much amp draw I could get on these savox brushless servos. The first part of the video is just constant movement, and the second part (although you cant see it) is me binding the surface. Keep in mind that on 6s, the bec pro is good to 13A continuous, which would mean on 4 servos I could be at 3 amps each and still have some head room. Check it out:
[video=youtube;oxJhFCoRzFg]http://www.youtube.com/watch?v=oxJhFCoRzFg&feature=youtu.be[/video]
As always if I missed anything or can answer any questions, just let me know!
65 Vyper Review and highlights of build
Hey guys! The 65 vyper is one of the most unique aircraft, regardless of company. It can draw straight lines comparable to pattern planes and 40% IMAC airframes, yet still throw down low and slow with the best of them. This is actually my second 65 vyper, the first being the original scheme. One of the best things about my original vyper was the super locked in knife edge and amazing crisp rudder control. I regrettably sold it to afford a much larger plane, but the new scheme gave me enough motivation to want it again. This time, I chose not to skimp out on anything (I went with cheap-0 servos the first time). Down below I will be outline some important aspects of the airframe, certain things that 3DHS does to make the build easier, as well as some extras I have found from various companies that just add that extra touch to turn this from a grade A airframe to an A+. (video and flight review will come later)


**Please note in this review any products that I use will contain links to the either the website where I bought them, where they are available, or the manufacturers website. for ex: 65 Vyper**
3DHS 65 Vyper Manual
Setup
Motrolfly 4320-450
6s5000 35c packs (will be changing brands soon)
Ice 100 w/castle bec pro
4x Savox SB-2271SG
Hitec Aurora 9 w/ XPS module and 6ch nano rx
Extreme Flight 3" Black spinner
13/16" length, m4 threaded Custom standoffs made by Craig (http://www.customstandoffs.com/)
Xoar 17x10e (will also be trying xoar 18x8e, 18x10e, mejzlik 18x8e)*
Unboxing / First Impressions

Upon opening the box, you know you have a high quality aircraft just like any other 3DHS airframe. Beautiful, vibrant covering scheme with high contrast will stand out amazingly well against any sky back drop. Covering came out tight, and hatch fit almost properly out of the box. (will go into greater detail later). One nice thing that 3DHS has started doing on their ARF's is putting a lot of the bolts in the fuselage as it is packed in the box. The big advantage of this is that you dont have to go fishing through the different part bags and pull out screws and test them all out until you find the correct size, and then hope that it is the correct length and is not supposed to be used somewhere else. They put them into the firewall, tail wheel bracket holes, and landing gear holes for you as seen in the pictures below. The pull pull wire is also pre-routed through the outside of the tail if you choose to do a pull pull setup. See my article on CG for determining pull pull or push pull configuration. It ended up working out with this particular setup that I can use push pull, which I prefer for simplicity and positive control, but everyone has different opinions and with this setup you can use either one.


Building
You can tell by the fit of the parts that 3DHS knows what they are doing, however there are a few pit holes to watch out for and be aware of while putting this models together because afterall, they are assembled by factory workers in china who really dont care about how easy it is for us to put together our toys. The first thing I like to do is check cowling/canopy hatch fit, especially since it seems that just about every plane I have ever owned has flung the canopy off at least once. Always always always make sure the latch fully engages. Anyone who has built multiple 3dhs planes can tell you it is vital to making sure that your canopy stays on while you are wringing out your plane. It just so happened that on my vyper the latch was not fully engaging. To check this, first install the cowling. The vyper uses the same tab and receptacle style that the 71 slick uses, so it is very quick to mount it with screws and not worry about canopy hatch fit. Once cowling is installed fully, slide on the hatch. There are two important things to check. The first is that the white tab that is sticking out of the fuse is all the way forward as seen below, exactly as when the hatch is not on.

To fix this, enlarge the holes for the locator pins in the cowling until desired fit for the latch is reached. Make sure to do it a small amount at a time as too much grinding out can cause a loose fit for the locator pins and the hatch can fly off. I just use a dremel with a pencil grinding bit to enlarge the holes

The other thing to make sure is that the pin is fully engaged. I talked to Ben Fisher about this a while back, and he said to make sure approx. 3mm is sticking out through the inside of the canopy. If the tab on the outside of the fuse is all the way forward and you are not getting the required amount of pin inside the canopy, take a pair of pliers and gently pull on the pin to get more length. Sometimes in assembly at the factory the pin gets pushed in, and it just takes a few seconds to ensure a secured canopy during heavy 3D and high speed flight.
As mentioned earlier, I decided to go overboard with servos this time around. Servos are one of those items that you really get what you pay for and they can make or break a setup. I have always wanted to try brushless servos, and this plane has given me the perfect opportunity to try them. I will be doing a separate review on these servos, so stay tuned! Spoiler: They are wicked fast on regulated 8.5v!

Extras
I tried out a bunch of little trinkets I tried out for the first time that really make this build and the plane overall just that much better.
The first item I tried out was custom standoffs from Craig over at customstandoffs.com. There were a few reasons I wanted to try them out. The first is I love the look of them and the rigidity they give the whole motor mount, especially with these high torque brushless motors we use. The main reason is that with this motrolfly, I had to redrill the firewall. I cannot reiterate how much I despise blind nuts, especially installing them. By getting the standoffs threaded, I could just put a bolt and washer on each side (one on the motor side, one inside the motorbox on the firewall) and all done! Also note how tight the spinner gap is with this setup.


The next item I tried out is from Azar over at aztech aeromodel. I ordered a set of the Secraft Wing Bolts. For all of the 3dhs 25% planes (65-74" wingspan), the M6 is the one that you want. The great thing about this is that you can loctite the threaded shaft into the blind nut in the wing, and just thread the head on when you install the wing, which I have found much easier.


Another nice little item i got from Azar are these fiberglass bracket with rubber bushing. These are awesome for installing in the wing and using as a retainer for aileron servo leads. I always have the problem of the servo leads falling into the wing during transportation and having to get out a mechanical finger to get them out. This is a great little trick to retain them, and the rubber bushing has an opening just small enough to gently retain the servo connector, although a little smaller one would probably be more ideal. The fiberglass bracket needs some trimming to fit in the wing, but a band saw or cutoff wheel on a dremel will work perfectly.
One thing that is very personal is spinner choice. I dont like spending the money on CF spinners, and really dont like cutting out slots or enlarging slots for my prop to fit through. Luckily, the kind folks at extreme flight have the gem of a spinner in their Elite Spinner series. There are quite a few things I really like about these spinners, such as the lightened aluminum back plate, extra wide prop cutouts, and very inexpensive listed price. They even recently started including hex bolts instead of phillips head with their spinners, as seen below. They even include an extra hex head bolts. Its really just icing on the cake, especially when they retail for just $9 for a 3" spinner. A picture of the size of the prop cut out is also shown.


Flight Performance
Because the vyper is such a unique airframe, I would like to break it down by maneuver (at least the maneuvers I have had a chance to perform with it). Keep in mind that this airframe is capable of doing every and anything you can throw at it, but because of it's hybrid nature, it takes learning how the airframe reacts to be proficient in 3D maneuvers. Sometimes the vyper will take more aileron, less rudder, or more elevator to do the same maneuver.
Hovering - Because this is a hybrid airframe, it performs 3D maneuvers differently. Note I did not say poorly, just different. This airframe hovers amazingly well once locked it, but it takes a little bit more effort to get it fully upright. I may just need some more elevator throw or better timed throttle pulses to get the plane perfectly upright, but it was a bit more difficult for me. I will also chalk it up to only having 6 total flights on the airframe now, even though by the 4th flight I was doing tail touches. Once vertical, this is as stable as it gets with any airframe I have ever flown. It actually takes effort to knock it out of a hover.
Harrier - Again, the vyper likes to harrier a bit differently than traditional 3D airframes. It is much more sensitive to wing rock if you do not harrier correctly. If you try to control your altitude by elevator rather than throttle, it will rock a bit. Once you get the hang of it, the vyper harriers extremely stable. Harrier turns are extremely smooth and can take a lot of rudder without falling out.
Rolling Harrier - This thing rolls fast! Definitely start with a middle rate that has lower throw on the ailerons, as this plane can easily get out of hand with how fast it roles. If you like rifle rollers, this is your plane.
Knife Edge Spin - This is one area where the vyper accelerates. Its entry is different then most airframes, requiring correct timing and amount of aileron, but once locked in it is phenomenal. Super crisp, almost completely horizontal, and extremely violent. This is definitely one of the most fun maneuvers to do with this plane.
Weeble Wobble (AKA Rolling Harrier Spin) - I know some differentiate between the two maneuvers, but for the sake of the review there is little difference. This is almost as fun as the knife edge spins, but much easier to enter. This plane does the easiest weeble wobble of any airframe I have flown.
Precision Rolling Circle - This is one of my personal favorites, especially the one roll rolling circle. Because of the massive rudder authority, it takes a very soft rudder input to make the circle look smooth, but once you get the hang of it, the vyper draws beautiful lines, and this maneuver is no exception. Can do the one roll flat circle equally well at high and low speeds.
Hammer Head Stall Turn, Point rolls, Slow Rolls - All of what I am about to say does not only apply to a hammerhead, but to all IMAC sequence style maneuvers. The amount of rudder authority makes it very easy to hide any insecurities with rudder timing, as you can be a little late but still pull off the stunt smoothly by inputting slightly more rudder. All straight lines are beautiful and this really feels like a pattern plane in most aspects. Aileron inputs and reactions are super crisp, stop on a dime, and even make cool noises (if you have ever heard a vyper fly, you know what I mean. I am not sure what causes it, but it sounds like the hinge sealing whistles like a composite arf during point rolls)
Knife Edge - This is the best part about the vyper. I will defend that this is the best airframe for knife edge circuits. I have spent entire flights in knife edge flight, both high speed and slow high alpha. This plane is confidence inspiring while on its side, and requires no mixing. If you are super picky you may be able to add a percent here and there for KE mixing, but it is actually more effort to attempt to mix it out than to fly it out.
Flat Spins - Super smooth, super easy, very stale. Just like every other maneuver, this vyper rocks it out.
Here is a video of my maiden. Unfortunately the video camera (my dad's go pro) had a dead battery after my first flight, so all I have is a video of the maiden. This was my first flight of the year, so cut me a bit of slack and chalk it up to getting used to the airframe.
[video=youtube;HAT3_zBVVtM]http://www.youtube.com/watch?v=HAT3_zBVVtM[/video]
Servo Amp Draw
This has been a big question, and just to settle any arguments I could I enlisted a family member's help and took this short video to show how much amp draw I could get on these savox brushless servos. The first part of the video is just constant movement, and the second part (although you cant see it) is me binding the surface. Keep in mind that on 6s, the bec pro is good to 13A continuous, which would mean on 4 servos I could be at 3 amps each and still have some head room. Check it out:
[video=youtube;oxJhFCoRzFg]http://www.youtube.com/watch?v=oxJhFCoRzFg&feature=youtu.be[/video]
As always if I missed anything or can answer any questions, just let me know!
Last edited by a moderator:

