• If you are new to GiantScaleNews.com, please register, introduce yourself, and make yourself at home.

    We're 1st in Giant Scale RC because we've got the best membership on the internet! Take a look around and don't forget to register to get all of the benefits of GSN membership!

    Welcome!

Assembly: Aeroworks QB 150cc Yak 55M

Joe Hunt

150cc
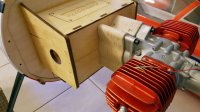
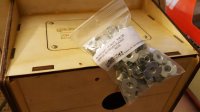
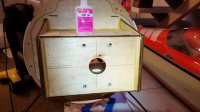
Next I downloaded a template for the engine and transferred that over to the universal wood template AW includes with the plane. I then taped that on the motorbox while lining its alignment lines up with the alignment lines on the firewall. Then I drilled it out for the blind nuts.
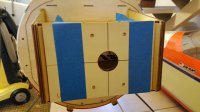
20150903_144100web.jpg

After I put in the blindnuts from microfasteners.com I used ZAP thin CA on all the glue joints I could get to throughout the plane. I used to get my ZAP glue directly from Frank Tiano of ZAP glues because it always came so fresh. Once when I got some CA from a hobby store it was so old that it could not glue two pieces of wood together (literally could not). My local hobby store says they get fresh glue in every week so I went ahead and got it locally this time.
20150903_144658web.jpg 20150903_152234web.jpg

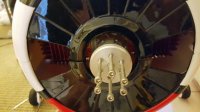
I put the cowl on and the engine was nice and centered:
20150903_160102web.jpg
 

Joe Hunt

150cc
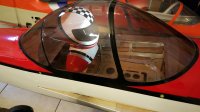
The H9 Sukhoi pilot is cool and comes included with that model. It weighs 7oz. I really like this AW pilot, and it weighs about half that at 3.8oz. Although it does not have a face, poor thing. haha

20150903_153248web.jpg
 

Joe Hunt

150cc
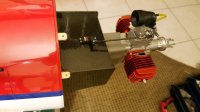
Somehow I forgot to show the engine mounted. :confused??:

20150903_155540web.jpg

I picked up some 5" bolts, although 4-3/4 would be perfect, and 4-1/2 could have worked in a pinch. I had some 4 and 4-1/4 bolts already here, but neither were long enough to attach a nut on the other side of the blindnut.

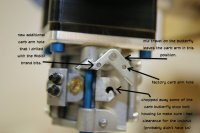
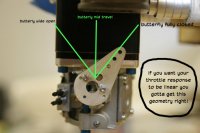
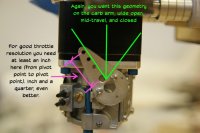
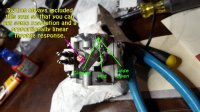
The Walbro carb has a short throttle arm with the wrong geometry to get any kind of proportionally linear transition of the engine. Here's some pics of a similar carb in a previous review I did where I show what I did and why:

yak-qb_177.jpg yak-qb_181.jpg yak-qb_182.jpg

I didn't have any more of those nifty old Nelson arms lying around so I used the included 3W arm. I soldered and bolted it down:

20150904_030731web.jpg
 

Joe Hunt

150cc
I cut in the throttle servo pocket, glued in some hard points for the servo screws, drilled 'em, put thin CA in them, and then bolted down the throttle servo. I used the stock throttle servo arm (4-40 piano wire), so I used a carbon fiber sleeve over it. I put some epoxy inside of each end to keep it from moving. Normally I'd just use a 6" titanium turnbuckle, but I didn't have one laying around. I used a stock plastic 3/4" long servo arm from Hitec. I ended up with the sub trim at 0 and end points at 130/130. That should give me the kind of resolution I like. And in combination with the butterfly/throttle linkage being correct... I should really have a nice throttle response.

20150904_185732web.jpg

Also, you can see that I covered the sides and bottom of the motorbox and painted the engine spacer grey. Not seen is that I soldered on a PAD and an extension to the Hitec brushless 9465 servo that I used for the throttle, this servo has a .07 speed.
 

stangflyer

I like 'em "BIG"!

I called it at 8oz. I could probably make it 2 oz lighter, but it's so tall. For all the time I have into it Monkey would definitely get upset if it were to crack because I made it thinner. ;) I can live with 2 extra oz. :)

View attachment 40173 View attachment 40174
Looks pretty cool Joe. I made the same type of stand off for the 37% Pilot Edge to mount the 111 after removing the 128 four cylinder. Solid as all heck and totally good looking.
 

Joe Hunt

150cc
Thanks stangflyer! I'm ready to have this plane done. I just realized I've almost had it for a month now. Going to try to get it done in the next 2 or 3 days...
 

Joe Hunt

150cc
I have only heard of using aileron differential to help with yaw while rolling. Now I am wondering if it might be part of poor geometry. If you did use differential, would you still keep the neutral point of the servo centered so you had equal degrees of throw and just move your horn location to get the differential you want?

When trying to achieve axial rolls you run into problems if you have an aileron on one side of the plane with more drag than the other. You won't feel it on roll rate, it will still roll at whatever rate you want by increasing or decreasing the overall roll rate. IOW, you can still roll with just one aileron working and the other fixed. But, the drag is heavy on one side of the plane and there is no drag on the other side. That's when you start wobbling around. Prior to working on geometry I had that effect all the time and would work on the radio to tune it out. And, also later with the CompARF with skinned hinges... one side always had more drag because the hinge line was not in the center of the wing. Aileron differential just means the ailerons are moving a different amount. Aileron differential can be used to avoid manually coordinating a turning maneuver, but I only used it to correct (as you suspected) bad geometry. I used the radio's aileron differential mix to remove the plane's aileron differential. ;)

As to the servo linkage setup, yes you can either set it up for equal travel with the servo as shown in this thread (no differential), or set it up without equal travel and then you will end up with differential. Different rates and speeds, as discussed. You can then use your radio to dial out the differential or leave it in if that's what you (2nd person plural) want... e.g., if you want it there for coordinated turns. In IMAC and Freestyle we don't actually do a lot of turns. I'm more concerned with axial rolls and rudder coupling. I pretty much thumb it from there for IMAC or Freestyle. But, talking to Jason Shulman back in like 2002... he told me he mixes the hell out of his planes. I've never taken the time to really tune a plane with a radio. I like to setup the linkage where the geometry is perfect, that gives me axial rolls. From there I do a rudder to elevator mix and a rudder to aileron mix and call it done. Sometimes for IMAC I'll do a low throttle tuck (low throttle to down elevator mix)... but usually I just thumb that, too. haha Hell, my friend's tell me they can fly 3D in my IMAC rates, haha, and I run little to no expo in 3D rates (sometimes positive expo). But, I've never talked about radio work, because I can't recommend mine, it's just how I like it. I talk about geometry because that's an absolute. :)
 

Joe Hunt

150cc
When I had rolls that were not axial that was my problem. This was before I learned how to get my geometry correct. It took me a lot of time figuring it out and im sure I remember watching some of Joes older post from down on the deck.com to help me figure out what to do. Since I was newer in the hobby I didn't know what aileron differential was. But my mid travels were not equal from aileron to aileron.

Exactly. :)
 
Top