• If you are new to GiantScaleNews.com, please register, introduce yourself, and make yourself at home.

    We're 1st in Giant Scale RC because we've got the best membership on the internet! Take a look around and don't forget to register to get all of the benefits of GSN membership!

    Welcome!

Sport Beautifying the Beast

TAIL WHEEL

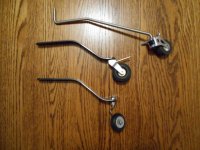
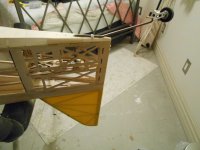
I wanted a more "Scale Look" tail wheel for this model, so I opted to use a J & J Tail Wheel assembly. This places the wheel farther back behind the rudder as it is on the real airplane.

I had another option in house, a tail wheel assembly that has the same CF with a more "Scale Looking" wheel but it just did not protrude far enough back for the look that I was after.

The bottom tail wheel is the one that comes with the kit, to me it just doesn't look correct!
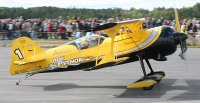
Pitts Python.jpg Choices.JPG Tail Wheel Mounted.JPG
 
RECEIVER & GYRO INSTALLATION

It's great to have a large cavity in the fuselage to place the electronic gear.

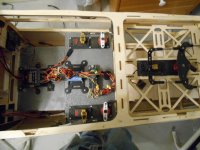
I've installed a gyro in this plane, and because of that I had to add a rigid mounting plate. I'm not using pipes on this plane so the top of the tunnel was a good place to begin. To make the plate solid, I used 1/16 inch birch plywood that fit perfectly underneath the hardwood rails on the side of the fuselage. Once epoxied in this plate was rock solid.

The receiver is mounted to a CF base that is on top of medium soft rubber mounts to help absorb any vibration. I use Velcro on the bottom of the receiver and on top of the CF base to hold it in place. Once I have completed all of the wiring I'll place a Velcro strap as an extra security feature. The gyro is mounted in the same way, EXCEPT I used a harder rubber washer to support the CF base. I have had great success with this method on 3 other planes. Since this airplane has dual servos for the right and left side, I take the single aerilon out put out of the Gyro and use an Intellimatch to split the signal for both right and left servos.

I have yet to decide on where the batteries will go, that will be determined by how the CG turns out after the plane is complete.

RECEIVER & GYRO.JPG
 
BOTTOM WING AERILONS AS FLAPS

Has anyone had any experience with this type of setup on a biplane.

I could program my radio so that the bottom aerilon in 1 mode acts as a true aerilon but in another mode acts a flap.

I am pondering this for two reasons:-

1:-Since I am painting this model, the weight will be higher than the film covered plane and this might help on landings.

2:-Also as I am using a gyro, I could eliminate the Intellimatch and have the bottom aerilon programmed to "follow the top aerilon".

ANY thoughts out there.
 

reyn3545

100cc
Interesting.... Sounds like a great idea. As for the Gyro, bow much do you find that it helps on slow speed flying? I've seen several threads on gyros in planes, but never took the time to look into them.

Sent from my XT1080 using Tapatalk
 
Gyros are great for gusty days and for those "PERFECT" landings!

I think of it as the same as fire insurance on my house, maybe you will never use it, but it's great when you do need it!
 

Pistolera

HEY!..GET OUTTA MY TREE!
Brian....on my Beast I experimented with flaps on the bottom ailerons. Within a couple of flights I managed to scrape both aileron tips during gusty wind landings. The bottom wings are not that far off the ground to begin with, then add 10 deg of roll and a down aileron and voila!

I removed that function and patched my tips. The Beast really does fly and land slow enough anyway.

BTW - I was running a DA120 on canisters and my flight batts ended up on the tray behing the canopy (in the turtledeck). The ignition batt was on the firewall.

Thanks for the insight. I'll scrap the flap idea.
 
MAIN FUSELAGE READY FOR PAINT

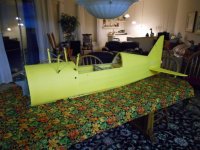
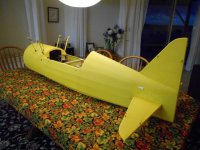
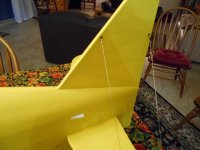
The ain fuselage is now complete with the Solartex fabric. A trick I learned on another build site was to paint every seam with thin Cyano to make a perfect seal. After drying use a very shark blade and scrape of any extra residue and then sand down width 400 grit paper. All of my seams are 1/4 inch overlapped. The glue on the Solartex really sticks to itself.

If you have never worked with a cloth covering such as Solartex, you are in for a treat. It stretches everywhere with hardly any work so you get NO wrinkles, its very durable and it is very difficult to put a hole in it. It never wrinkles once applied, BUT - BUT it does need painting.

The main color of my plane will be this yellow and I have found a perfect match for the color. But I'll detail that when I get to the painting part of the build.

SIDE VIEW.JPG REAR VIEW.JPG TAIL.JPG
 
Top