• If you are new to GiantScaleNews.com, please register, introduce yourself, and make yourself at home.

    We're 1st in Giant Scale RC because we've got the best membership on the internet! Take a look around and don't forget to register to get all of the benefits of GSN membership!

    Welcome!

Sport JTEC RADIOWAVE 26% Pitts Model 12

stangflyer

I like 'em "BIG"!
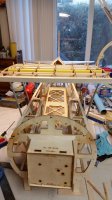
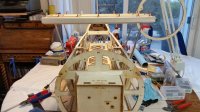
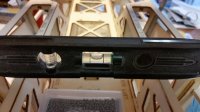
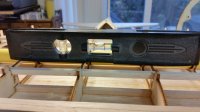
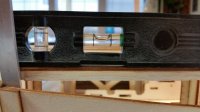
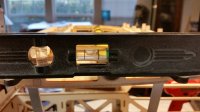
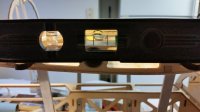
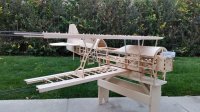
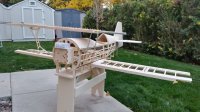
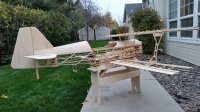
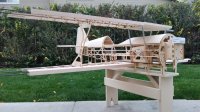
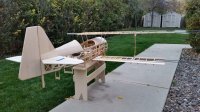
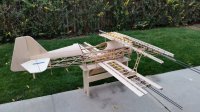
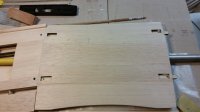
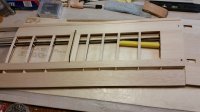
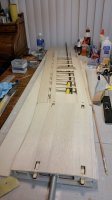
I figured that sheeting the center section of the top wing before I was supposed to would really create a problem. Na...!! I needed to make a couple of cutouts in the sheeting to allow the center section to rest on the cabane struts anyway, So cutting a little out for this next step was purely not a problem. With all my issues resolved, (for the moment) and mini tempertantrum behind me, I actually got some good progress today. Center section and upper right wing now bolted together and looking pretty good. I wanted to see how this thing was going to look soooo....yup. Test assembly minus one wing. LOL....
20161031_180405.jpg 20161031_180423.jpg 20161031_180521.jpg 20161031_180605.jpg 20161031_180626.jpg 20161031_180712.jpg 20161031_180749.jpg 20161031_182848.jpg 20161031_182904.jpg 20161031_182923.jpg 20161031_182944.jpg 20161031_183043.jpg 20161031_183110.jpg 20161031_223118.jpg 20161031_223125.jpg 20161031_223144.jpg

I am going to try really hard to get the last wing built tomorrow. Then I can start sheeting the bottom of all the wings and finishing this girl up.
 

HRRC Flyer

GSN Sponsor Tier 1
Hey Rob,

Looks AWESOME Buddy. . . . . :big_yes:

Have you considered putting a 2.4 receiver and a small LiFe battery in the upper wing so you won't see the servo wires running from the fuse to the top wing? You could make a hatch in the bottom of the center section with a switch in it for the battery. The only down side is that you'd have to remember to charge the extra battery. Just a thought.
 

Xpress

GSN Sponsor Tier 1
Hey Rob,

Looks AWESOME Buddy. . . . . :big_yes:

Have you considered putting a 2.4 receiver and a small LiFe battery in the upper wing so you won't see the servo wires running from the fuse to the top wing? You could make a hatch in the bottom of the center section with a switch in it for the battery. The only down side is that you'd have to remember to charge the extra battery. Just a thought.

If he uses the Hitec gear he normally uses he won't be able to do this. But t is a good idea :way_to_go:
 

stangflyer

I like 'em "BIG"!
You guys are just alright. Thank you for the compliments. Definitely moving along with it.

David, awesome idea and yes it would be totally worth the effort. Not that much effort really. I remember a few years back, my son and I were flying "Fun 51's". Some of you may remember them. Tower Hobbies nitro powered profile Mustangs. Add a O.S. SF 46 with a tuned pipe, and that baby hauled the mail. They have an access hatch in the bottom of one wing where the rx. battery and rx. was stored. Kind of a pain to pull the hatch everytime a charge was needed. But a small price to pay. I eventually ran a charge plug outside the hatch for easier accessibility.

Tanner however is 100% correct. Hitec protocol will not allow more than one operational rx. for radio set up. Not with the Optima 7 and 9 rx's that is. I have been considering my options on the top wing servo's as I have moved through this build. About the only option I have short of changing radio systems, (and that ain't gonna happen) is to route aileron servo leads from the rx. in the fuse up to the top wing. But I do have some ideas. I was thinking of running the servo leads up from the lower wing "inside" a passage way built into the interplane struts. Since they will get a laminated layer of balsa on both sides, it would be easy enough to run an access passage up to the top wing. Totally concelled. It would mean I will need to plug in (4) aileron servo leads everytime I put the lower wing on. But, it would solve having to run the leads up through or near the hatch and having them run past the cabane struts. Either way, I'll have to use longer extensions to make the distance to the top wing aileron servos. Just a first thought, but I'm open to suggestions.

Last (top left) wing is about 90% framed up now. Just need to place the sheeting, cap strips and bolt down blocks. Photos of today's progress to be posted later.
 

Snoopy1

640cc Uber Pimp
I figured that sheeting the center section of the top wing before I was supposed to would really create a problem. Na...!! I needed to make a couple of cutouts in the sheeting to allow the center section to rest on the cabane struts anyway, So cutting a little out for this next step was purely not a problem. With all my issues resolved, (for the moment) and mini tempertantrum behind me, I actually got some good progress today. Center section and upper right wing now bolted together and looking pretty good. I wanted to see how this thing was going to look soooo....yup. Test assembly minus one wing. LOL....
View attachment 90836 View attachment 90837 View attachment 90838 View attachment 90839 View attachment 90840 View attachment 90841 View attachment 90842 View attachment 90843 View attachment 90844 View attachment 90845 View attachment 90846 View attachment 90847 View attachment 90848 View attachment 90849 View attachment 90850 View attachment 90851

I am going to try really hard to get the last wing built tomorrow. Then I can start sheeting the bottom of all the wings and finishing this girl up.

Man it looks like you are building in the dinning room how do get away with that for that amount of time.
Plane is looking good it will still be some time before you start covering.
 

stangflyer

I like 'em "BIG"!
Man it looks like you are building in the dinning room how do get away with that for that amount of time.
Plane is looking good it will still be some time before you start covering.
Oh you know, 'bout the only one I have to worry about saying anything is my four legged co-pilot. He don't say much. Except when he's hungry. Lol. I plan to start covering as soon as the building is done. From table to field in two months? Lol....don't think the weather will cooperate.
 

Snoopy1

640cc Uber Pimp
IMG_1374.JPG
You guys are just alright. Thank you for the compliments. Definitely moving along with it.

David, awesome idea and yes it would be totally worth the effort. Not that much effort really. I remember a few years back, my son and I were flying "Fun 51's". Some of you may remember them. Tower Hobbies nitro powered profile Mustangs. Add a O.S. SF 46 with a tuned pipe, and that baby hauled the mail. They have an access hatch in the bottom of one wing where the rx. battery and rx. was stored. Kind of a pain to pull the hatch everytime a charge was needed. But a small price to pay. I eventually ran a charge plug outside the hatch for easier accessibility.

Tanner however is 100% correct. Hitec protocol will not allow more than one operational rx. for radio set up. Not with the Optima 7 and 9 rx's that is. I have been considering my options on the top wing servo's as I have moved through this build. About the only option I have short of changing radio systems, (and that ain't gonna happen) is to route aileron servo leads from the rx. in the fuse up to the top wing. But I do have some ideas. I was thinking of running the servo leads up from the lower wing "inside" a passage way built into the interplane struts. Since they will get a laminated layer of balsa on both sides, it would be easy enough to run an access passage up to the top wing. Totally concelled. It would mean I will need to plug in (4) aileron servo leads everytime I put the lower wing on. But, it would solve having to run the leads up through or near the hatch and having them run past the cabane struts. Either way, I'll have to use longer extensions to make the distance to the top wing aileron servos. Just a first thought, but I'm open to suggestions.

Last (top left) wing is about 90% framed up now. Just need to place the sheeting, cap strips and bolt down blocks. Photos of today's progress to be posted later.

What I did to get around the problem of wiring at the field I did the following. See picture, built everything in the bottom wing doubled the size of the servos and connected the top and bottom aileron with strut. In the bottom aileron add heavy block connected the servo to the block and the strut wire in the same block. Then connected the strut to a block in the top wing with the same connection.
 
Top