Aerobeez
70cc twin V2
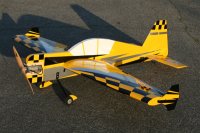
Good day 3DRC and hello all you pilots and builders, welcome to another installment of Pete's Tip of the Week! In today's tip, we will be installing a 4Titude fuel tank in place of the stock fuel tank onto our Aerobeez 65" Yak 54 Profile ARF! These same steps can also be used on our 65" Extra 330 Profile ARF or other profile planes with some minor modifications to the process.
Step 1: Insert the long zip tie into the slots where you will be mounting the fuel tank. (this tip works great for the stock fuel tank as well) Use a strip of velcro on the fuselage and the fuel tank.

Step 2: Have a short thin piece of wire ready. Bend the wire head in a U shape. We are using this wire to guide the zip tie through the slots.

Step 3: Shine a bright light into the slot. The tip of the zip tie should be just visible. Now insert the U shaped wire into the slot and cradle the zip tie. Slowly lift while pressing the zip tie from the other side and guide the zip tie tip through the slot.

Step 4: Use a bit of foam on the fuel tank rear zip tie and tighten both sip ties down into place. The front zip tie should be tightened around the cap area of the aftermarket fuel tank.

Step 5: Pete uses a short piece of fuel line and a line cap for the fueling side of the tank. Run your vent to the landing gear and zip tie to the gear. Next run the clunk line to the carburetor and you are ready!

Thank you as always for reading Pete's Tip of the Week and Happy Flying!
Your Hobby, Our Passion!
Aerobeez
Step 1: Insert the long zip tie into the slots where you will be mounting the fuel tank. (this tip works great for the stock fuel tank as well) Use a strip of velcro on the fuselage and the fuel tank.

Step 2: Have a short thin piece of wire ready. Bend the wire head in a U shape. We are using this wire to guide the zip tie through the slots.

Step 3: Shine a bright light into the slot. The tip of the zip tie should be just visible. Now insert the U shaped wire into the slot and cradle the zip tie. Slowly lift while pressing the zip tie from the other side and guide the zip tie tip through the slot.

Step 4: Use a bit of foam on the fuel tank rear zip tie and tighten both sip ties down into place. The front zip tie should be tightened around the cap area of the aftermarket fuel tank.

Step 5: Pete uses a short piece of fuel line and a line cap for the fueling side of the tank. Run your vent to the landing gear and zip tie to the gear. Next run the clunk line to the carburetor and you are ready!

Thank you as always for reading Pete's Tip of the Week and Happy Flying!
Your Hobby, Our Passion!
Aerobeez

