You are using an out of date browser. It may not display this or other websites correctly.
You should upgrade or use an alternative browser.
You should upgrade or use an alternative browser.
Rotormast V-22 Osprey Review
- Thread starter Stevendavis
- Start date
Go for it! I'm all in on learning about it.I build a Rotormast V-22 for a buddy of mine a couple of years ago. Since then, he as given it to me as a gift and if anyone is interested, I'll post the build pics and flight updates. Thanks.
Stevendavis
100cc
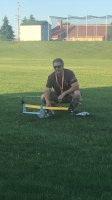
Got flight #6 on it today, but I didn't have anyone with me to record it. I'm learning the in's and out's of maintaining the Rotormast V-22 and need to do a video on just adjusting the conversion gear slider. I'll try and have it done in the next few weeks. I'll post the photos I took during construction and give some insight on process. I'm really enjoying this bird. Today was my first flight with a partial conversion, and it fly's great so far. Here's one of my earlier flight video's, the first forward flight in heli configuration.
(5) Rotormast V-22 Osprey First Forward Flight - YouTube
(5) Rotormast V-22 Osprey First Forward Flight - YouTube
Stevendavis
100cc
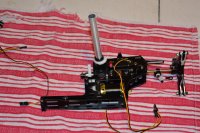
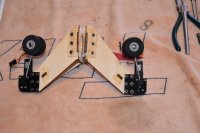
The Rotormast V-22, sold and developed by Tom Mast has been on the market for some time now, and has gone through a few updates over the years. The kit is a builders kit and anyone who enjoys building would enjoy this build. Attention to details is quilt important on this one, as any missed step could result in disaster, and its easy to overlook some thing. Tom has several videos out on the construction process and he's done a good job on explaining things throughout the videos. One of the first steps is building the motor pods. It starts out just like building two 450 helicopters. The parts bags in this kit were not numbered or labeled, so taking your time and identifying what screws and parts go where is important. Here's the first motor pod, with the joiner tube.
Attachments
Stevendavis
100cc
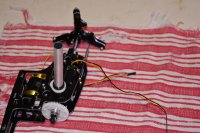
The next step is to add the speed controller and connector board. I had some Hitec aluminum servo arms that worked great on the build. If you are planning on building the scale kit, make sure you tuck all the wires neatly inside the frames and along the sides so they don't interfere with the scale covers.
Attachments
Stevendavis
100cc
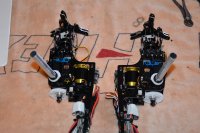
If you buy the kit with the power package, it comes with some quality scorpion motors and castle speed controllers.
Stevendavis
100cc
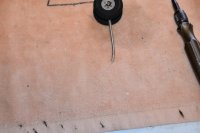
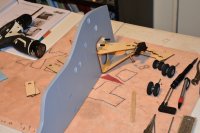
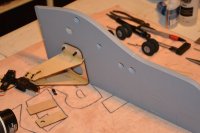
Next I built the landing gear up. You have to glue the frame set together and drill the mounting points through the fuse. There are a couple of lexan parts you have to put a bend in and a pair of duck billed channel locks works great. My kit had some wrong screws with it, but Tom sent out a set to replace the bad set. I ended up tapping out the mounting holes in the retract to use the next size up screw any way. I also pulled each retract apart and thoroughly cleaned them, as they were full of debris. The struts that came with the kit were also fattened on the wrong side of the strut, where the locking screw hits the wire strut, so I dremeled a new spot where needed.
Attachments
Stevendavis
100cc
pawnshopmike
Staff member
Interesting project for sure.
Stevendavis
100cc
Interesting project for sure.
Thanks Mike!
That's what makes it fun!