• If you are new to GiantScaleNews.com, please register, introduce yourself, and make yourself at home.

    We're 1st in Giant Scale RC because we've got the best membership on the internet! Take a look around and don't forget to register to get all of the benefits of GSN membership!

    Welcome!

The 'What did you do in your workshop tonight?' thread

js-rc

70cc twin V2
Are you putting a new or used 100 in it ? ! I just put new Bjorn rings in mine !! Too bad I will probably have to wait till spring to start it though !! They say the 100s are great running engines & mine has been really great this past summer but it was shooting out too much black stuff so I replaced the rings, very easy job too !!
Thanks, John
 

Snoopy1

640cc Uber Pimp
Are you putting a new or used 100 in it ? ! I just put new Bjorn rings in mine !! Too bad I will probably have to wait till spring to start it though !! They say the 100s are great running engines & mine has been really great this past summer but it was shooting out too much black stuff so I replaced the rings, very easy job too !!
Thanks, John
It is a new DA100L it has never been run and as you when done will have to wait till 2018 spring. It will be a long wait.
 

stangflyer

I like 'em "BIG"!
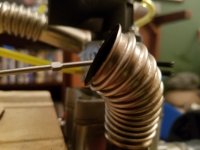
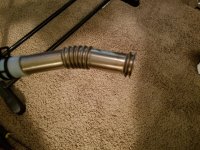
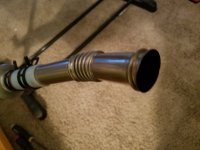
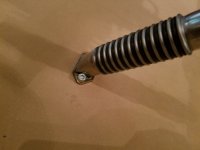
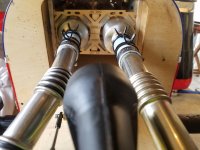
A little bit accomplished this weekend. I took a few minutes yesterday after getting off work early, to tear into the Pilot Edge so I could replace the broken KS Comfort header that broke a couple of weeks ago. Thing I don't understand is how it broke "right" on a "fold". I could see it if it broke between the folds as that would be the place most likely for the stress...right guys? Heck, I dunno. Anyway, I had to bend the new replacement header to match the original. Dang, not at all fun. Especially since I have to make numerous compound bends around the throttle linkage. I still have to maintain, I love my dubs. I love my dubs. I LOVE MY DUBS! But I still do NOT like the angle of the exhaust port. Oh well, gotta take the good with the bad right?

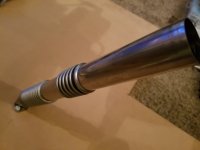
Here is the broken header.
20171110_190434.jpg 20171110_190441.jpg 20171110_190457.jpg 20171110_190503.jpg
Next, bolted the new header to my big 3/8" fiber board so I could get the leverage I needed to bend it.
20171110_200237.jpg 20171110_200243.jpg
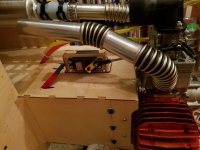
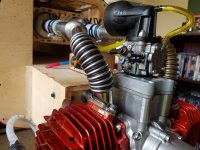
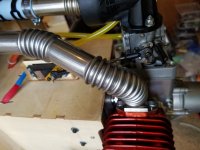
After about an hour and a half of bending a little at a time. First this bend, then that bend...then the next bend...then the angle for the connection to the muffler bend. Ah ha! Finally....got it.
20171110_212357.jpg 20171110_212408.jpg 20171111_143126.jpg 20171111_152023.jpg 20171111_152029.jpg
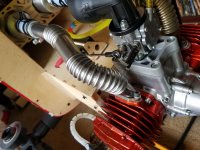
Once I was satisfied with the bends, I cut the rubber "o" rings from the header. Supposedly they keep the header from crushing while trying to put your bends into them.
20171111_152221.jpg 20171111_152226.jpg
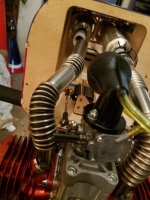
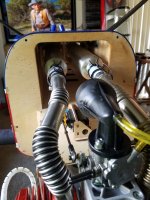
Final connection to the mufflers and a new forward canister mount installed, the Edge is finally ready to blast off again. Yay...back into the "flyable" status and added back to the fleet.
 

stangflyer

I like 'em "BIG"!
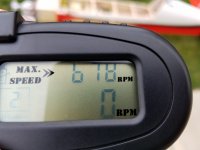
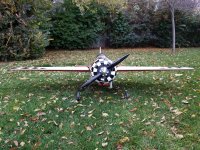
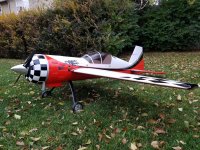
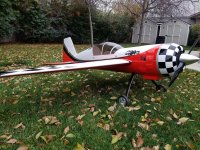
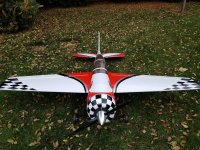
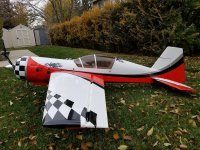
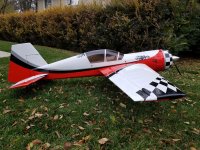
So what else did I do this weekend? Oh yeah, that darn baby Yak. I really didn't like the fact that I was going to have to "hack" up the cowl with the Pitts muffler. So I decided I would do a test run with the stock muffler. Huh...what do you know about that? It gained a little more rpm. Ok, I like this. I won't have to cut as much of the cowl and getting just shy of 6800 with the Falcon 24x9. Well, within 220 rpm to be exact. I think I can live with this.
20171112_110133.jpg
So after a little "eye-balling" and double checking, I started the dreaded cowl whacking. Ugh. Guess it has to be done.
20171112_133449.jpg
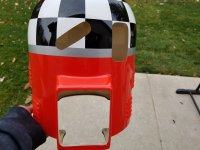
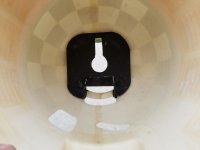
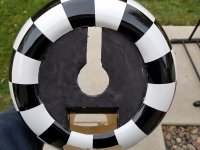
One side ways slanted cut for the sparkle plug wire. One oblong cut for the muffler stack. And the bottom of the scoop belly for air exit and access to the choke linkage. Once that was done and sanded nice and smooth, I added some baffling and another opening in the front of the cowl to keep that BE 62 bone chilling cold.
20171112_133425.jpg 20171112_133438.jpg 20171112_133441.jpg 20171112_133444.jpg
After I made my rough cuts in the baffling, I even'd them up and smoothed out the cuts. Then it was time to bolt it to the SD 33% Yak.
20171112_142341.jpg 20171112_142349.jpg
Ok, cowl cut and installed. 1/4x20 wing studs epoxied in place, and a final check of everything...I think it is time to assemble this little beast for some photos huh?
20171112_142335.jpg 20171112_142400.jpg 20171112_142408.jpg 20171112_142420.jpg 20171112_142431.jpg 20171112_142450.jpg 20171112_142459.jpg 20171112_142507.jpg 20171112_142514.jpg 20171112_142532.jpg 20171112_142540.jpg 20171112_142559.jpg 20171112_142621.jpg 20171112_142633.jpg 20171112_142652.jpg
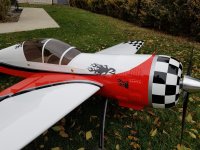
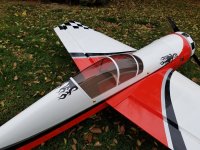
She is finally done and ready for a test flight. I am so excited and anxious. That BE 62 is really waking up each time I fire it up. Sad to say, the midrange and throttle response is every bit as smooth and quick as my 3w engines. Ugh... LOL.
20171112_142706.jpg
 

49dimes

Damn I'm hungry
She is finally done and ready for a test flight. I am so excited and anxious. That BE 62 is really waking up each time I fire it up. Sad to say, the midrange and throttle response is every bit as smooth and quick as my 3w engines. Ugh... LOL.
View attachment 100152

Looks great Rob! Looking forward to the flight report. I know the DL50 going to fly my Extra. I'm just hoping to be surprised like you with its performance. I could dump 3/4 pound going with a side dump but the canister going to give me some smooth torque. When it's ready to fly and I end up not liking the power there are OPTIONS! :way_to_go:.
 

stangflyer

I like 'em "BIG"!
Looks great Rob! Looking forward to the flight report. I know the DL50 going to fly my Extra. I'm just hoping to be surprised like you with its performance. I could dump 3/4 pound going with a side dump but the canister going to give me some smooth torque. When it's ready to fly and I end up not liking the power there are OPTIONS! :way_to_go:.
Thanks Kelly. That too was my thinking. I could use the canister route but I figured as smooth as this motor runs I probably would not gain that much in how it runs. And I am really not too sure I would gain that much in the performance department over the stock exhaust. For the deficit of another 8 to 12 ounces, I couldn't justify it. Even though I have a perfectly good 60cc canister sitting idle. Of course if I ever joined a field that had noise restrictions, I guess that option is available. Oh, yeah...that not gonna happen. LOL. Looking forward to how that newly rebuilt brand new DL 50 twists up.
happy-nodding-smiley-face-emoticon.gif


Now git busy....
whipping.gif
 

Alky6

150cc
Quick question to you gentleman that Owen a 120cc size aerobatic aeroplanes my ViperST wing is 13 inches at the wing tip cord and 25 inches at the root cord and 48 inches long. Looking at a set of wing bags but would like to know the size of a 12occ size aeroplane. Because if a buy another plane it will be a 120 size and the ViperST is a 100cc size , just trying to cover all the bases. Thanks.
Snoopy, my 2.7m JTEC extra (with the DA 100) wings are too big for 100cc wing bags (by a couple of inches) so I just bought the 150cc wing bags from Valley View RC. They are a little big but work just fine. Nice bags too. Figured I could fit anything I wanted to in the future.
 

Jetpainter

640cc Uber Pimp
I think if you can find the WingTote bag specs online. I know the wings for a 107" Pilot Extra fit the 120cc WingTote bag. Chief Aircraft's website has the specs for the Pilot wing bags. I'm using the 120cc Pilot bag for my 120cc Hangar 9 Extra 300X and the they fit great, it even has a spot for the stabs. The WingTote bags have more padding.
 

Snoopy1

640cc Uber Pimp
A little bit accomplished this weekend. I took a few minutes yesterday after getting off work early, to tear into the Pilot Edge so I could replace the broken KS Comfort header that broke a couple of weeks ago. Thing I don't understand is how it broke "right" on a "fold". I could see it if it broke between the folds as that would be the place most likely for the stress...right guys? Heck, I dunno. Anyway, I had to bend the new replacement header to match the original. Dang, not at all fun. Especially since I have to make numerous compound bends around the throttle linkage. I still have to maintain, I love my dubs. I love my dubs. I LOVE MY DUBS! But I still do NOT like the angle of the exhaust port. Oh well, gotta take the good with the bad right?

Here is the broken header.
View attachment 100116 View attachment 100117 View attachment 100118 View attachment 100119
Next, bolted the new header to my big 3/8" fiber board so I could get the leverage I needed to bend it.
View attachment 100120 View attachment 100121
After about an hour and a half of bending a little at a time. First this bend, then that bend...then the next bend...then the angle for the connection to the muffler bend. Ah ha! Finally....got it.
View attachment 100122 View attachment 100123 View attachment 100124 View attachment 100125 View attachment 100126
Once I was satisfied with the bends, I cut the rubber "o" rings from the header. Supposedly they keep the header from crushing while trying to put your bends into them.
View attachment 100127 View attachment 100128
Final connection to the mufflers and a new forward canister mount installed, the Edge is finally ready to blast off again. Yay...back into the "flyable" status and added back to the fleet.

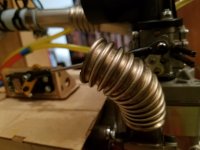
Have you ever tried the knuckle header. Those corrugated headers the corrugated part must be very thin and prone to failure or am I wrong. Question are they hard to bend into shape to match the header to the canister.just interested never work with that type of header.
Looking at your pictures again you are installing two clamps and a hose clamp to the header can you explain why are using the two standard clamps and a extra hose clamp , thanks.
 
Last edited:
Top