You are using an out of date browser. It may not display this or other websites correctly.
You should upgrade or use an alternative browser.
You should upgrade or use an alternative browser.
3D Viper-ST 100-120cc scratch build......it continues!
- Thread starter Terryscustom
- Start date
Terryscustom
640cc Uber Pimp
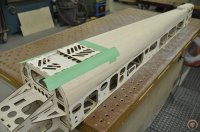
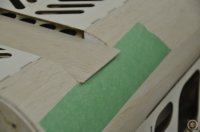
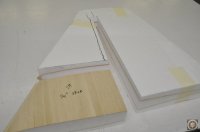
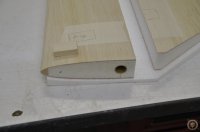
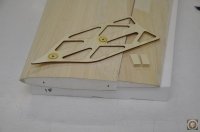
Back to the landing gear plate after glue has dried. Start with two layers of masking tape around the border and with an 80-100 grit sanding block begin blending in the gear plate. I'm good with an orbital sander so started this with 80 grit on that and got close. NEVER use an orbital sander on your plane if you are not comfortable with it's use and NEVER use an electric powered orbital as you don't have enough control!!! Once close to the point that my sanding block was leaving scratches in the masking tape, I removed the tape and finished with 180 grit paper on a block.
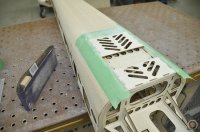
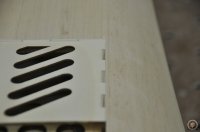
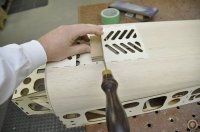
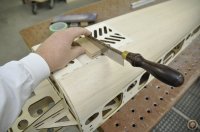
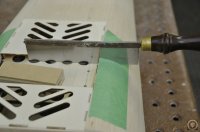
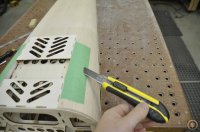
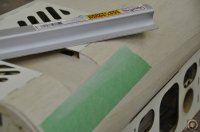
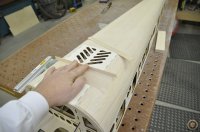
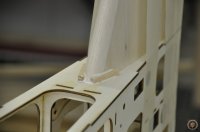
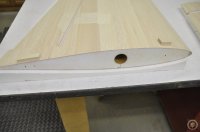
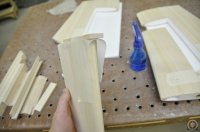
Next, cut out the slots where the gear will run through the belly pan foam. For this I use a small block and a razor saw. The block is used to hold the blade against the vent plate and will keep the blade at 90 degree angle. Mask off the belly pan first and slowly make the cuts until the saw blade is touching the gear plate itself. Repeat on all four corners. Draw a line and score with a hobby knife. Use a long razor blade cutter to cut in line with the gear plate as shown to remove the foam.
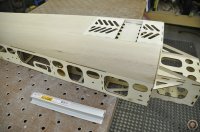
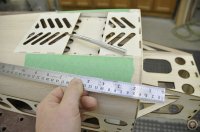
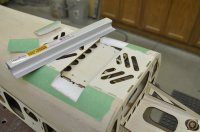
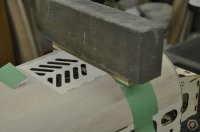
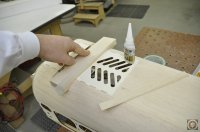
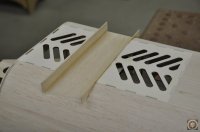
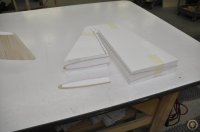
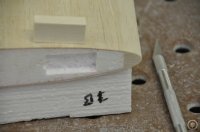
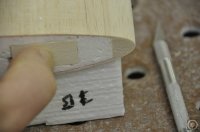
Sand the gear plate and foam with a long sanding block. Install some medium density 1/16" balsa on the gear area as shown tape and hold down with weight until dry. Sand flush, and cut some 1/16" - 1/8" light balsa for the front and back of the gear plate. This serves no structural purpose so just just glue in place with thin foam safe CA glue. These are there to support the front of the vent plates and give you something to attach covering to. I use a block and some wax paper to hold it in place while gluing and applying kicker.
Rough cut off the ends with a hobby knife and sand flush.


Next, cut out the slots where the gear will run through the belly pan foam. For this I use a small block and a razor saw. The block is used to hold the blade against the vent plate and will keep the blade at 90 degree angle. Mask off the belly pan first and slowly make the cuts until the saw blade is touching the gear plate itself. Repeat on all four corners. Draw a line and score with a hobby knife. Use a long razor blade cutter to cut in line with the gear plate as shown to remove the foam.
Sand the gear plate and foam with a long sanding block. Install some medium density 1/16" balsa on the gear area as shown tape and hold down with weight until dry. Sand flush, and cut some 1/16" - 1/8" light balsa for the front and back of the gear plate. This serves no structural purpose so just just glue in place with thin foam safe CA glue. These are there to support the front of the vent plates and give you something to attach covering to. I use a block and some wax paper to hold it in place while gluing and applying kicker.
Rough cut off the ends with a hobby knife and sand flush.
Attachments
-
 _DSC0484.JPG100.7 KB · Views: 481
 -
 _DSC0485.JPG98.1 KB · Views: 440
 -
 _DSC0486.JPG108.7 KB · Views: 433
 -
 _DSC0488.JPG43.7 KB · Views: 433
 -
 _DSC0489.JPG83.7 KB · Views: 418
 -
 _DSC0490.JPG79.9 KB · Views: 742
 -
 _DSC0491.JPG66.4 KB · Views: 764
 -
 _DSC0492.JPG87 KB · Views: 417
 -
 _DSC0493.JPG92.2 KB · Views: 468
 -
 _DSC0494.JPG80.5 KB · Views: 456
 -
 _DSC0495.JPG69.9 KB · Views: 448
 -
 _DSC0503.JPG51.6 KB · Views: 441
 -
 _DSC0504.JPG61.6 KB · Views: 433
 -
 _DSC0505.JPG89.4 KB · Views: 447
 -
 _DSC0506.JPG73.2 KB · Views: 442
 -
 _DSC0507.JPG57.3 KB · Views: 439
 -
 _DSC0508.JPG53.1 KB · Views: 480
 -
 _DSC0510.JPG67.8 KB · Views: 417
Terryscustom
640cc Uber Pimp
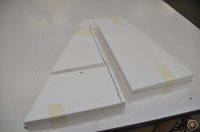
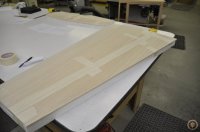
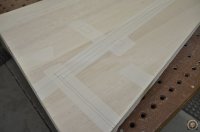
Time to cut out some surfaces. Typically I will install all the root and tip stock before cutting them out, this just works better for me this time around to cut the first so I can work on other projects while the root and tip caps are drying.
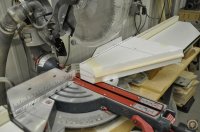
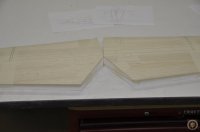
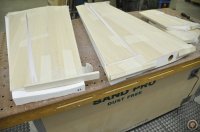
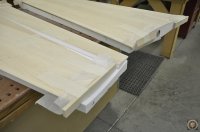
I measured out and marked, checked three times and cut out the rudder. After cutting out the bottom section of the rudder foam (where fuse will go) take another slice about 1/4" or less off the top of the scrap part before tossing it. This will be used as a template for the turtle deck top as well as covering for the TD.
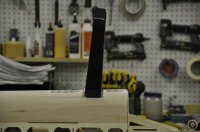
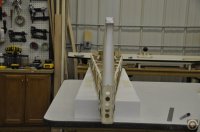
I marked and glued on the vertical stab checking carefully that it is straight up and down to the fuse as well as forward and back. I've recently been adding a couple of small blocks glued to the front of the stab for a little added insurance. Let dry and continue marking out the other surfaces for both cut lines and servo box and control horn box locations.
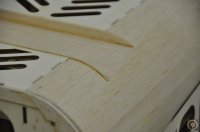
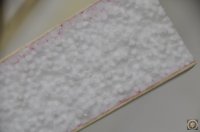
**I added one pic of the foam broken to show that I got a perfect 2-4 beads deep penetration of the resin during the bagging process. This means I got the perfect mix of not too much / not too little on the resin.
I measured out and marked, checked three times and cut out the rudder. After cutting out the bottom section of the rudder foam (where fuse will go) take another slice about 1/4" or less off the top of the scrap part before tossing it. This will be used as a template for the turtle deck top as well as covering for the TD.
I marked and glued on the vertical stab checking carefully that it is straight up and down to the fuse as well as forward and back. I've recently been adding a couple of small blocks glued to the front of the stab for a little added insurance. Let dry and continue marking out the other surfaces for both cut lines and servo box and control horn box locations.
**I added one pic of the foam broken to show that I got a perfect 2-4 beads deep penetration of the resin during the bagging process. This means I got the perfect mix of not too much / not too little on the resin.
Attachments
-
 _DSC0511.JPG44.2 KB · Views: 432
 -
 _DSC0512.JPG101.4 KB · Views: 469
 -
 _DSC0513.JPG48.6 KB · Views: 437
 -
 _DSC0514.JPG46.6 KB · Views: 468
 -
 _DSC0515.JPG56.2 KB · Views: 431
 -
 _DSC0516.JPG74.9 KB · Views: 451
 -
 _DSC0517.JPG61.3 KB · Views: 424
 -
 _DSC0518.JPG52.4 KB · Views: 434
 -
 _DSC0519.JPG41.7 KB · Views: 448
 -
 _DSC0520.JPG51.4 KB · Views: 443
 -
 _DSC0521.JPG66.3 KB · Views: 441
 -
 _DSC0522.JPG68 KB · Views: 463
 -
 _DSC0523.JPG47.5 KB · Views: 410
Terryscustom
640cc Uber Pimp
Looks great! And, you are setting the standard for all instruction manuals to follow!
Thanks, want to make sure if someone wants to build one there is plenty of reference material. And obviously I can be found here for any and all questions.
Terryscustom
640cc Uber Pimp
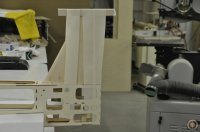
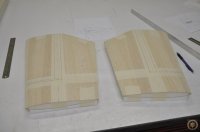
I did glue in hard points for the anti-rotation points, wing bolts and SFG mounts. I'll set these after the roots are installed. Rotation pins will be installed with glue and the bolt holes will be drilled, tapped and the threads hardened with foam safe thin CA. I will also cover the process for that since I've tested a few things that seem to be working well.
For hard points I prefer 3/4" thick basswood or Maple. I typically use basswood. Cut the blocks staying away from the sheeting at least 3/16-1/4". Some of them I taper on a belt sander like the ones at the rear of the wing. I'll get a better close-up of that when I remove the blocks in the AM. Simply cut around the blocks with an exacto which has a blade just a little longer than 3/4". So with a 3/8" block on the face, cut against the block straight in will make a cut that is about 3/8" deep. Clean out he inside by simply picking and scraping it out with the tip of the blade. Make it just deep enough so it requires slight pressure to hold it in flush.
I install them with Gorilla quick poly. Put a fair amount to cover the bottom of the holes and mist the block only with water. Install, cover with wax paper and use a scrap of wood as a caul to clamp it in place. Use a fairly long piece of tape to secure it well, and let dry.
Attachments
-
 _DSC0524.JPG56.2 KB · Views: 438
 -
 _DSC0525.JPG61.7 KB · Views: 449
 -
 _DSC0526.JPG55.8 KB · Views: 427
 -
 _DSC0527.JPG69.5 KB · Views: 439
 -
 _DSC0528.JPG63.2 KB · Views: 459
 -
 _DSC0529.JPG104.5 KB · Views: 432
 -
 _DSC0530.JPG64.3 KB · Views: 420
 -
 _DSC0531.JPG84.2 KB · Views: 436
 -
 _DSC0532.JPG74.8 KB · Views: 439
stangflyer
I like 'em "BIG"!
I'm telling ya guys, Terry has an incurable decease. It is called, Ibuildamostbodaciousandmonsterhuckin'plane-a-cydis. For which there have been literally only a few rare reported cases, and yet still no research for development of treatment other than, fly that thing like ya hate it!!!!!!
Thumbs up Terry. Building skills and technics not many can even come close to.
Thumbs up Terry. Building skills and technics not many can even come close to.
Terryscustom
640cc Uber Pimp
What the best covering cutter for doing straight lines.thanks
I cut all my covering with an exacto and templates. For straight lines just use a straight steel ruler. If needed clamp the templates or straight edge down to the table.