Terryscustom
640cc Uber Pimp
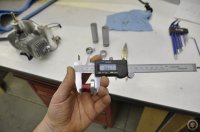
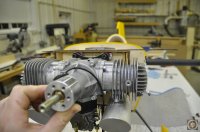
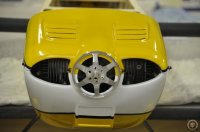
I determined that I needed about 7/8" of standoff for the DLE120 so I started digging through my stash of standoffs and precision washers. I found a great combo of washers and SWB spacers to make it work. REMEMBER to use a wide base standoff if at all possible to distribute the loads and engine bolt torque. Narrow standoffs with a narrow base will sink into the firewall with stress and you will end up with a bad day at the field!!!
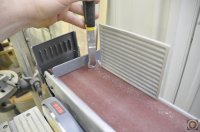
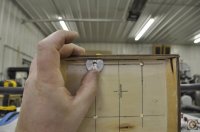
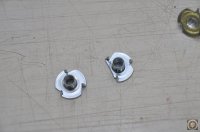
Now, what the heck do you do if your engine mounting holes are too close to the top of the engine box????? No sweat, Ill show ya. In my case I am using a 1" x .25" machined base washer. I used a belt sander to grind a flat area until the hole lines up. I've done this with SWB mounts as well, no problem. I typically like to make my own wood engine mounts to really spread the stress out on the firewall, but these are made from hard maple and are not something that anyone can do since they need to be precisely cut.
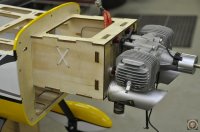
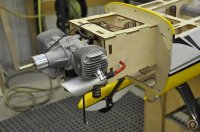
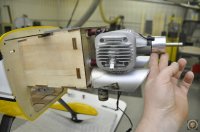
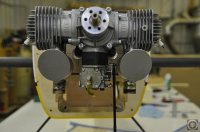
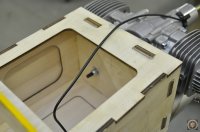
Once the engine is test fit and everything is looking great (I had to move mine about 1/16" from my initial measurements) it's time to install the engine. I like to use a blind nut on the backside of the firewall, if not make sure you use a fender washer of at least 3/4" dia. to make sure the mounting hardware does not sink into the firewall. If you use a blind nut you will need to drill out the final hole a little larger so that the blind nut fits into the hole. Also, as in my case, the blind nuts may need to be trimmed for the top of the engine box, I do this with a tin snips. Once installed I also like to add at least two nylon lock nuts for one extra level of security.
Now, what the heck do you do if your engine mounting holes are too close to the top of the engine box????? No sweat, Ill show ya. In my case I am using a 1" x .25" machined base washer. I used a belt sander to grind a flat area until the hole lines up. I've done this with SWB mounts as well, no problem. I typically like to make my own wood engine mounts to really spread the stress out on the firewall, but these are made from hard maple and are not something that anyone can do since they need to be precisely cut.
Once the engine is test fit and everything is looking great (I had to move mine about 1/16" from my initial measurements) it's time to install the engine. I like to use a blind nut on the backside of the firewall, if not make sure you use a fender washer of at least 3/4" dia. to make sure the mounting hardware does not sink into the firewall. If you use a blind nut you will need to drill out the final hole a little larger so that the blind nut fits into the hole. Also, as in my case, the blind nuts may need to be trimmed for the top of the engine box, I do this with a tin snips. Once installed I also like to add at least two nylon lock nuts for one extra level of security.
Attachments
-
 _DSC0338.JPG65.7 KB · Views: 563
 -
 _DSC0339.JPG76.5 KB · Views: 585
 -
 _DSC0340.JPG68 KB · Views: 642
 -
 _DSC0341.JPG84.2 KB · Views: 584
 -
 _DSC0342.JPG79.8 KB · Views: 974
 -
 _DSC0343.JPG79.3 KB · Views: 978
 -
 _DSC0344.JPG77.1 KB · Views: 972
 -
 _DSC0345.JPG66.8 KB · Views: 934
 -
 _DSC0346.JPG50 KB · Views: 602
 -
 _DSC0347.JPG70.5 KB · Views: 562