Notorious B.E.N.
100cc
Ok, had a busy day yesterday and today at work so last night you could argue that I didn't do anything to the Dalton.
I was trying to figure out the best way to install the pipe mounts and I will need to have the engine and headers on to do so. So I pretty much spent about 30-45 minutes looking and taking various measurements, which is why you could argue I really didn't do anything.
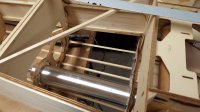
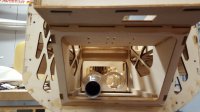
After thinking about it, I think the best route is to go ahead and build a pipe tunnel and include provisions for the pipe mounts.
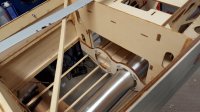
The big thing/issue was the front pipe mount. But with what I'm thinking about doing for the install/engineering of the pipe tunnel, I would be able to leave the front mount in and just need to make the rear mount removable for getting the pipes into the tunnel. I.E. I might not be able to install them because of the pipe exit tubes so I need to make at least one mount removable.
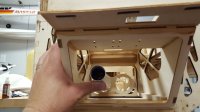
So I think my plan is to actually make them both removable granted it would be hard to undo screws/bolts on the front mount with the pipes installed. There's plenty of room to stick a hand in the front when the pipes are out so if I can make the rear one removable as well for getting the pipes in and out of the tunnel, then I should be OK. The advantage of making the front removable is to make repairs or adjustments.
I was trying to figure out the best way to install the pipe mounts and I will need to have the engine and headers on to do so. So I pretty much spent about 30-45 minutes looking and taking various measurements, which is why you could argue I really didn't do anything.
After thinking about it, I think the best route is to go ahead and build a pipe tunnel and include provisions for the pipe mounts.
The big thing/issue was the front pipe mount. But with what I'm thinking about doing for the install/engineering of the pipe tunnel, I would be able to leave the front mount in and just need to make the rear mount removable for getting the pipes into the tunnel. I.E. I might not be able to install them because of the pipe exit tubes so I need to make at least one mount removable.
So I think my plan is to actually make them both removable granted it would be hard to undo screws/bolts on the front mount with the pipes installed. There's plenty of room to stick a hand in the front when the pipes are out so if I can make the rear one removable as well for getting the pipes in and out of the tunnel, then I should be OK. The advantage of making the front removable is to make repairs or adjustments.

 . Keep up the great work. . . . .