• If you are new to GiantScaleNews.com, please register, introduce yourself, and make yourself at home.

    We're 1st in Giant Scale RC because we've got the best membership on the internet! Take a look around and don't forget to register to get all of the benefits of GSN membership!

    Welcome!

IMAC Carden Pro 124 Build, My Dream Plane

ROLLERMAN

70cc twin V2
Very happy how the wheel pant turned out, I used black vinyl for the stripe and Monokote for the blue, used the same method to adhere the covering to the wheel pant as I did for the wings, I also used the iron to get a good contact, I sprayed clear coat on it today, I'll post a pic tomorrow.
 

Attachments

  • 20160210_214755.jpg
    20160210_214755.jpg
    85 KB · Views: 388

Alky6

150cc
Very happy how the wheel pant turned out, I used black vinyl for the stripe and Monokote for the blue, used the same method to adhere the covering to the wheel pant as I did for the wings, I also used the iron to get a good contact, I sprayed clear coat on it today, I'll post a pic tomorrow.
I went back through the last 10 pages or so where you started talking about the covering process, but could not find the part where you talked about the method you use to lay monokote over monokote. I apologize if it is already there and I am asking a rudundant question...but what is your method to put monokote over monokote? Thanks!
 

ROLLERMAN

70cc twin V2
Ah my bad, I posted a bunch of pictures on page 284 but did not elaborate on how I did that. LOL . I'll have something up shortly.
 

ROLLERMAN

70cc twin V2
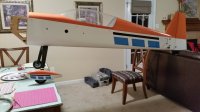
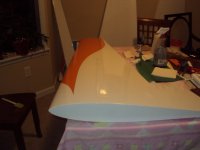
Ok, so this is my method on Monokote over monokote.


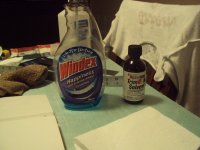
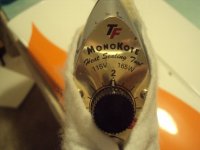
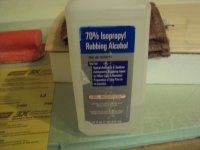
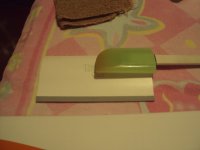
Tools, Windex, paper towels, alcohol, Monokote trim solvent, a cooking squeegee and your covering hot iron with felt on it NOT with the sock. The felt is much softer.


Tips, practice doing all this an some pieces of balsa before you do it on your model, DO NOT use the trim solvent on large areas, this stuff is very aggressive and it activates the glue on contact and you will not have time to get bubbles out.


Step 1, I start by cleaning the entire area where you are planning on adding the covering with the alcohol, this will remove any oil from the monokote that you may have added on it while eating that big fat burger or chicken wings ( just a joke so don’t take it personal LOL).


Step 2, Ensure the covering on the balsa has not lifted and if so go over it with the Iron.


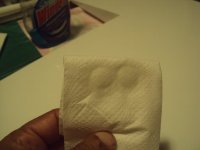
Step 3, Now the fun begins, using a paper towel dabbed the solvent on it (make sure you put the cap back on the solvent, stuff is expensive) go over the area you are laying down the piece, immediately after, spray the area with Windex and do not be shy with it. Now you can remove the plastic from the back of the covering and lay it down and position it where you want it, you should be able to slide it around some.


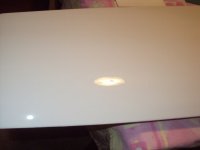
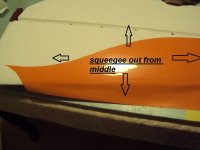
Step 4, At this time you can start squeegeeing out the Windex FROM THE MIDDLE out to the edges and keep the squeegee wet, this will help it glide over the covering, keep some small amount of pressure on the opposite side while you push the Windex out or the piece may move on you. Using towels soak up what is being removed in the same direction, from the middle out, if you go the other way you WILL lift the covering. If you are happy with it let it sit for 15 minutes, then go over it again with the squeegee, middle out.


Step 5, Sit back have a beer or twelve and admire your work.


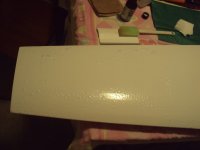
Step 6, With LOW heat go over it and AGAIN from the middle out, take your time. To make sure the covering does not pull up dab more trim solvent and go around the edges.


Step 7, Ask your significant other, What do you think? And she will reply AAAAHHHH!!! What am I looking at?


Step 8, you just got your feelings hurt.


Step 9, More beer or at this time Tequila


Step 10, Well!! after all the beer and Tequila, you will be laying down admiring your work from the floor.


This was fun, one more note, I almost forgot. When you peel off the plastic from the Monokote try not to crinkle it or it will show up, since you are not putting a ton a heat on it, it will not shrink.


Hope this helps.
 

Attachments

  • DSC09489.JPG
    DSC09489.JPG
    73.1 KB · Views: 329
  • DSC09495.JPG
    DSC09495.JPG
    56.3 KB · Views: 322
  • DSC09506.JPG
    DSC09506.JPG
    55.6 KB · Views: 328
  • DSC09535.JPG
    DSC09535.JPG
    51.3 KB · Views: 387
  • DSC09537.JPG
    DSC09537.JPG
    41.2 KB · Views: 346
  • DSC09539.JPG
    DSC09539.JPG
    28.1 KB · Views: 323
  • DSC09540.JPG
    DSC09540.JPG
    43.7 KB · Views: 353
  • DSC09541.JPG
    DSC09541.JPG
    45.2 KB · Views: 336
  • DSC09493.JPG
    DSC09493.JPG
    100.4 KB · Views: 342

Alky6

150cc
Thank you, thank you, thank you!!!! That was very descriptive and extremely helpful! On the windex, does it matter if you use the ammonia based or not? Assuming not since you are lacing it with the trim solvent?
 

ROLLERMAN

70cc twin V2
You are most welcome, I used the ammonia one, the trim solvent starts to dissolve almost as soon as you apply it. That's why I mention to spray the Windex right away. Post pictures here when you do it.
 

tl3

50cc
That's a pretty good description of the Windex method. I have never used trim solvent in the process though; I don't really think it's needed. If you take all the steps as described the monokote will be pretty well stuck once the Windex is squeegeed out, then I let the piece sit for at least 24 hours (which is a good idea especially when including the Jose Cuervo part of the process) before going over with the iron...the last thing you want is a little bit of moisture left between the layers when you hit it with the iron.
 

ROLLERMAN

70cc twin V2
LOL!!! Yea old Jose can be very detrimental when he wants to be. I do agree with Ty, you should wait until the Windex is completely dry before going over it with the iron, I jumped ahead too soon.
 

ROLLERMAN

70cc twin V2
OK!! much closer now,


I’ve started installing servo leads, and the rudder servos are in place and programed, the power box is in place. I made my own wire tube using a 48” balsa sheet; I used the stab tube to shape it after spraying it with Windex. Turned out great. The landing gear is on permanently now and so is the DA200.


As you will see on the pictures, I did not used ¼ 20 blind nuts due to the fact that after a while they start to pull in to the plywood, I made two small plates with ¼ 20 taped holes 90mm on center, this spreads the load much better, and for security I added ¼ 20 lock nuts behind them, may be overkill but I feel good about it.
 

Attachments

  • DSCN0203.JPG
    DSCN0203.JPG
    49 KB · Views: 313
  • DSCN0204.JPG
    DSCN0204.JPG
    62.2 KB · Views: 274
  • DSCN0205.JPG
    DSCN0205.JPG
    58.7 KB · Views: 315
  • DSCN0207.JPG
    DSCN0207.JPG
    57.1 KB · Views: 320
  • DSCN0212.JPG
    DSCN0212.JPG
    69.1 KB · Views: 308
  • DSCN0215.JPG
    DSCN0215.JPG
    50.2 KB · Views: 318
  • DSCN0216.JPG
    DSCN0216.JPG
    59 KB · Views: 284
  • DSCN0218.JPG
    DSCN0218.JPG
    69.8 KB · Views: 321
  • DSCN0220.JPG
    DSCN0220.JPG
    88.3 KB · Views: 292
  • DSCN0221.JPG
    DSCN0221.JPG
    89.2 KB · Views: 285

Alky6

150cc
OK!! much closer now,


I’ve started installing servo leads, and the rudder servos are in place and programed, the power box is in place. I made my own wire tube using a 48” balsa sheet; I used the stab tube to shape it after spraying it with Windex. Turned out great. The landing gear is on permanently now and so is the DA200.


As you will see on the pictures, I did not used ¼ 20 blind nuts due to the fact that after a while they start to pull in to the plywood, I made two small plates with ¼ 20 taped holes 90mm on center, this spreads the load much better, and for security I added ¼ 20 lock nuts behind them, may be overkill but I feel good about it.
The aluminum bars are exactly how I am planning to finish off my JTEC extra, threaded with lock nuts behind. Looking fantastic!

One question: why did you choose to put the SWB mount with the circular flange against the engine mount versus to the firewall?
 
Last edited:
Top