You are using an out of date browser. It may not display this or other websites correctly.
You should upgrade or use an alternative browser.
You should upgrade or use an alternative browser.
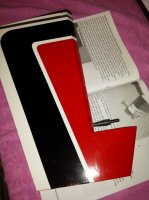
IMAC Extreme Flight 78" Extra
- Thread starter hbollier
- Start date
hbollier
70cc twin V2
Thanks Ortho. I hate epoxy. I may try gorilla glue for the ailerons and rudder using a trick I saw on another thread. Now I'm off to the hardware store for another ball driver. I stripped mine trying to disassemble the tail wheel. I think there may be another step Extreme Flight has done for me and not made the manual yet (like cutting out the servo holes). I am waiting on confirmation from Curtis. Lol


Capt.Roll
70cc twin V2
Thanks Ortho. I hate epoxy. I may try gorilla glue for the ailerons and rudder using a trick I saw on another thread. Now I'm off to the hardware store for another ball driver. I stripped mine trying to disassemble the tail wheel. I think there may be another step Extreme Flight has done for me and not made the manual yet (like cutting out the servo holes). I am waiting on confirmation from Curtis. Lol
Have you tried the Loctite Hysol 9462? Long pot time, no run or sag, easy to clean before it starts to set and harden.
Gorilla glue may work but there is no strength in the air pockets it creates when expanding between the balsa and hinge points.

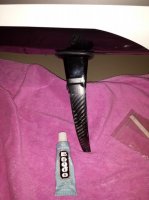
Use Hysol epoxy for your hinges and control horns as recommended above. It has a long curing time and a long set time.
You don't have to be in a rush and you will have plenty of time to move things around if they don't look right.
Buy the Hysol applicator gun. You can poke the nozzle right down the hinge hole and apply the Hysol as your backing out of the hole.
As you push the hinge in, it will move any glue near the surface further into the hole.
I never have to put oil on the hinge joint and I can take all the time I need to make certain all of the hinges are properly aligned.
Alky6
150cc
When I did mine I dry fitted then marked them with a sharpy where they line up against the outside of the rudder. That way when you install you just make sure the lines are shown evenly on each side. Then I double checked fore and aft by making sure the center of the holes were at the leading edge of the rudder. Seemed to work pretty good for me. You can then remove the sharpy lines with denatured alcohol as you clean up the epoxy.I am concerned with getting the rudder horns in evenly. Any tips?
Edit: You can also mark the covering with the sharpy also to help the aligning during install, then use your denatured alcohol to remove the sharpy marks.
Last edited:
hbollier
70cc twin V2
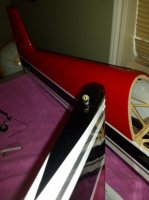
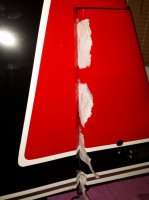
OK, after using my 4 ft torque wrench to get out the 1.5mm set screw on the tail whee,l I have that all installed (just kidding, but it was TIGHT). The Extreme Flight videos on their site are great. I followed their advice on the tail wheel. I used a dremel to make a flat spot on all the shafts where a set screw secured a collar. Once you loctite the set screw in, the collar wont turn or slide off. Rudder was hinged and a 2mm ball joint glued into the bottom for the tail wheel tiller. Tail wheel, rudder, and landing gear installed. I messed up on the gear fairings. I did not realize that they are a right and a left. I mistakenly thought they were just directional. So the neoprene tube at the top has the seam on the outside. Oh well, it is black on black and hard to notice.
I used Gorilla Glue on the rudder hinge. It was much easier than working with epoxy. I saw a tip on putting WD40 on the hinge line to keep the glue from sticking to the covering. Maybe the oil I used didn't work the same way, but I spent a long time picking GG off the covering and hinges. The rudder is free now but it was kind of a PITA picking it all out.
I frequently see gear fairings that have slid down the gear at the field. The manual said to use either epoxy or a silicone based glue. quick email to Curtis, and he said not to use epoxy, use something flexible. Hello E6000, it is a flexible rubber based adhesive that I had on the shelf. I tried putting a bead on the gear and sliding the fairings up into the glue, but it seems that I missed a bit. What I did after that was to turn the plane upside down and put a bead on the joint between the fairing and the gear. I put as much as I could get into the hole and tried to get a fillet. We will see how this holds up.
EF included a piece of foam to make an air dam and it looks like it will force air over the batteries instead of underneath. I think I am going to install it.
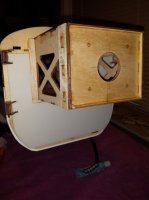
Today she stands!
Thanks Capt. Roll, Stinger, and Alky6 for the tips!
I used Gorilla Glue on the rudder hinge. It was much easier than working with epoxy. I saw a tip on putting WD40 on the hinge line to keep the glue from sticking to the covering. Maybe the oil I used didn't work the same way, but I spent a long time picking GG off the covering and hinges. The rudder is free now but it was kind of a PITA picking it all out.
I frequently see gear fairings that have slid down the gear at the field. The manual said to use either epoxy or a silicone based glue. quick email to Curtis, and he said not to use epoxy, use something flexible. Hello E6000, it is a flexible rubber based adhesive that I had on the shelf. I tried putting a bead on the gear and sliding the fairings up into the glue, but it seems that I missed a bit. What I did after that was to turn the plane upside down and put a bead on the joint between the fairing and the gear. I put as much as I could get into the hole and tried to get a fillet. We will see how this holds up.
EF included a piece of foam to make an air dam and it looks like it will force air over the batteries instead of underneath. I think I am going to install it.
Today she stands!
Thanks Capt. Roll, Stinger, and Alky6 for the tips!
Attachments
-
 20150328_102306.jpg49 KB · Views: 443
 -
 20150328_102315.jpg37.3 KB · Views: 466
 -
 20150328_103411.jpg86.6 KB · Views: 492
 -
 20150328_104034.jpg32.9 KB · Views: 479
 -
 20150328_120004.jpg52.2 KB · Views: 769
 -
 20150328_120010.jpg32.2 KB · Views: 794
 -
 20150328_121908.jpg20.5 KB · Views: 745
 -
 20150328_122108.jpg35.5 KB · Views: 769
 -
 20150328_122353.jpg36.5 KB · Views: 480
 -
 20150328_122403.jpg50.9 KB · Views: 463
 -
 1427555474590.jpg97.6 KB · Views: 519
 -
 1427555761008.jpg131.4 KB · Views: 453
 -
![20150328_181540[1].jpg](/data/attachments/15/15934-b9db8c22c58e1522ad3fd74b96a0b3c8.jpg) 20150328_181540[1].jpg43.5 KB · Views: 487
20150328_181540[1].jpg43.5 KB · Views: 487
Last edited: