49dimes
Damn I'm hungry
Good Work!. If memory serves me....If you decided to go cans and headers.... There was barely enough length for the mtw cans that fit the 3w 85 when I built the can tunnel. Medium Pro Flows for that 120 would not fit in to your plane. Just some info.
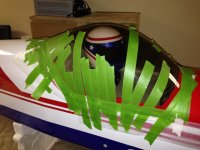
I had a large horse shoe shape opening cut in my cowl with an extraction lip/foil. The snorkel would hang out just a bit but you could easily get to the needles and choke. I baffled just the lower portion of the cylinders and it cooled well. I did open the air inlets a bit on the cowl front.
I had a large horse shoe shape opening cut in my cowl with an extraction lip/foil. The snorkel would hang out just a bit but you could easily get to the needles and choke. I baffled just the lower portion of the cylinders and it cooled well. I did open the air inlets a bit on the cowl front.