• If you are new to GiantScaleNews.com, please register, introduce yourself, and make yourself at home.

    We're 1st in Giant Scale RC because we've got the best membership on the internet! Take a look around and don't forget to register to get all of the benefits of GSN membership!

    Welcome!

Sport JTEC RADIOWAVE 26% Pitts Model 12

stangflyer

I like 'em "BIG"!
Sorry but love the yellow and the paint scheme.
On this plane, the yellow actually looks pretty good. I had a Yellow Dave Patrick 330 with a DLE 55 on it a few years back. Though terribly heavy, the plane flew really well.

You could change the Yellow to Red, the Blue to Black, and the Red to White. Scallops like on the wing are a classic look, and Red, Black, and White are classic colors.
I was actually thinking about maybe using that scheme but changing up the colors. Maybe say, White where in place of the Yellow, Pearl Purple in place of the Blue and either Silver or Orange bordering all the Purple? I do like the Scallops!

The Burnt Orange/Missle Red? color is very eye catching.
 

stangflyer

I like 'em "BIG"!
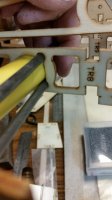
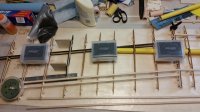
I did get started on the bottom right wing today. After a few drawbacks and a few phone calls, I finally got it figured out. There is one piece, (BR1B) that is inaccurately cut for the location it goes in. It turns out it is a doubler for the BR1 rib. So it had to be modified to fit correctly. Also, BR2E and BR8E will not sit correctly in the jig as there is no cut out in the jig for the forward support leg. Not a big deal. I simply shortened the front leg to allow it to rest "on top" of the jig. It seemed to work out pretty well, because it all came into alignment no problem.

I have the basic structure of the wing framed up. Minus two of the "top" 1/4" x 1/4" stringers. I will put those in later and then begin the sheeting process. Now that I have an idea of how this thing goes together, the remaining left bottom wing and the two top wings should go rather quickly. Sheesh, maybe it have it completely framed by Sunday? What an awesome thought. LOL.
20161028_120614.jpg

20161028_170550.jpg
20161028_173726.jpg


I took a few moments to try to get an idea of how this thing was coming out weight wise. First photo is nearly completed fuse with elevators and rudder attached. Under 4 pounds. Sweet!

20161028_114428.jpg


Next photo is of the "dub" 70 twin with exhaust and ignition.

20161028_114748.jpg


Last photo is the landing gear, wing tubes, prop, spinner and a few misc. hardware items.

20161028_124346.jpg


13 pounds, 11.1 ounces. I am guessing the wings are going to be a total of 4 pounds. Add to that servos and radio equipment including wiring harnesses of approximately 2.5 pounds. Then you have covering and other misc. items. i.,e., wheels, tailgear, linkages and what not....It's going to be pretty tough to keep this under 20 pounds. But still hopefully less than 25. Oh well, no worries. I be havin' a 3dub up front. LOL
 
Last edited:

stangflyer

I like 'em "BIG"!
I did get started on the bottom right wing today. After a few drawbacks and a few phone calls, I finally got it figured out. There is one piece, (BR1B) that is inaccurately cut for the location it goes in. It turns out it is a doubler for the BR1 rib. So it had to be modified to fit correctly. Also, BR2E and BR8E will not sit correctly in the jig as there is no cut out in the jig for the forward support leg. Not a big deal. I simply shortened the front leg to allow it to rest "on top" of the jig. It seemed to work out pretty well, because it all came into alignment no problem.

I have the basic structure of the wing framed up. Minus two of the "top" 1/4" x 1/4" stringers. I will put those in later and then begin the sheeting process. Now that I have an idea of how this thing goes together, the remaining left bottom wing and the two top wings should go rather quickly. Sheesh, maybe it have it completely framed by Sunday? What an awesome thought. LOL.
View attachment 90391
View attachment 90386 View attachment 90387

I took a few moments to try to get an idea of how this thing was coming out weight wise. First photo is nearly completed fuse with elevators and rudder attached. Under 4 pounds. Sweet!

View attachment 90388

Next photo is of the "dub" 70 twin with exhaust and ignition.

View attachment 90389

Last photo is the landing gear, wing tubes, prop, spinner and a few misc. hardware items.

View attachment 90390

13 pounds, 11.1 ounces. I am guessing the wings are going to be a total of 4 pounds. Add to that servos and radio equipment including wiring harnesses of approximately 2.5 pounds. Then you have covering and other misc. items. i.,e., wheels, tailgear, linkages and what not....It's going to be pretty tough to keep this under 20 pounds. But still hopefully less than 25. Oh well, no worries. I be havin' a 3dub up front. LOL

Sorry everyone. I have to correct myself. I mentioned this is the bottom right wing. I just know Doug and Sam and Brett and Van and David and....well probably everyone caught it right? Actually it is the bottom left wing. LOL.
 

stangflyer

I like 'em "BIG"!
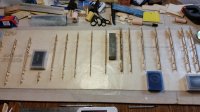
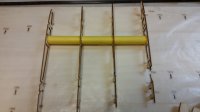
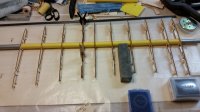
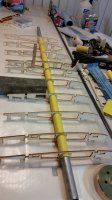
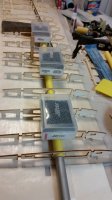
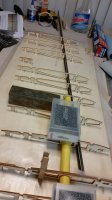
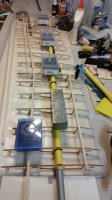
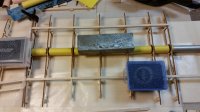
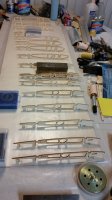
Time for a little update. I finished up the top side of the bottom left wing last night. Then removed it from the jig. Double checked all my glue joints and test fit to the fuse. Today, I framed up the bottom right wing to the same level as the left wing. There have been little weird things to contend with along the way but was able to get them resolved with next to no problem. I did add a couple of things that were not mentioned in the manual. First, I don't like a wing tube floating in the sleeve so I added a stop plate to the inside of both of the wing tube sleeves. Also, taking into consideration when it comes to covering, there is no mention or structure to build against the number 8 wing rib. This is where the interplane struts mount. There was nothing to attach covering to, so I added a 13/16" strip against both sides of the rib so that covering will stay put.

Just a few photos of a little progress.
20161029_014000.jpg
20161029_014010.jpg
20161029_023931.jpg
20161029_024212.jpg
20161029_125109.jpg
20161029_125133.jpg
20161029_125140.jpg
20161029_125540.jpg
20161029_131022.jpg
20161029_132041.jpg
20161029_155739.jpg
20161029_155745.jpg
20161029_173755.jpg


I am very pleased with how well these built up. They are total "BEAST" wings. I can't remember how long it's been since I felt so proud of building a set of wings. LOL
 

stangflyer

I like 'em "BIG"!
Hey everyone... another day of building on the Jtec Pitts. I was hoping to get it all framed up by Sunday, but I highly doubt that is going to happen. I ran into too many setbacks and "snafus" today. After removing the bottom right wing from the jig, I started on the upper right and center section. It builds pretty much straight forward like the bottom wings do, however due to the top wing having a "swept" back angle, certin things with the center section has to be built at the same time one of the upper wing panels are built. In this case, the upper right was easiest to do because of the jig setup. The main objective is to get the main tube in alignment so I chose to build the center section in it's entirety until done. This way I can keep the wing tube in perfect alignment with the right wing half. Once it is complete to the stage the lower wings are done, I will remove the complete structure and flip the jig. I will then put the center section back on the jig and build the upper left wing panel in alignment with the center section like I did with the right.

There have been a number of inconsistencies with building the Pitts. Perhaps it is due to revisions to the kit, or perhaps it was oversights. The biggest problem I have had is the manual is only as concise as the major points of interest. There are a number of things that are not mentioned and it kind of leaves a guy scratching his head and wondering what the heck to do. For those particular instances, I am very thankful for @Maxwell1945 and @Wacobipe for being so generous, kind and patient in answering my questions. Not that I need someone holding my hand to build this thing. Just that I have found in the past that those that have previously built something or assembled something, it is much easier to get a clearer idea of something that is not so easy to understand.

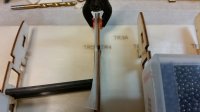
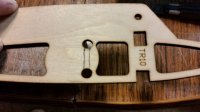
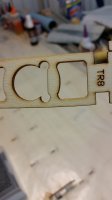
As mentioned previously, I ran into some snafus that slowed me down drastically. #27, #28, #29, #30 and #31. Snafu's were that I had at one point, had the upper right wing panel and center section on, then off, then on, then off and back and forth about five times this evening. It seemed as soon as I got one issue taken care of, I would proceed to the next step only to realize I had yet another issue that needed resolved before I could proceed. First, snafu #27. According to the manual, the upper interplane strut bracket is supposed to be marked "TR11". Mine was marked "TR10". Since TR10 is a full length ply rib and TR12 is also a full length ply rib, therefor the strut bracket "should" have been marked "TR11". I don't know if it is going to make a difference or not, Perhaps it was just an oversight when the parts were numbered. So I attempted to proceed. Oops, snafu #28. Turns out "TR10" is "not" lazer cut to allow the ply shear web to pass through all the way from TR14 to TR5 at the center section union. So it was necessary to remove the structure from the jig, remove the TR10 bracket and cut a slot to facilitate the passing of the shear web. Back together and back down on the jig, In the attempt to pass the shear web through, I noticed it would only go as far as "TR8". "Snafu" #29. It also did not have the cut out to allow the shear web to pass through. UGH!! Off the jig, "AGAIN" to open up a slot to allow the passage of the shear web. With the slot now cut, back down on the jig. "TR5" also is not quite long enough to allow the 1/4" stringer to rest in it as designed. So I will have to add a piece of stock to take up the slack. (#30). Next I started laying in the spars at the trailing edge of the wing. The one for the trailing edge is correct. 1/4" x 1/4". However I figured the leading edge of the ailerons would be the same as the ones on the ailerons of the lower wings which are 3/16" square. Not so much. The width of the slot is 1/4" and the height is 3/16". (#31) I double checked the listing for parts needed to see if I had missed something. Nope, I ordered exactly what was listed. So my resolution is to use the 1/4" square stringers. I will simply sand the top of the stringers down to meet the surface of the ribs for the sheeting that will then be applied on top of them.

I am still finding some inconsistencies in the manual and I am needing a little direction from those of you that have built this plane. First, I "ASSUME" the control horn block for the top wing locates in the same location as they do on the lower wings? Between #7 and #8 aileron rib. The manual makes no mention of it. Next, I am wondering what you all did when it came to sheeting the opposite side of each wing panel. As with most kits and planes I have built, there are certain things that are left up to each individual builder. Yet, there is at least some mention to a procedure in order of steps to be completed. Because all four wing panels have a strut bracket built into the wing, it would be nearly impossible to lay the wing flat for the opposite side sheeting process. And certainly I do not want to end up with twisted wings. Everything is so darned straight and true as they stand now.

All things being considered, I do have the top right wing panel and center section partially framed up. Tomorrow I will finish up the framing process and hopefully get those sections sheeted. I would still like to get the last wing panel framed up and sheeted by tomorrow night.

I also need to make a decision on finishing the construction on the wing tips. As it is not mentioned in the manual, I am guessing the wingtips are built as an Extra or Edge wing. Flat wingtip. But it really doesn't look right. I have been looking at more photos of the full scale Pitts. Some of them are showing a "rounded" wing tip. I believe this is what Brett and Van did with theirs. I have also noticed other full scale that only the front or leading edge of the wing tip is rounded then goes to a 90 degree when it meets up with the aileron. (My preference) What's the general concession from you guys? What do you think looks the best?

20161029_213026.jpg 20161029_213039.jpg 20161029_220233.jpg 20161029_223246.jpg 20161029_223255.jpg 20161029_225239.jpg 20161029_225259.jpg 20161029_225303.jpg 20161029_230847.jpg 20161029_231837.jpg 20161029_231850.jpg 20161030_004412.jpg 20161030_004424.jpg 20161030_004435.jpg
 
Last edited:

WMcNabb

150cc
Sorry to read about the difficulties Rob. However, I have no doubt the folks here who have built this kit will have suggestions on how to resolve.

I've attached a few photos for referencing the wing tips. Kevin Kimball would tell you that he designed three versions of wing tips and ailerons for the full scale Model 12. I'll call them Viking, Thor and HP.

image.jpeg


image.jpeg


image.jpeg
 

stangflyer

I like 'em "BIG"!
Sorry to read about the difficulties Rob. However, I have no doubt the folks here who have built this kit will have suggestions on how to resolve.

I've attached a few photos for referencing the wing tips. Kevin Kimball would tell you that he designed three versions of wing tips and ailerons for the full scale Model 12. I'll call them Viking, Thor and HP.

View attachment 90482

View attachment 90483

View attachment 90487
Yup...those be the ones. (Second photo) I first considered the wingtips like the one in this photo.
070825_120712.jpg

But they just don't do anything for me. Yes I am looking for a little insight and everyone has been so awesome with their help, suggestions and over all coaching. I have to be honest, I guess I had forgotten the level of work that is involved in making a bunch of sticks and slabs of wood into a flying model. It's called "I have aged and so has my memory!" Lol
 
Top