You are using an out of date browser. It may not display this or other websites correctly.
You should upgrade or use an alternative browser.
You should upgrade or use an alternative browser.
Scale Pitts S1-T, S1-S, and a Challenger.
- Thread starter acerc
- Start date
HRRC Flyer
GSN Sponsor Tier 1

Jaketab
50cc
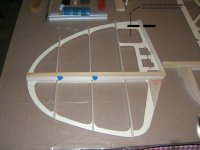
Started working on the tail sections of the EMHW Pitts S1 3.04m
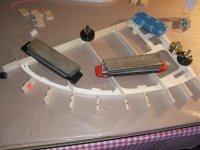
Questions - does the attached pic demonstrate the correct location of the single attachment point for the flying wire on the fin ???
Since the top side tail section has only 1 flying wire at the trailing edge of the fin/stab, does the front stab tube need a screw or pin to keep the stab from gapping away from the fuse ????
Thanks - Jaketab
Attachments
acerc
640cc Uber Pimp
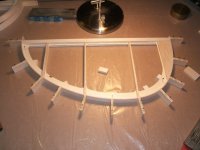
That hard point looks right and I put bolt's both front and rear on mine. In the pic the arrow is the same on mine as yours. But on another note, if you are going to use the kit provided plastic strip to pull the fabric in at the bottom fin rib I would recommend replacing the balsa with hardwood. But if you are going to tie the fabric to the bottom fin rib no need for the hardwood, although it would be stronger.
Attachments
Last edited:
acerc
640cc Uber Pimp
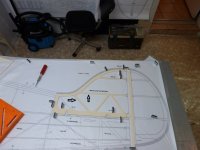
That's ok, you know me, I document everything for future reference.Ace - on my 58% Pitts, the plans for the fuse are not 1:1 as in your plans and not quite as detailed.
acerc
640cc Uber Pimp
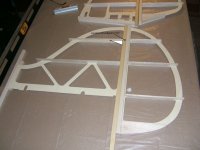
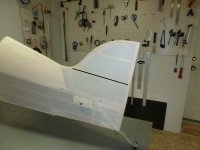
The framework has been disassembled and ready. Now I will do some final sand and fill as needed per section and cover, I will start with the tail feather as they are going to be the biggest pain. But first a break to go fix my breaks. The rear pads are shot and I need to replace them before heading out for anything, such as some grub. Don't feel like cooking.